
This article covers the standard progress note editor for an individual patient note. This does not cover group notes.
Those are their own separate articles and can be found here: Group Notes.
Filling out the Progress Note
Once you select your note type or template, the progress note opens: 
 If you see this blue message at the bottom of the display, it means the note type has been configured for Pull forward. Pull forward pulls previous signed note content based on the most recent signed note for the same patient, same service type and same note type, as well as an additional setting to pull based on the same note author for the current and prior month, based on the session date for the note.
Left Pane
The left pane of the progress note is used to access scribbles for the patient, patient info such as diagnosis, goals and future appointments, plus a list of expansions available for you to use in your note.
![]()
| Icon | Functionality |
 |
Scribbles |
 |
Transcriptions (Bells Virtual Scribe only) |
 |
Sidebar (Diagnoses, Enrollments/Episodes, Care Team, Insurance, Contacts), etc |
 |
Future Appointments |
You can open, close, change tabs or change the width of the left pane of the progress note. Depending on which action is taken, Bells will remember the state in which you last left the pane. So if you decide the left pane is not for you and close it, the next time you open a progress note, Bells will remember and keep the pane closed. If you set your left pane to be on the Scribbles tab, each time you open the progress note Bells will remember and open it on the Scribbles tab and so on. When you alter the left pane Bells will remember what setting the pane was on.
Scribbles tab


By default, you will start on the Scribbles tab of the left panel. The Scribble pane, by default, will display the scribbles associated with the patient for the note. If no scribbles are created for that patient you will see a message "No scribbles found." You can add scribbles via the + icon in the top right of the pane.

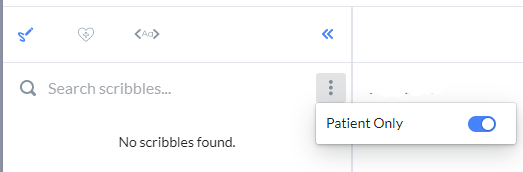
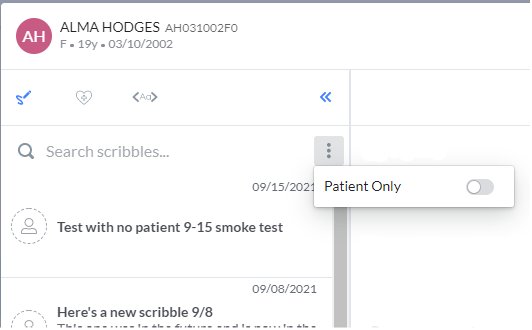
Additionally, the scribble pane can be toggled to show scribbles regardless of patient. In the scribble tab, there is an ellipses menu in the top right corner of the pane. In this menu, you can see a toggle for Patient Only.
When toggled on, only the scribbles for the current note's patient show.
When toggled off, all scribbles (with or without patients) show.
Sidebar tab
Just like within the Patient Chart, the Sidebar is displayed within the note as well, so you can easily reference information for the patient as you are writing the note. In the Note, the sidebar is on the left side. Click the following link to learn more about the SideBar.
Appointments tab

The appointment tab shows upcoming appointments for the patient on the note.
You can filter between just your appointments for the patient or all appointments for the patient.
Notes tab
 - GEHRIMED users will see an additional section in the left pane for Notes.
In the Notes tab, users will be able to see the patient's signed Bells and GEHRIMED notes to reference while writing notes.


Signed notes from Bells or GEHRIMED can be reviewed in the pane while writing progress notes. At the top of the pane is a toggle for Bells and GEHRIMED. When toggled to Bells, the notes for the patient signed in Bells can be found. When toggled to GEHRIMED, the notes for the patient signed in GEHRIMED can be found.
Note Back-Up Tab
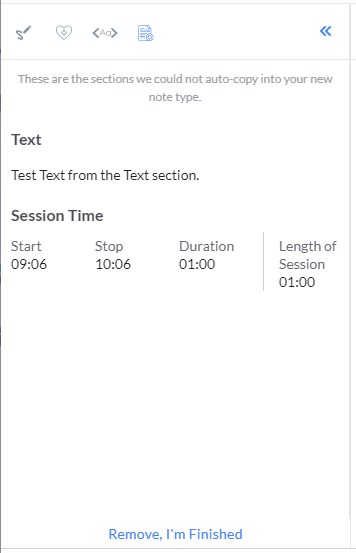
When you edit session information on a note, if there is data in the existing note, you will be given a new tab in your left pane to reconcile the data into the new note. This new tab is called the Note Back-Up tab. This tab will display regardless of the previous view state if there is data from the previous note type to reconcile.
When the note is changed, depending on the scenario, a few things can happen. If the same note type is used, the note sections that were filled out before the session information change will auto-populate into the same sections of the new note.
If a different note type is used but includes the same sections, the same sections that were filled out before the session information change will auto-populate into the same sections of the new note. Sections that were filled out before the session information change that are not included in the note will go to the Note Back-up tab in the left pane of the progress note.
If a different note type is used and the sections are different, sections that were filled out before the session information change that are not included in the note will go to a new Note Back-up tab in the left pane of the progress note.
The new tab in the left pane will allow you to Copy To sections of the new note.
A note for our tablet users: I recommend selecting text from the bottom to the top when making your copy/paste selections on a tablet. If done from the beginning of the text to the end, only the first word may get copied. 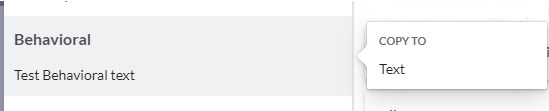
Clicking the Remove, I'm Finished button at the bottom of the tab will shut the tab and it will no longer be accessible. Clicking the button tells the application that you're done with the information in the tab and that it is no longer needed.
If there is data still in the Note Back-Up tab when you go to save or sign the note, a message will display. You are not able to save or sign the note until the data in the note back-up tab is reconciled by either moving it to the new note or clicking the Remove, I'm Finished button.
Progress Note Header

Along the top of the Progress Note, you will see the Progress Note Header.
Patient Card allows you to easily reference the patient name, PatientID, gender, age, and birthdate.
Note Type name is the name of the note type and will display in the top left corner so you know what note type you're using.
Author is the user who is writing the note. You cannot change this value.
Location is the Facility for the note as selected on the Session Information of the Start Note window. You cannot change this value within the note; you have to start the note again to change it.
Service Type is the name of the Service Type for the progress note as selected on the Session Information of the Start Note window. You cannot change this value within the note; you have to start the note again to change it.  myAvatar users: Service Type is called Service Code. myEvolv users: Service Type is called Services.
Session Date/Time is the Date and Time that was defaulted or entered on the Session Information of the Start Note window.
If the note is started from an appointment, a calendar icon will display. Hovering on the icon will show the appointment details.
Clicking the pencil edit icon on the right side of the Progress Note header will allow you to edit the session information for the progress note. You can edit the session date/time, the status of the note, the location or the service type. Making changes can cause a different selection of note types or templates to be available.

If there is data in the existing note before making edits to the session information you will be given a new tab in your left panel to reconcile the data into the new note. See the Left Panel section above for these details.
When the note type is changed depending on the scenario a few things can happen.
If the same note type is used, the sections that were filled out before the session information change will auto-populate into the same sections of the new note.
If a different note type is used but includes the same sections, the same sections that were filled out before the session information change will auto-populate into the same sections of the new note. Sections that were filled out before the session information change that are not included in the note will go to a new Note Back-up tab in the left pane of the progress note.
If a different note type is used and the sections are different, sections that were filled out before the session information change that are not included in the note will go to a new Note Back-up tab in the left pane of the progress note. The new tab in the left pane will allow you to copy to sections of the new note.
 myAvatar users have the ability to add “Number of patients in group” to their individual notes. This entry is available if the myAvatar form is configured to include it and the service is set to be a group service.
Right Panel - Bells Pane
The right panel of the progress note is designed for you to open and close by clicking the Bells avatar in the top right corner. The Bells pane can also be closed by clicking the blue >> on the left side of the pane.

Timeline section
The Timeline section of the Bells Pane shows a timeline that reflects how your current note's session to sign time is tracking relative to your average session to sign time and relative to the sign note goal configured by your Bells administrator.
Correctness section
The Correctness section of the Bells Pane displays spelling and grammatical errors that are found in the text fields of your progress note, if any exist. The illustration in the correctness section will change depending on what Bells finds in your note. If there is no text to review the image will change; if there are corrections to make, the corrections will display.
The Correctness section of the right pane will also display Documentation Recommendation rule recommendations.
Spelling and Grammar suggestions display with red underline and a red dot in the right pane. Documentation Recommendations display with a purple underline and a purple dot in the right pane.
| Spelling and Grammar |  |
 |
| Documentation Recommendation |  |
 |
Sometimes you need to use a specialized word that is not part of the standard dictionary and you don't want to keep seeing it flagged as a spelling mistake. You can add words to your personal dictionary in Bells while writing progress notes. Hovering on a spelling error will allow you to add the errored word to your personal dictionary. 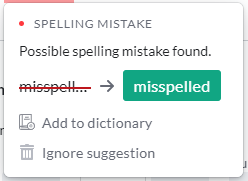
 Additionally, you can click on the add to dictionary icon in the narrative toolbar to add words to your personal dictionary while writing progress notes.
Documentation Recommendations
The Documentation Recommendations section of the Organization Settings displays the Documentation Recommendations and rules configured for your organization. Click the following link to learn more about Configuring Documentation Recommendations or Documentation Recommendation Capabilities.
Other illustrations you may see in the text corrections display:


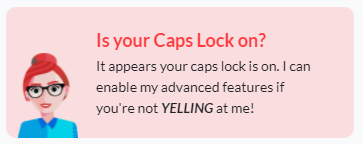
Bells can even identify when your caps lock is on! When the caps lock is on Bells can't help with other text corrections, so she'll ask you to turn it off so she can help.
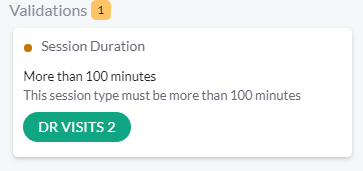
Validations
Validations are rules your Bells administrator has configured to help your notes be even more accurate. Some validations prevent you from signing the note; others let you decide whether to take the suggestion or not. You can read more about validations in the Validations article.
When the Bells pane is closed, the Progress Note header includes the Time since session counter that shows the hours and minutes for the progress note from Session date/time start to current date/time.

When the Bells panel is closed, the Bells correctness actions are still taking place. If there are corrections to be made, you will see a red indicator next to the Bells avatar that shows how many (if any) corrections need to be made.


If there are no corrections found, a green checkmark will display.
Clicking on the Bells avatar will reopen the right panel, and show the session to sign note timeline as well as the corrections to be made.
Note Type Sections
The sections you see in a progress note may vary depending on the note type you are entering. Your Bells Administrator configures which sections are included in each note type, as well as whether the section is required or optional.
There are 6 standard Note Type sections:
- Text
- Diagnosis
- Section
- Goals/Objectives
- CT|One Custom Drop Down
- Custom Note Sections
Other Note Type sections include
- Custom Note Sections
- Patient Signatures (CT|One and myEvolv)
- Problems (myAvatar and myEvolv)
- Add-Ons (myAvatar)
- Clinical Quality Indicators / CQI (myAvatar)
- Evidence-Based Practices (myAvatar)
 myAvatar and myEvolv users will see an additional sections for Problems, Add-Ons, CQI, and Evidence-Based Practices.
Text Sections

Text sections allow you to enter large amounts of formatted text. The Progress Note in Bells can have more than one Text Section as part of the Note Type. The labels and whether the section is required are configured by your Bells Administrator in the Note Type section under Organization Settings.
Note: Text sections can hold up to 50k characters per note section. To give you a sense of what that looks like - think of about 5 single-spaced pages of text.
 Text sections of the Note Type in Bells are the equivalent to large text fields in CT|One progress notes today.

As part of the Text section, you will have access to all of your text formatting tools:
- Drop-Ins (~ commands)
- Text Expansions
- T@gs (@)
- Slash ( / ) command action menu options such as the Date picker and mentions
- Formatting options such as bold, italics, headings, strikethrough, numbered lists, bulleted lists or checklists
Click the following links to learn more about Text Formatting and Spelling and Grammar.
Text note type sections and Long Text custom note sections include the ability to add words to your personal dictionary directly from the field, translate from your native language to English or start speech to text capability. These are the 3 icons on the far right of the formatting bar.
![]()
Writing Assistant
For information, check out the Writing Assistant article.
For more information on your microphones and settings check out the Bells Microphone Management article.
Diagnosis Section
The diagnosis section of the Note Type in Bells is a section within the note so you can edit it within the note without having to leave the Progress Note window. This section allows you to select one or many diagnoses for the patient that will be discussed during the session.
A Progress Note in Bells can only have one diagnosis section. The label and whether the field is required or not can be configured in the Note Type section under Organization Settings, which is managed by your Bells Administrator.

As part of the Diagnosis section, if the patient has one primary diagnosis it will automatically be selected as the default diagnosis for the note. If the patient has more than one primary diagnosis, no diagnosis will be auto-selected for the note. Primary diagnosis is indicated by a 'P' following the number of the diagnosis (1, 2, 3): 
You can change the diagnosis list as necessary to reflect the session.
Adding a Diagnosis
To add a diagnosis, click on the "+ Select Diagnosis" button in the section: 
This will open the Diagnoses window, which allows you to make additional selections of diagnoses for the session.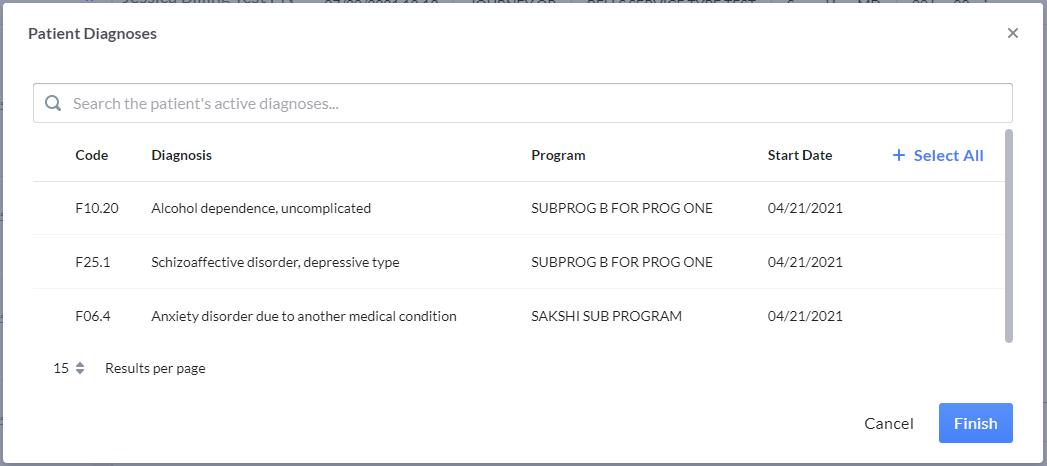
The Diagnoses window will only display active diagnoses for the note's patient. For each diagnosis, Bells shows the Code, the Diagnosis Description, the program (if one is associated to the diagnosis), and the Start Date for the diagnosis for the patient. You can select up to 12 diagnoses for the patient.
Additionally, the diagnosis for the patient may be filtered based on the Organization Preference for filtering diagnosis based on the program. If the diagnosis for a patient is associated with a program and the filter is set, the diagnosis add window will only display the active diagnosis associated with the selected program on the session information of the progress note.
The sort on the diagnosis selection display is set to show the primary diagnosis first in the list.
 myAvatar users will see a toggle on the display to "Include Historical".
When selected, the historical diagnosis for the patient will be shown for selection. The display will split into two separate sections, one for Active and one for Historical. Only non-historical diagnoses will be selected for the default.

Note: If there are no more diagnoses to add to the diagnosis section of the progress note, the "+ Select Diagnosis" button will be disabled.

Removing a Diagnosis
To remove a diagnosis, point your mouse to the diagnosis on the progress note. An X will appear on the right side of the diagnosis row. Click the X to remove it. 
Ordering the Diagnoses
Once you've selected the Diagnoses that are being discussed in session they can be ordered via drag and drop on the progress note window.
Clicking the dotted icon  on the left side of the diagnosis card will allow you to drag the diagnosis up or down to determine the order.

Session Time
The Session Time section of the Note Type in Bells is a section within the note so you can edit it within the note without having to leave the Progress Note window. This section allows you to alter the session time, add additional time increments, or change the length of the session.
 myEvolv users: Only a single time increment can be added to the Bells progress note.
A Progress Note in Bells can only have one session time section. The label and whether the field is required can be configured in the Note Type section under Organization Settings, which is managed by your Bells Administrator.
You can record session time by duration or time increments, depending on your organization's need.
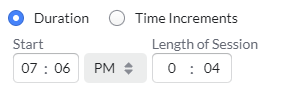
Session Duration
Duration begins with the start time of the note from the Session Date/Time selected in the Session Information, but is editable. Changing the session time in the Progress Note header or within the section of the note will update it for both places. Then you can enter the length of session.
Session Time Increments
Time Increments begin with the start time of the note from the Session Date/Time selected in the Session Information but are editable. 
Changing the session time within the section of the note will update it for both the Session Time section as well as the display in the top right corner of the header of the note. Then, you can enter the stop time for the session, the duration will update to show the hours/minutes of that increment of time. As part of this layout, you can enter more than one increment of time by clicking the + icon on the right side of the section. If another increment of time is added you will see in the individual duration for that increment, the length of session will update to show the full session time.
 myEvolv users: Only a single time increment can be added to the Bells progress note.
 For myAvatar users, when the note type includes the session time section, a duration of zero is not allowed and will prevent the sign of the note.
Units
 If the Service Type selected for the note is set up in CT|One to use units instead of time, a Units field will be included as part of the Session Time section of the note and will sync back to CT|One to proceed through the billing process.
 myAvatar and myEvolv users will not see units as part of the Session Time section.
Session Time standard and spanning multiple days


Session Time with Units 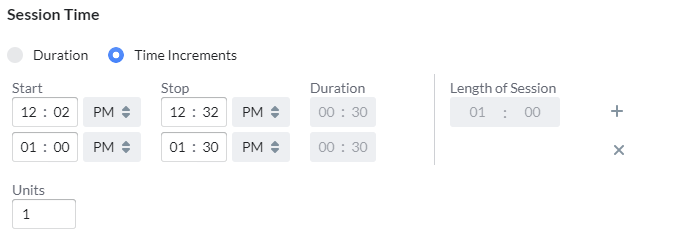
If the session start/stop time spans across midnight to the next day, dates of the days will appear under the Start and Stop fields.
When signing the note, if the session stop date/time is greater than the sign date/time of the note you will be prompted with a message detailing the error and allowing you to correct the issue. The time must be updated to allow you to sign the note. This error also presents in bulk sign as a red banner in the note preview. 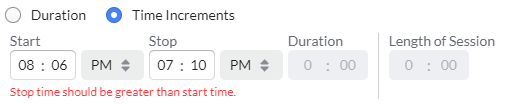
Goals/Objectives
The Goals/Objectives section of the Note Type in Bells is a section within the note so you can edit it within the note without having to leave the Progress Note window. This section allows you to select Objectives as part of the note and add a comment for that objective.
A Progress Note in Bells can only have one goals/objectives section. The label and whether the field is required can be configured in the Note Type section under Organization Settings, which is managed by your Bells Administrator. Additionally, the Bells administrator can configure the goal section to force which level must be selected for the note to be signed. When this is configured, there can be disabled checkboxes that are disabled in the selection.
If the patient has Goals/Objectives from their EHR, the "Select Goals" button will be enabled. When the start date for the goal/object is not set in the EHR, Bells will use the CT|One packet date as the start date for the goal.

Clicking the button will expand the section to show a field to select an objective. The field will show active goals and objectives for the patient.
Goals/Needs will display as a heading in the display with the Objectives for that goal displayed below it.
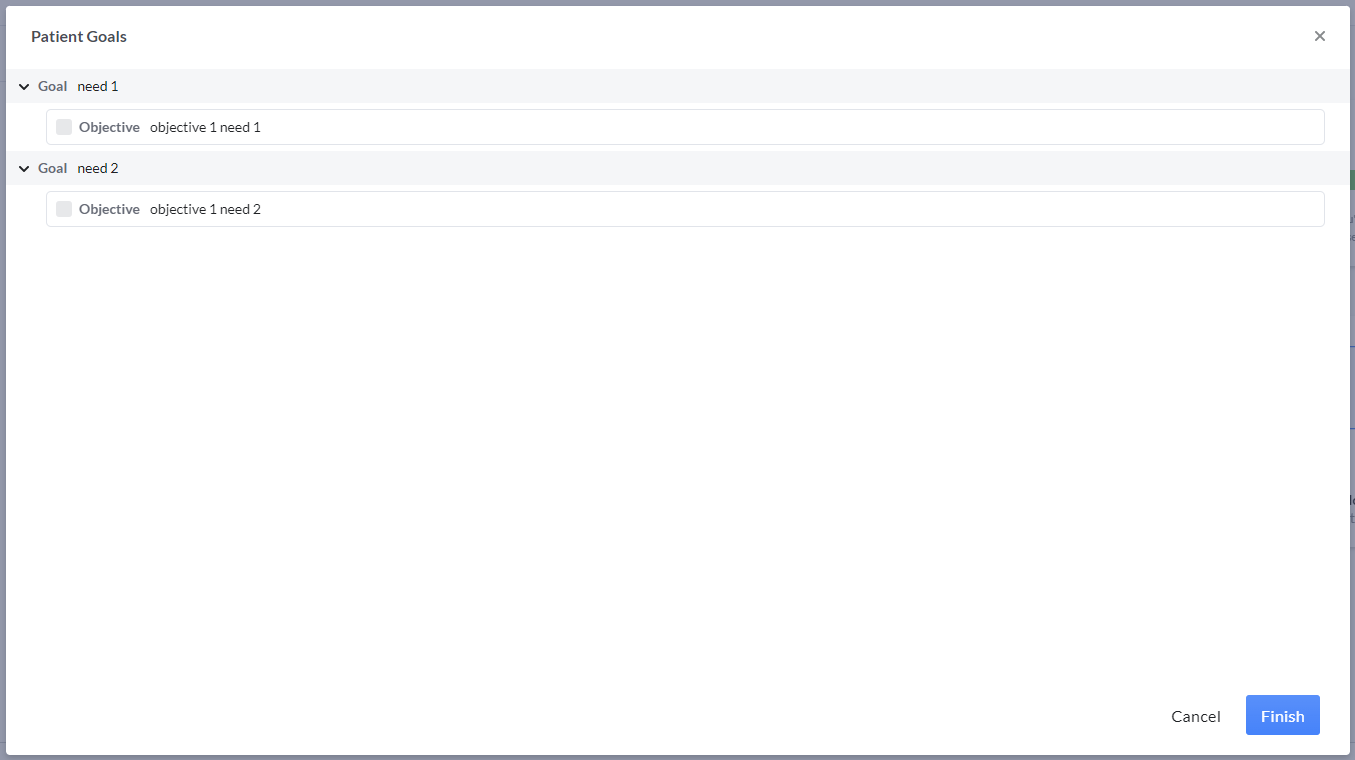
Selecting one of the objectives will add the goal and objective to the progress note. You will now see a new icon:
 |
The chat bubble will show a field for adding a comment |
To remove any of the selected objectives, re-click the +Goals button and uncheck the box for the objective you'd like to remove.
To change the selection or remove the goals from the selection, re-click the "Select Goals" button to make changes.
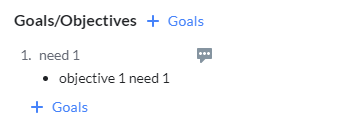
 myAvatar and myEvolv users, treatment plans are additionally grouped/sorted by the start date for the treatment plan and show the name of the Treatment Plan. The Goal section shows the Next Review Date and Plan End Date from the EHR. For myAvatar, both dates have been added. For myEvolv only the End Date has been added.
Additionally, myAvatar/myEvolv goal selection will include the display of the Problem text for the selected goals/objectives. The problem text will continue on the note into the preview, print preview, and on the note in the EHR.
 myAvatar and myEvolv users, the Goal selections in the progress note display will be a bulleted list.
myAvatar users will see the status for each row in the display across goals, objectives and interventions.
myEvolv users, the Goal section in the progress note display can be filtered based on the status for the goal. There is a dropdown at the top of the display to select the status based on the available goals in the display.

Problem List
myAvatar and myEvolv users will see an additional section for Problem List. You can add one problem list section to the note type. The Problem List section acts similarly to the diagnosis section, in that it allows users to select problems from their list from the base EHR. This section also acts similarly to the Goals section and lets you add comments for each problem. You can also add additional problems as part of the Bells progress note by clicking Other.
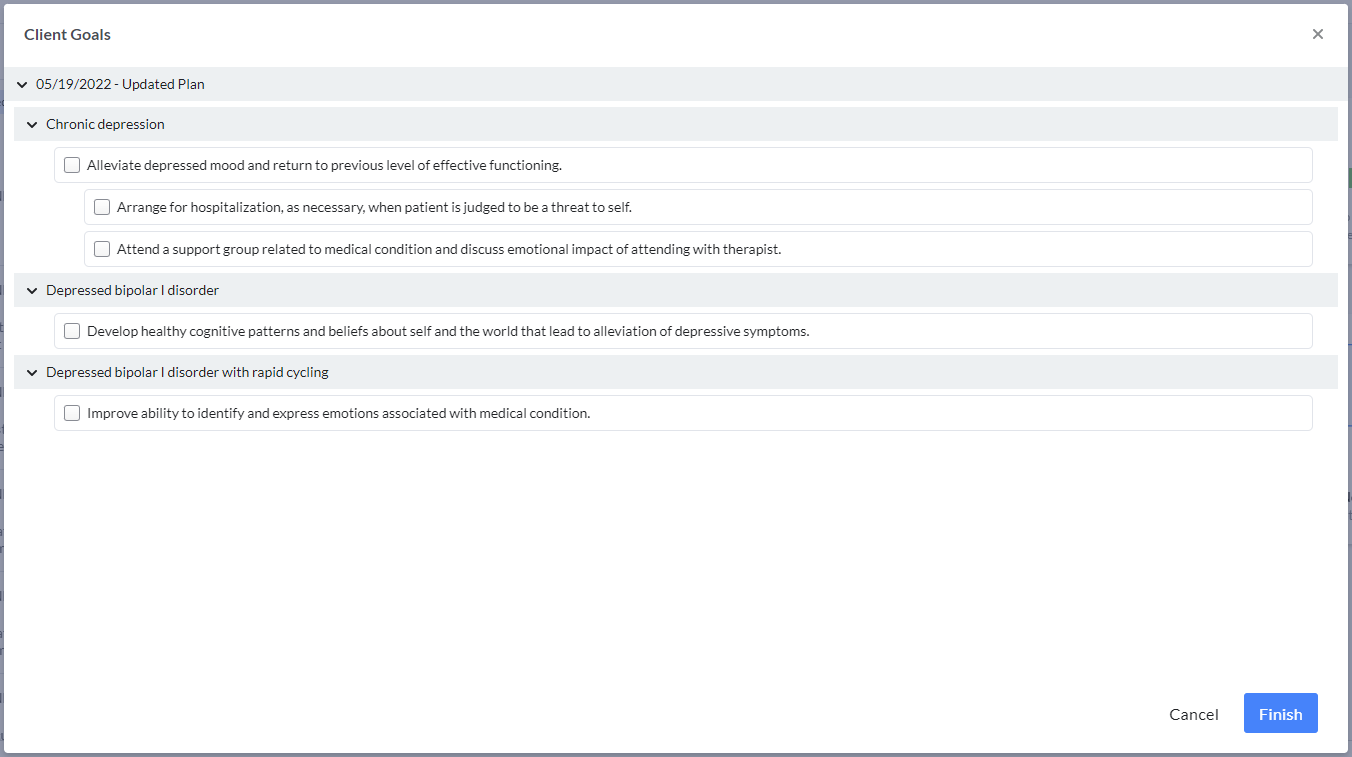
To select problem(s), select the + Select Problems button in the progress note editor display. This will open the Problem List selection display.
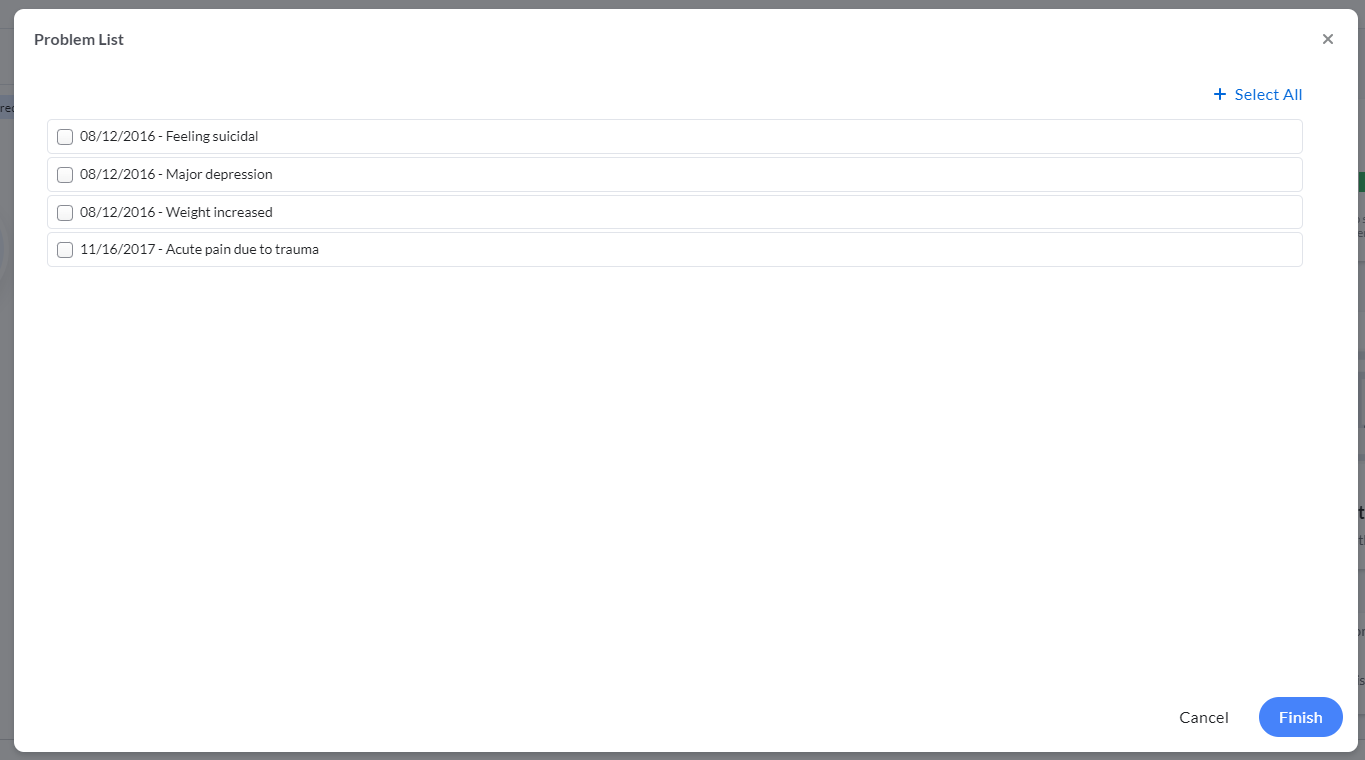
Choose problems from the list by clicking the problem from the list. If you'd like to select all, you can click the + Select All button in the top right corner. When clicked, you will then have the ability to remove all if you change your mind. You can also select all, then unclick problems in the list to remove single problems from the selection. Clicking Finish in the bottom right corner will place the selected Problems in the note.
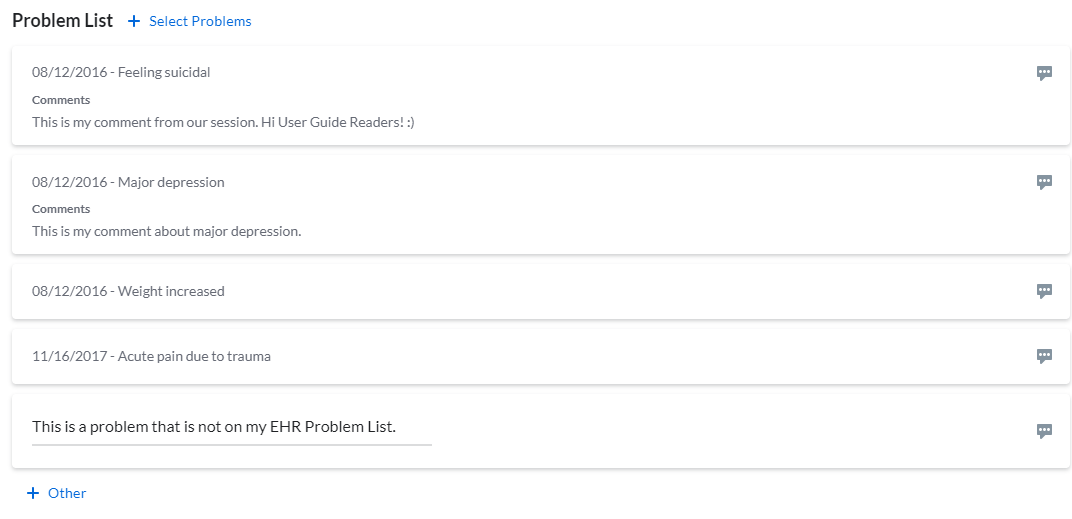
Once Problems are added to the note, you can add comments per problem or enter Other problems by clicking the + Other button at the bottom of the section.
The problem list selections will show in the note preview, print, and print preview displays and will sync to the note narrative section of the note on the EHR.
 CT|One Custom Drop Down
The CT|One Custom Drop Down section of the Note Type in Bells is a section that is configurable in CT|One via the Progress Note Flags Maintenance window.
There you can configure the label and what values show in the drop-down. This section allows you to select a value in the drop-down to be part of the note.
CT|One Set Up
Progress Note Flags Maintenance can be found in the Maintenance menu of CT|One.
Access the Drop Downs tab and find the last question - "Show the customizable drop down (Additional Session Tab)". Setting this field to True will enable a new tab to display "Custom Drop Down Options". This tab allows you to enter the values you would like to select from in the drop-down.

The label for the drop-down is customizable on the Labels tab of the same window. The last field on the window "Customizable Drop Down Label Setting (window):".


Custom Drop Down in Bells
A Progress Note in Bells can only have one custom drop-down section.
Unlike other sections of the Note Type editor, the label of the Custom Drop Down section cannot be edited within Bells. The field requirement toggle can be configured in the Note Type section under Organization Settings, which is managed by your Bells Administrator.

 Add-On Services
myAvatar set up note types may include an Add-On section in the progress note. This section is configured in the Note Type configuration and the values/services are filtered by the configuration in myAvatar.
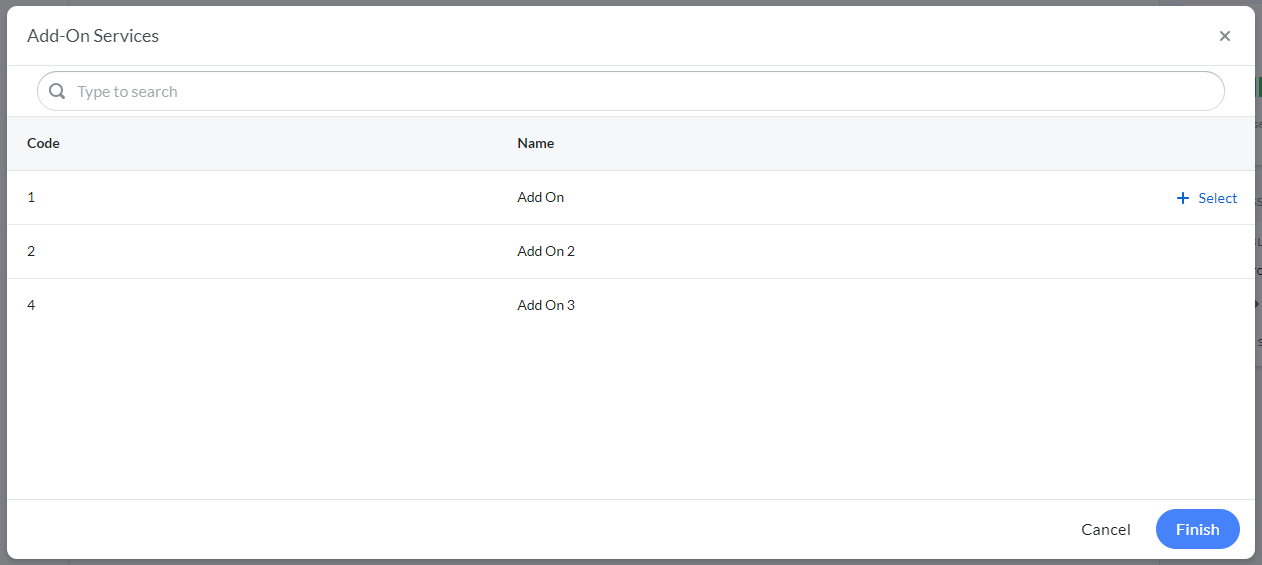

Clicking the + Select Add-On Services button shows the services available for add-on based on the configuration from myAvatar. You can select one or many services, set a duration for the service, and apply a comment in the note.
 Clinical Quality Indicators (CQIs)
myAvatar Note Types may include a Clinical Quality Indicator section in the progress note. This section is configured in the Note Type configuration and the values for this section come from myAvatar.

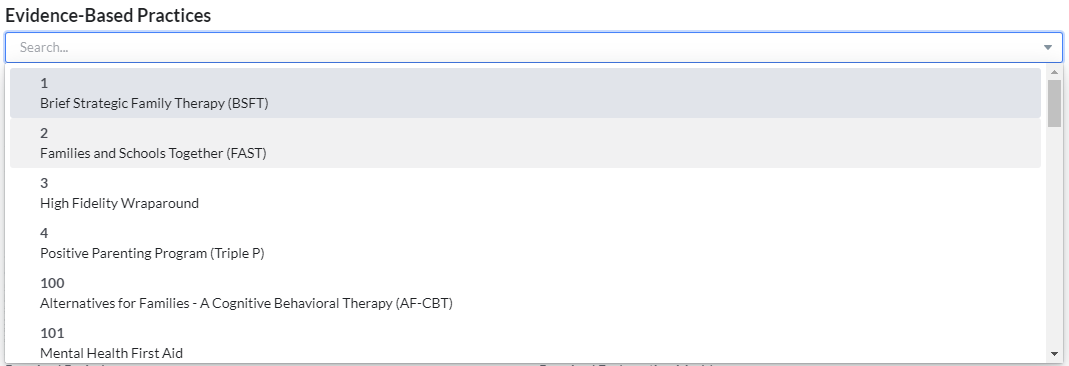
Evidence-Based Practices
myAvatar set up note types may include an Evidence-Based section in the progress note. This section is configured in the Note Type configuration and the values for this section come from myAvatar.
Custom Note Sections
The Custom Note Sections can be created in the Organization sections of the application. Your Bells administrator can create custom sections to be added to the note type used for progress notes.
Custom Note Sections can be configured to be form based or narrative based and include a variety of Question Types, settings and configuration.
In the setup, question types can include additional configuration including filters, gender/age/character limits, note output text and conditional sub-questions. The note output text allows your admin to enhance the text that shows on the progress note preview and print with predefined text around the answers for the questions from the note.
These custom note sections will accompany the note type in all aspects, including templates, incomplete section handling for bulk sign, drafts, preview and print. They will sync to the base EHR as part of the transcription of the note.
Custom Note Section/Assessment/Subforms/Imports etc that include text question types will have access to the Writing Assistant. For more information, check out the Writing Assistant article.
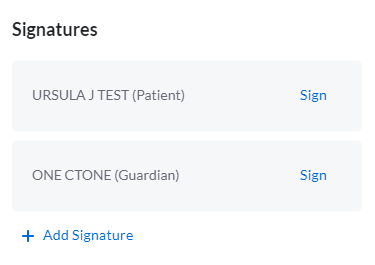
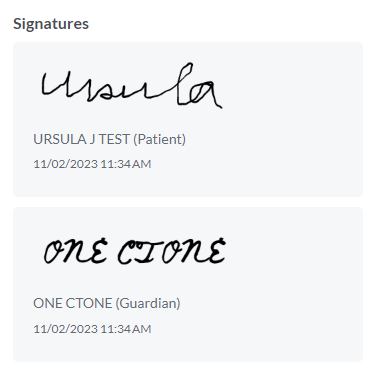
Patient Signatures
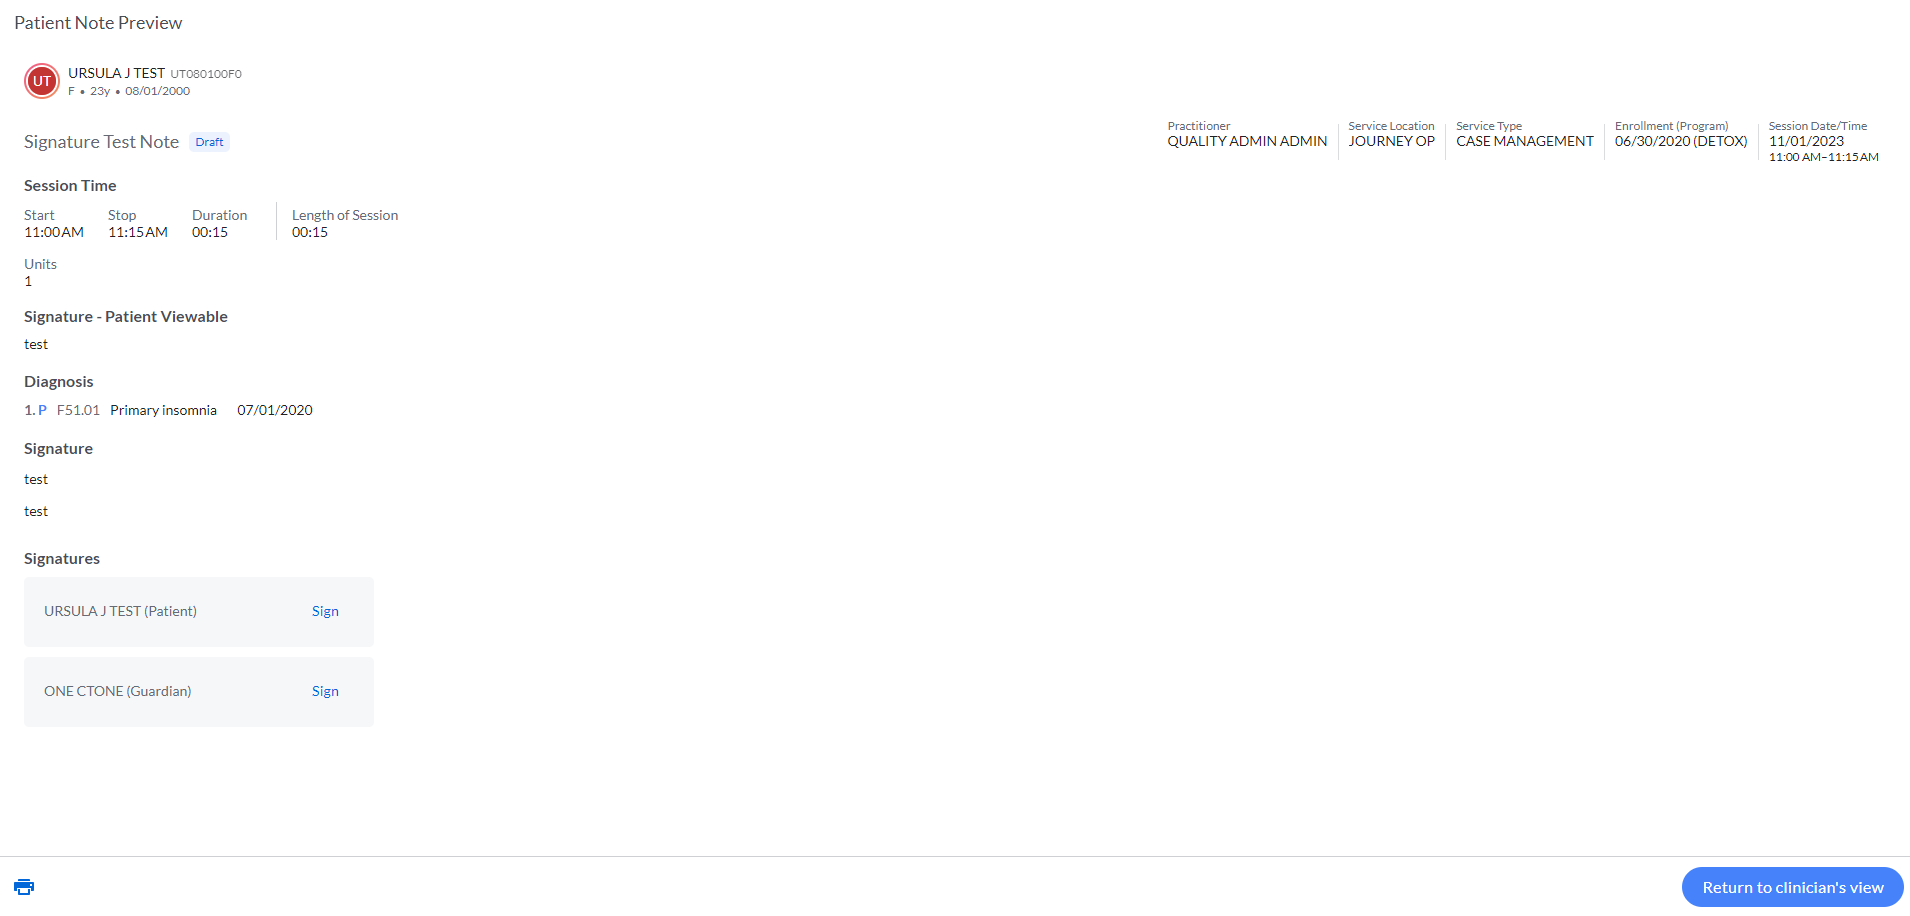
Users can apply additional signatures for their progress notes. These signatures can be for patients, guardians, or additional signers. Once signatures are configured, they will show at the bottom of the progress note.
Signature Workflow
Clicking Sign on a patient/additional signature box will follow this workflow:
- Patient-viewable sections are validated for required content.
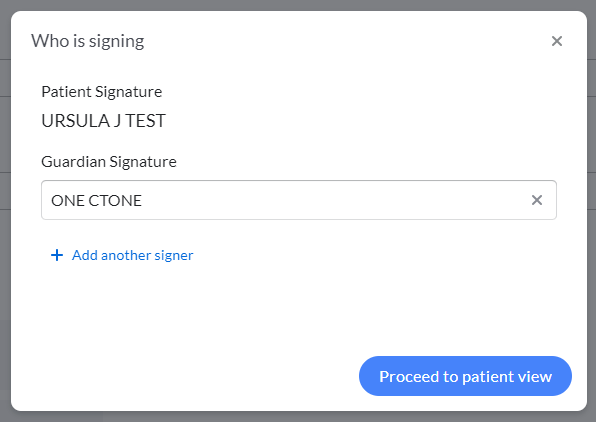
- Additional information for who is signing can be added as needed.
-
Patient view displays, where all patient-viewable content except the signature is read-only.
Bells administrators configure which note sections are patient viewable. - Signatures are applied.
- All content in patient-viewable note sections is locked down and can no longer be modified.
- When done signing, the practitioner enters a PIN to resume control of the entire progress note.
- The practitioner finishes the progress note, modifying any non-patient-viewable sections as necessary.
- The practitioner signs the note.
A patient/additional signature can be removed once signed if a note needs to be further edited.
Adding Additional Signatures
If configured to do so, additional signatures can be added beyond what was initially set up in the note type. This is done via the +Add another signer button.
Notes from Mobile Sessions with Signatures
If the note is started from a mobile session that includes signatures there is handling for those signatures.
If the signatures added in the mobile session are configured on the note type, the signatures will automatically map to those signature positions.
If additional signatures are applied that cannot map automatically there's an “Assign” link on the signature card in the note. Clicking Assign opens a menu to map the signature to the appropriate signature on the note. If it's determined the additional signatures are not needed, they can be removed with the X in the top right corner of the card.

The same handling occurs if the note type selected does not have signatures configured but there are signatures that were captured in the mobile session.
Patient View
Clicking Proceed to patient view launches the patient view for the patient to review the note before signing. The patient view is a filtered view of the note; your Bells administrator configures which sections or question types are available in the view. This is done in the Note Type editor per section, or the Custom Note Section editor per question type.
Once in the Patient View, the patient can review the sections set as Patient Viewable and continue into signing.
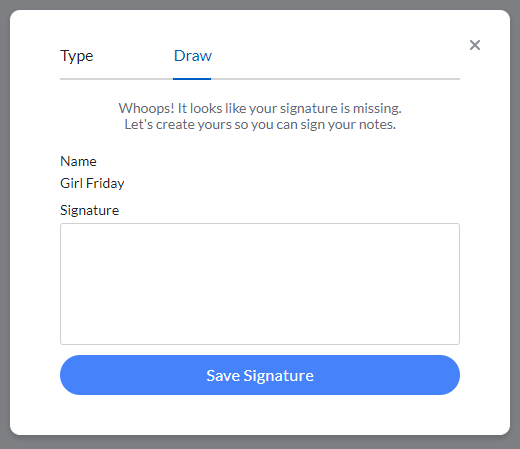
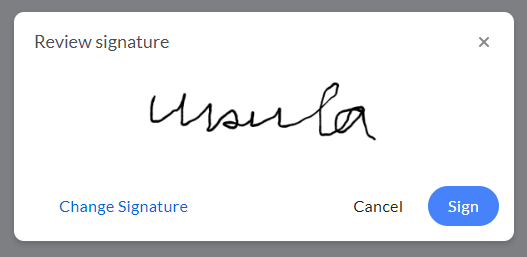
Signatures are applied just like note author signatures and can be typed or drawn (depending on configuration) as well as remembered. When a signature is remembered, it reuses your signature from previous signs. This is based on configuration and can be cleared.

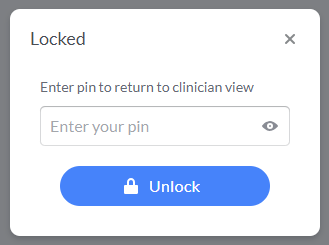
Clicking Return to clinician view displays a PIN entry for the clinician to unlock the view back into the full note.