
Accessing the Patient Chart
There are several ways to access the Patient Chart.
- Click the patient card at the top of the Dashboard
- Click a patient in the Patient List
- Click a patient card at the top of the Chart
- Click Start Note from the patient card at the top of the dashboard
Once you have clicked one of the options above, you are in the Patient Chart.

 myAvatar users: Enrollment is called Episode and Service Type is called Service Code. myEvolv users: Service Type is called Services.
Patient Card and Header

The top of the Patient Chart displays the patient card and additional patient details in the header.
The patient card includes the Patient's
- Avatar - the patient's initials or the patient's image, if available.
-
 Minor indicator - if the patient is less than 18 years old, the minor indicator will display.
-
First Name + AKA/Nickname + Middle Initial + Last Name + Suffix
 The patient's nickname is from the AKA field of the client master in CT|One.
- Patient Id
-
Gender
- Shows the shorthand of the patient's personal pronouns. Hovering over the gender abbreviation displays the full text.
- Age
- Birthdate
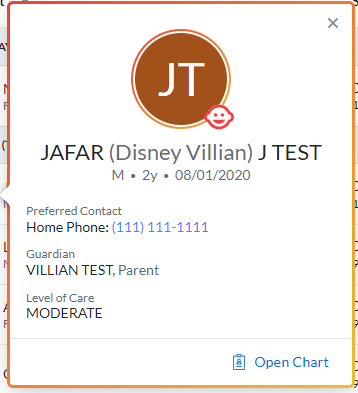
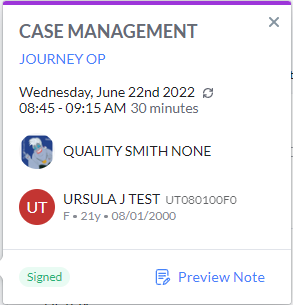
Clicking a patient avatar in Bells will show a pop-out display for the patient card. This card includes the patient's name, avatar, the minor indicator (if under the age of 18), gender, age, and birthdate. Additionally, if the patient has a preferred contact, guardian, or level of care those will show. You can also open the patient's chart from the patient card.
The patient card will show in the following locations in Bells.
- Patient Access Report
- Patient Service Usage Report
- Appointment Details popup
- Agenda right pane
- Unsigned Notes Report
- Signed Notes Report
- Sync Issues
- Signed Today tab
- Open Sessions
- Scribbles that include a patient
The header of the Patient Chart also shows the patient's preferred contact, guardian information, level of care (if available), and includes a button to start a note for the patient.
 The preferred contact will display for patients with E-mail or Phone preferred contacts selected on the Client Master in CT|One and will display the patient's email or phone depending on what is set for the patient.
 The guardian details display in the chart header if available for the patient from the Client Master in CT|One. This will include the guardian's first and last name as well as the relationship to the patient.
 The level of care details also display in the chart header if available for the patient from the Client Status in CT|One.
The Start Note Button includes an additional menu, depending on your EHR and user role the values in this menu will be different.
-
Here is an example

- Clinical Pathways lets you set the clinical pathway for the patient, this is for myAvatar and myEvolv users only.
- Set as Confidential and User Exclusions are only available to Bells Administrators and lets you adjust the confidentiality for the patient
- Patient Refused Recording - this setting is Bells Virtual Scribe only and lets you set for the patient if they allow recording or not and drives Bells Virtual Scribe functionality.
- Exclude from Audits can be set by Bells Administrators and lets patients be configured to not be included in Audit/Quality Audit runs.
Clinical Pathways
Selecting Clinical Pathways in the Patient menu allows you to review or configure Clinical Pathways for the patient. Clinical Pathways are only available for myAvatar and myEvolv users.

Clinical pathways configured in your EHR will sync into Bells and Bells specific pathways can be configured within Bells to be assigned to patients. Clinical pathways drive additional filtering behavior in Bells for Note Types, Custom Note Section/Import/Assessment/Subform Question and Answers as well as Quality Coach auditing.
Additionally, the Clinical Pathway for the patient shows in the Patient Detail card and in the Patient Chart Sidebar on the right side of the patient chart when the patient is enrolled in a Clinical Pathway.


Summary tab
When you access a patient's chart - you're by default placed on the Summary tab of the chart. The Summary tab is divided into 3 separate sections - Incomplete Notes, Upcoming Appointments and Distribution of Services. The Incomplete Notes section is your worklist for the patient. The Upcoming Appointments section shows upcoming appointments for the selected patient. Distribution of Services shows the breakdown of services and the show rate for the patient.

Incomplete Notes
The Incomplete Notes section of the patient chart shows all draft notes as well as sessions that have not yet been turned into progress notes, including Group Notes.

Group Notes in the show with the group notes icon  on the right side and all the details for the note just like a single patient note.
The incomplete note section is sorted by the Session Date by default, with the most recently updated note showing first.
The display of the notes is in a card view, and shows the Service Type, Enrollment date and program (where applicable). Additionally, the session to sign alert and status show on the right side of the card display.
Note status tags as well as the Sign Note Warning displays for the draft note. Status tags include Not Started or Draft as well as the Mobile Signature tag. Additionally for Group or Multi-Service notes there is a counter for the incomplete vs. total notes. There is a status filter in the top right corner of the display.
If the note is started from an appointment, a calendar icon will display. Hovering on the icon will show the appointment details.
Hovering on a card in the display will show the actions that can be taken on the note.


 Delete Icon
Allows you to delete a draft progress note or a session from the Worklist tab.
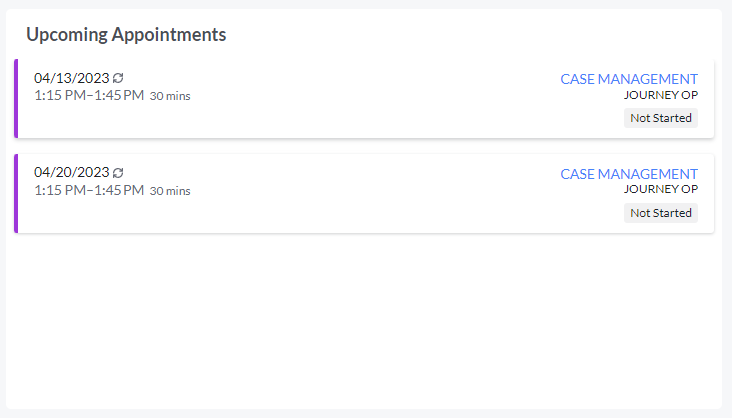
Upcoming Appointments
The Upcoming Appointments widget displays your appointments scheduled for the specified patient. Clicking the appointment card will open the appointment details to the right. Within the appointment detail display you can review the appointment details and start, edit or preview the note associated with the appointment.
For organizations that do not utilize the agenda, the Incomplete Notes display will be expanded across the display.
Distribution of Services
The Distribution of Services widget shows the breakdown of the services for the patient by service. This is based on Signed Notes only. Hovering on a section of the wheel shows total session time for the signed notes for the service you're hovering on. You can choose to review different data ranges with the filter buttons in the top right corner of the widget. The show rate displays the percentage of time the patient shows for their appointments.

Total Sessions
The total sessions widget shows the signed note sessions for the patient based on the selected date range in the top right corner. Hovering on a point in the display shows the date and number of sessions for that date.

Signed Notes tab

 myAvatar users: Enrollment is called Episode and Service Type is called Service Code. myEvolv users: Service Type is called Services.
Progress Note search
At the top of the Progress Notes tab is the progress note search. This search field allows you to quickly search progress notes by patient name, note type and author, as well as the text entry fields of the note to narrow down the records shown. This does not include the session time, diagnosis or goals and objective sections of the note at this time.

Signed Note List
The Signed Note list shows all of the Signed Bells progress notes for the selected patient if the user has access to that patient.
Important: Progress notes that originate in the EHR will not show in Bells. The list only includes signed progress notes that originate in Bells.
The progress note list is sorted by the Session Date column by default, with the most recently updated note showing first in the list. However, you can also filter by the Author of the note.
Session Date column displays the note's Session date and the draft/signed tag. When accessed via the Chart icon in the left navbar or next to the recently accessed patient cards, the Signed tag will always be present as all of the records in the note list are signed notes.
Author column displays the name of the user who wrote the note.
Note Type column shows the note type for the note.
Session column displays the Service, Location, Enrollment date, and Program (if applicable) for the note.
Signed Date displays the Date and Time the note was signed as well as the Session to Sign time.
If a signed note is late, the orange late icon and orange banner will show. The orange banner shows on the left, and the icon shows on the right of the note card in the display.


If a signed note has a sync issue, the red sync issue icon and red banner will show. The red banner shows on the left, and the icon shows on the right of the note card in the display. Clicking the red icon will take you to the sync issue tab of the chart.


Sorting
Column names that are followed by an arrow are sortable. Simply click the arrow t...
Column names that are followed by an arrow  are sortable. Simply click the arrow to sort.
Clicking on a record in the Signed Notes List opens the note. If it is a draft note you created, it opens in edit mode. Draft notes created by any other note authors and signed notes opens the preview of the note.
Preview/Print Notes
When you point to a row in the draft note list, some icons appear on the far right side of the row.
 |
Preview Icon: Allows you to view the draft progress note in a read-only mode. |
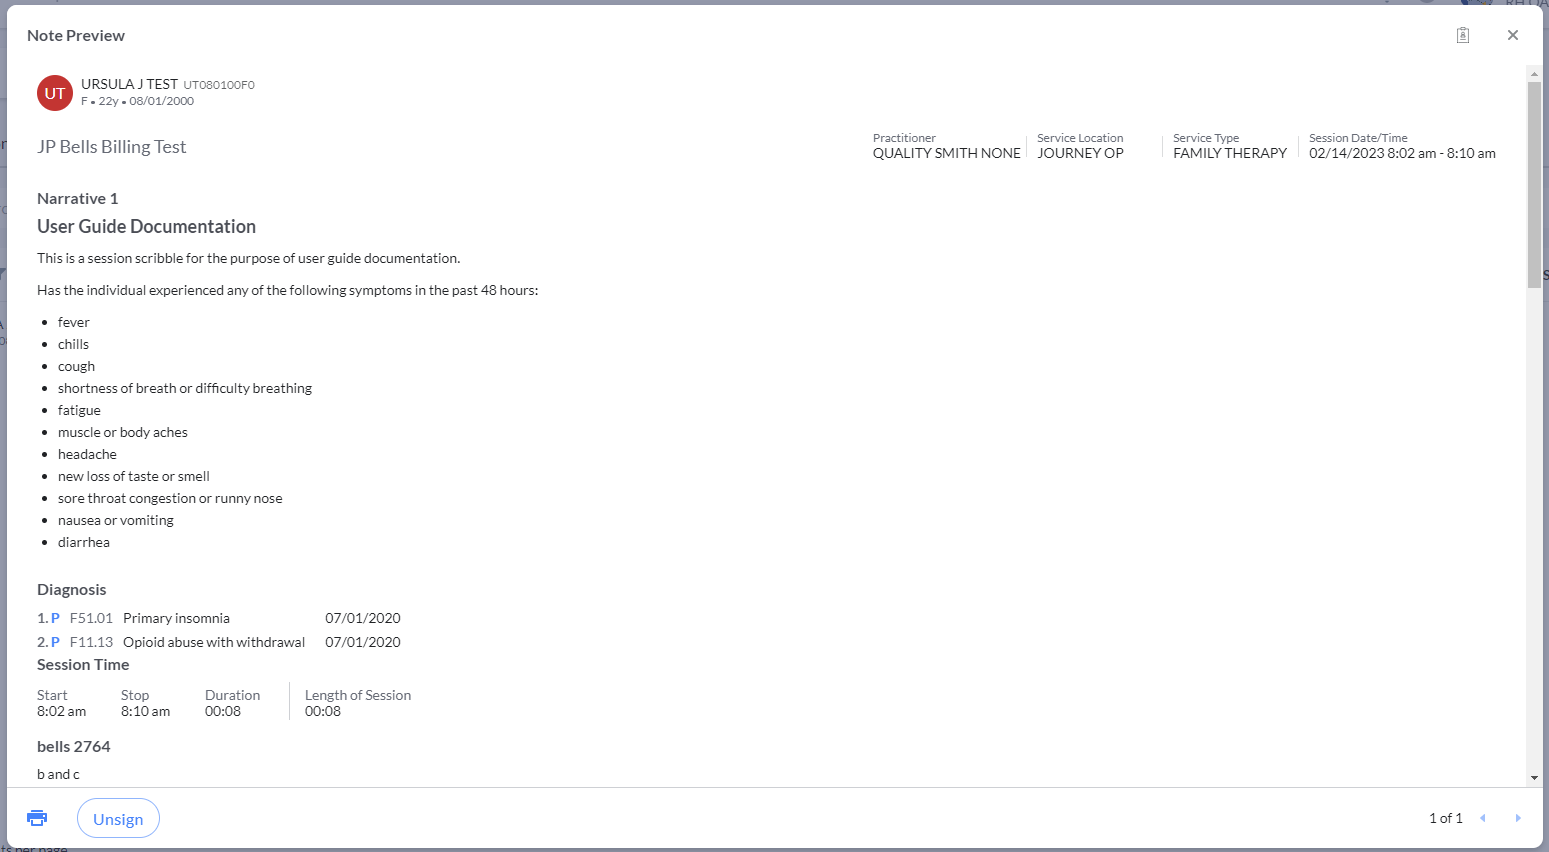
Preview Signed Notes
While in the preview view of notes you can skim through more than one note easily using the note preview feature in the bottom right corner of the Preview Note view. You will see a note counter and arrows to be able to easily review your notes without closing the note and opening the next note from the display grid.
You may have the ability to print the note by clicking the printer icon in the lower left corner of the note preview. Your Bells administrator controls whether you are allowed to print notes from within Bells or whether you should return to your EHR to print notes from there.

Scribbles Tab
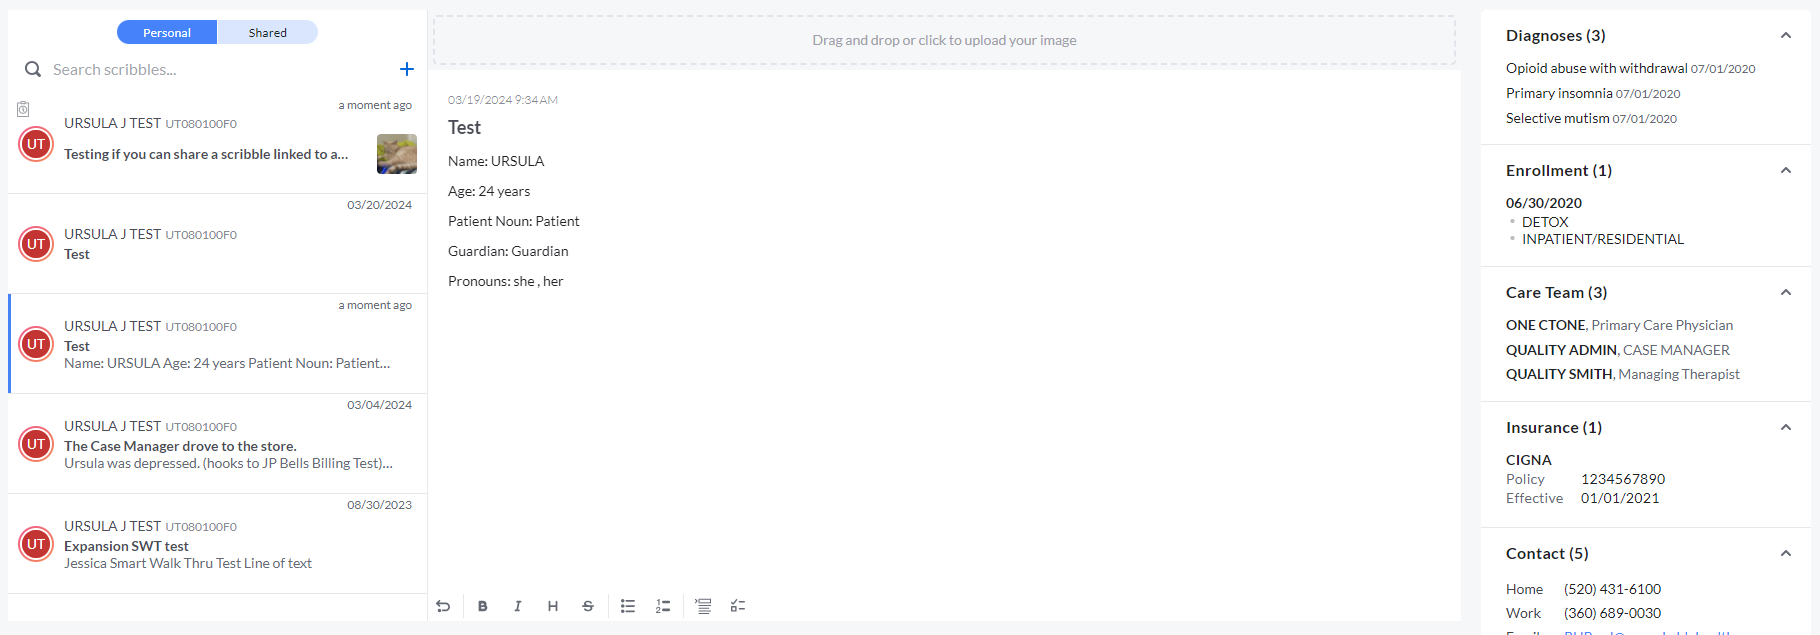
When you access a patient's chart, you have a third tab where you can view the patient's scribbles.
This tab only shows your own scribbles that have been linked to the selected patient. These may be scribbles you have authored or scribbles that were shared with you.
Scribbles Search
At the top of the Scribbles tab is the scribble search. This search field allows you to search for scribbles within the scribbles list to be able to quickly access a specific scribble. You're able to search by patient name or scribble content to narrow down the scribbles shown. 
Scribbles List
The list of scribbles on the left side of the Scribbles tab displays all of your scribbles linked to the selected patient. You will see the patient's avatar, minor indicator icon (if the patient is under 18 years of age), patient's full name, and PatientId. The scribble card will also display the first few lines of the scribble, when the scribble was last updated, and if any image(s) are attached to the scribble.
The Scribbles list displays in order of when the scribble was last updated, with the most recently updated scribbles showing first.
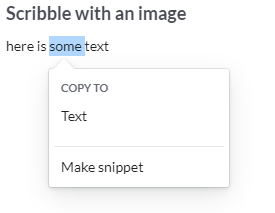
Adding a new Scribble
Clicking the + icon next to the scribbles search will add a new scribble. The new scribble will automatically be linked to the selected patient when added via the scribbles tab of the patient chart.

To learn more about making Scribbles, see Scribbles.
Appointments Tab
The appointment tab in the Patient Chart section shows all past appointments and upcoming appointments within the next two weeks for the selected patient.
At the top users can toggle between Past and Upcoming appointments. Additionally, a filter is available to only show your appointments for the patient or all appointments for the patient.

Clicking on a record in the list will show the appointment details. Additionally, the user will be able to review the note associated with the appointment, if available.
Treatment Plan Tab
 For GEHRIMED users, this tab is hidden.
The Treatment Plan tab in the Patient Chart section shows active Treatment Plans including the problems (where applicable), goals, objectives and interventions for the selected patient.
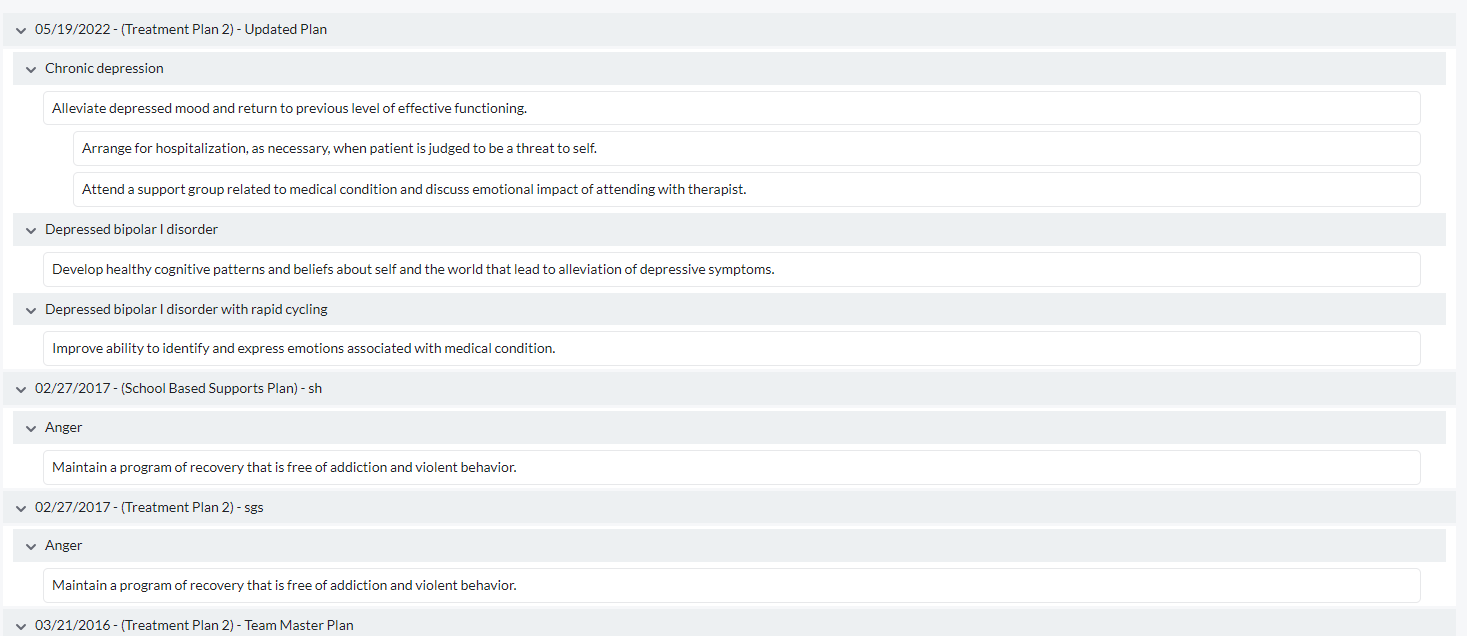
The display is collapsible at the treatment plan level to condense the display.
 For myAvatar and myEvolv users, the Treatment Plan tab shows the Next Review Date and Plan End Date from the EHR. For myAvatar, both dates have been added. For myEvolv only the End Date has been added.
Force Sync Button
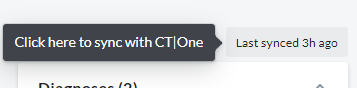 We've added the ability for you to initiate a fresh pull of a patient's data into Bells from your EHR. Clicking the ‘Last synced…’ text button above the Sidebar will accomplish this. If something goes wrong in the live pull, a message will display to you indicating which element of the pull wasn't successful.
Side Bar
The Side Bar displays on the right side of the Patient Chart and within the Progr...
Side Bar
The Side Bar displays on the right side of the Patient Chart and on the left side of the Progress Note.
Customize
![]()
Users can customize the sections and what order the sections show in for their view of the patient chart.
Clicking Customize under the Patient Side Bar shows a customize display that allows the user to drag and drop the applicable sections they want to see in the patient side bar. This customization impacts the patient side bar display as well as the left pane in the progress note editor. Users can then also re-order/change the order of the sections as they show in both places.

The mobile application is not yet updated to handle this customization, but is in development now.
Side Bar in the Progress Note
In the progress note, you see an additional section at the top of the side bar:
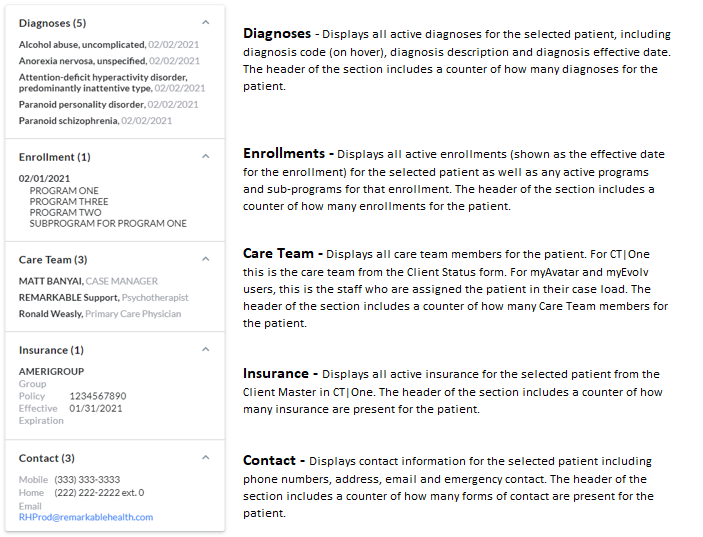
 |
Displays Diagnoses, Enrollments, Care Team, Insurance and Contact info. |
 |
Shows Scribbles for the patient.
|
 |
Click to expand/contract the Sidebar. |

 Delete the image by clicking the trash can.
You can resize the side bar. Simply move your mouse over the right-hand side of the section. Once the pointer turns into a vertical bar surrounded by left- and right-pointing arrows, simply click and drag to resize the section.