
Chart
Selecting Chart on the left navigation bar or in the upper left of the patient chart will take you to the Chart landing page of the Bells application.
Think of this as your main workspace. This page will display all of the draft notes for your patients, including Group Notes.
 myAvatar users: Enrollment is called Episode and Service Type is called Service Code. myEvolv users: Service type is called Services.
Search Patients

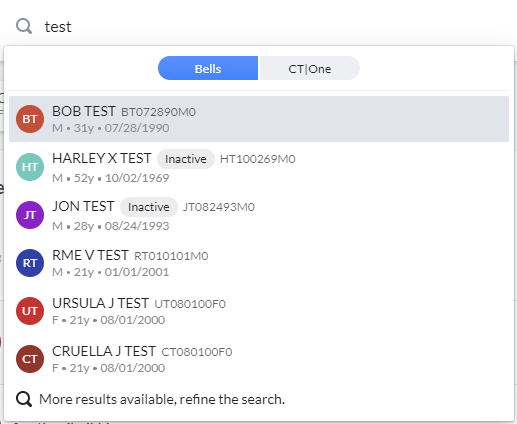
At the top of the Chart section, you can search directly for a patient for quick access and an easy workflow. Using the Ctrl+k keyboard shortcut can put you directly into the search field. Single-clicking in the field will pull up your recent patients. As part of this search and other patient searches in Bells, you will see a pill-style toggle for Bells and your EHR. When toggled to Bells you'll search for patients in Bells. When toggled to your EHR you'll be searching for patients that haven't synced to Bells that are part of your EHR. Clicking the patient in your EHR side of the search will pull that patient and their data into Bells.
.
 myAvatar users can only search by the last name due to the functionality available in myAvatar.
Note: This search field allows you to search by name, patient ID or date of birth. The patient ID is case-sensitive.
For example, if you have a patient with an ID of UT010180F0, searching for UT010180F) will return the patient, but searching for ut010180f0, will not find a patient.
Depending on settings in Bells for patient search and access limits, you may struggle to find a patient. The settings that drive which patients you can see in Bells are:
- Toggle setting on Bells User Management for All Patients
- Client Lookup Limits from CT|One (staff limit, not the agency limit)
- Whether you are a member of that patient's Care Team or case load (from the EHR)
- Whether you are the patient's Managing Therapist (from CT|One)
- Whether the patient is active or inactive
Recently Visited Charts

Next to the Chart button in the upper left of the Chart, you may see a series of patient cards. These cards are your recently accessed patients. If you've opened a patient's chart within the Bells application, that patient's card will display in the bar. This bar will show up to six recently visited patients for quick access.
Clicking one of the cards will take you to that patient's chart and will add a highlight to the card while you're in the chart.
Hovering on the cards will show a start note button and an X button in the top right corner. Clicking the Start Note button will launch the start note display for a progress note and the patient's chart for the clicked patient. Clicking the X in the top right corner will remove that patient from the Recent Visit display.
 This feature is similar to the drop-down on the header of the Client Chart within CT|One that displays client names for the charts that were recently accessed.
Open Sessions

Think of this as your worklist. Open Sessions shows you all of your draft notes and sessions.
The date picker allows you to narrow the Open Sessions results based on a date/range.
The Patient column displays the patient card including First Name + Middle Initial + (AKA/Nickname) + Last Name + Suffix, PatientID, Gender, Age and Date of Birth.
The Session Date column displays the note's Session date and time. When accessed via the Chart icon in the left navbar or next to the recently accessed patient cards.
If the note is started from an appointment, a calendar icon will display. Hovering on the icon will show the appointment details.
The Deadline column shows the Sign Date for the note, and the time it took to from session to sign. Additionally, the late note indicator will show if the note was late.
The Session includes the Service Type, Location, and Enrollment for the note. This column can be filtered based on Service Type or Location. Clicking the filter will show a togglable search display.
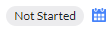
The Status column displays the tag for the record. If the record is a draft note it will show a "Draft" tag and if the record is from a Session it will show a "Not Started" tag. If there is an appointment associated with the encounter, a calendar icon shows next to its status. Clicking the filter will show the tags to be able to filter to just drafts or just not started notes.
Note status tags as well as the Sign Note Warning displays for the draft note. Status tags include Not Started or Draft as well as the Mobile Signature tag. Additionally for Group or Multi-Service notes there is a counter for the incomplete vs. total notes.
If a note is started for an appointment in Bells, but then also started/signed for the appointment in the EHR, the External tag will show on the note in Bells.
You may also see a counter in the card for your note. Group notes show a two or three piece counter depending on your involvement in the group.
-
You'll see a two piece counter if you are
- Group administrator but are not listed as a practitioner for the group.
- Bells administrator but are not listed as a practitioner for the group.
- The only practitioner assigned to the group.
-
The two piece counter shows the total number of unsigned notes for the group and the total number of notes for the group.
-
You'll see a three piece counter if you are a practitioner for the group and there is more than one practitioner in the group.
- The three piece counter shows the unsigned notes for the signed in user, the total unsigned notes for the group and the total number of notes for the group.
-
The counter color indicates if there is action left for the signed in user.
- When the counter is green, there are no notes left to complete for the signed in user.
- When the counter is blue, there are incomplete/draft notes for the signed in user for the group.
Example:

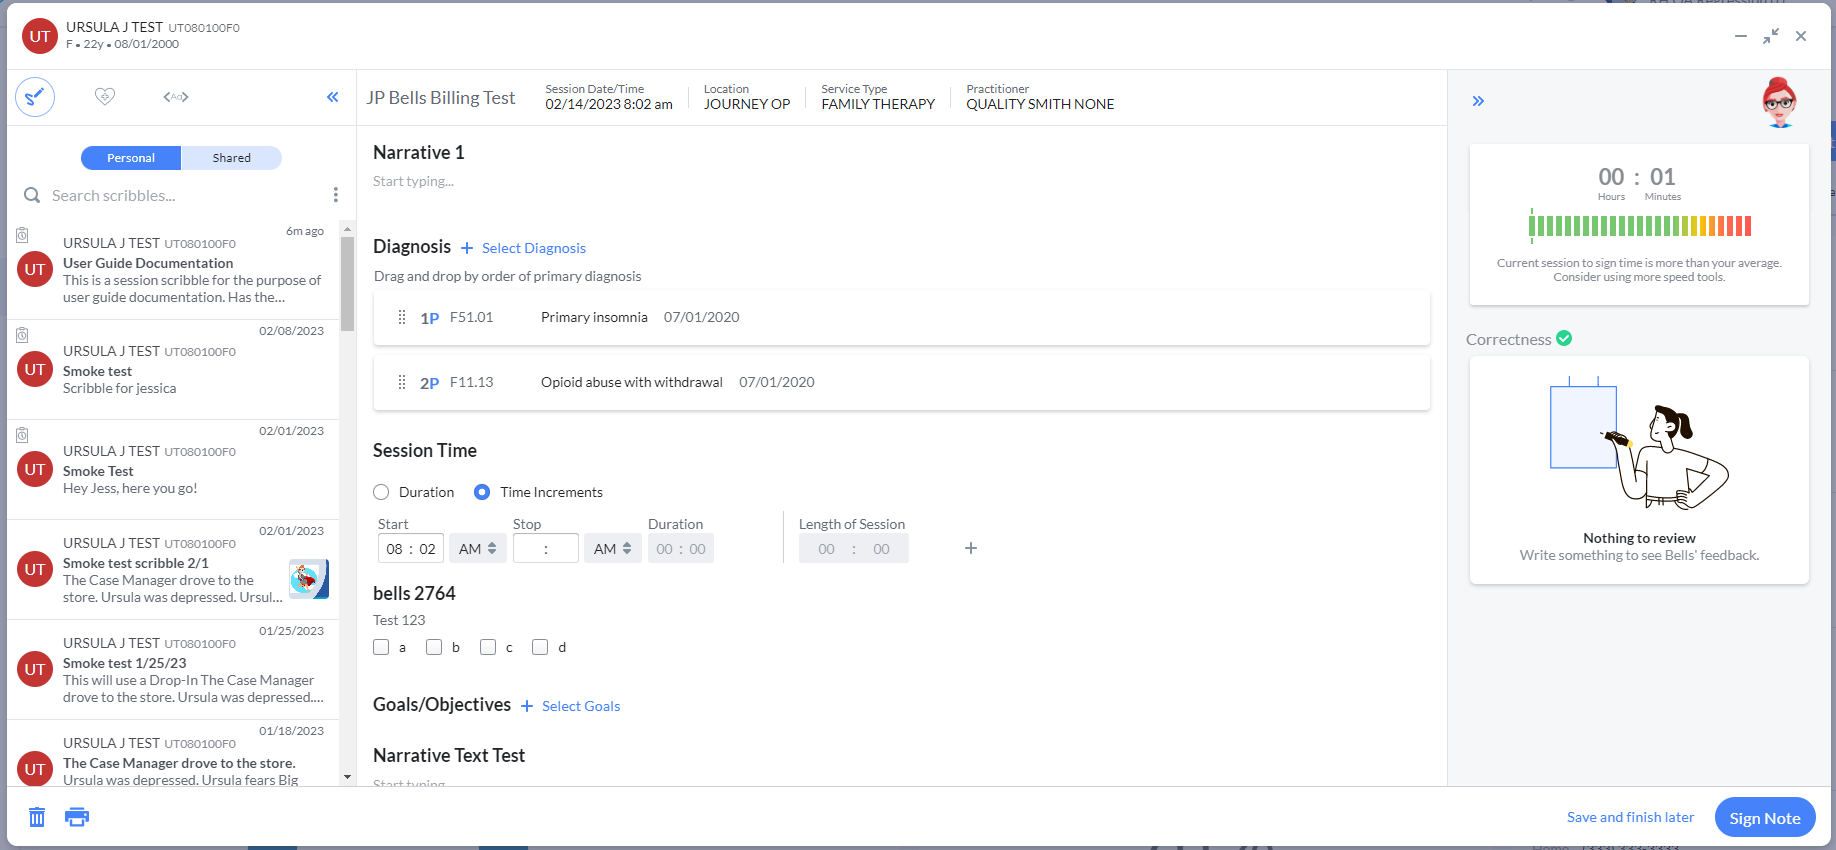
The Sign Note Warning displays when the note time (Session Time to current time) exceeds your organization's sign note goal (in hours) or is approaching (within 8 hours) the threshold that is configured.


The Open Sessions display is sorted by Session Date by default. You can also filter by the Patient.
The display is grouped by date and will show a gray banner at the beginning of each day.
Sorting
Column names that are followed by an arrow are sortable. Simply click the arrow t...
Column names that are followed by an arrow  are sortable. Simply click the arrow to sort.
Clicking on a record in the Open Sessions List opens the note in start or edit mode depending on the record selected.
 If the selected record is tagged as Not Started, this is an encounter started from the Sessions in Mobile, and will start the note when selected.
 If the selected record is tagged as Not Started and includes a blue calendar icon, this is an appointment encounter, and will start the note when selected.
 If the selected record is tagged as Draft this is for a note that has already been started and the note will be opened for edit.
The Open Sessions display also includes Group Note drafts. These notes display differently in the Open Sessions display. See below for comparison between a single patient note record vs. a group note record in the Open session display.

Some differences you'll see are that the patient avatar is replaced with the group avatar, the group name displays instead of the patient name, the number of incomplete/complete notes in the group is indicated, and no enrollment is shown since multiple patients in a group means there are multiple enrollments.
Delete Draft Notes or Sessions
When you point to a row in the draft note list, some icons appear on the far right side of the row.
Delete Icon: Allows you to delete a draft progress note from the Progress Note list. You may only delete draft progress notes.
Preview Draft Notes
While in the preview view of draft notes you can skim through more than one note easily using the note preview feature in the bottom right corner of the Preview Note view. You will see a note counter and arrows to be able to easily navigate through and review your notes without closing the note and opening the next note from the display grid.

Signed Today
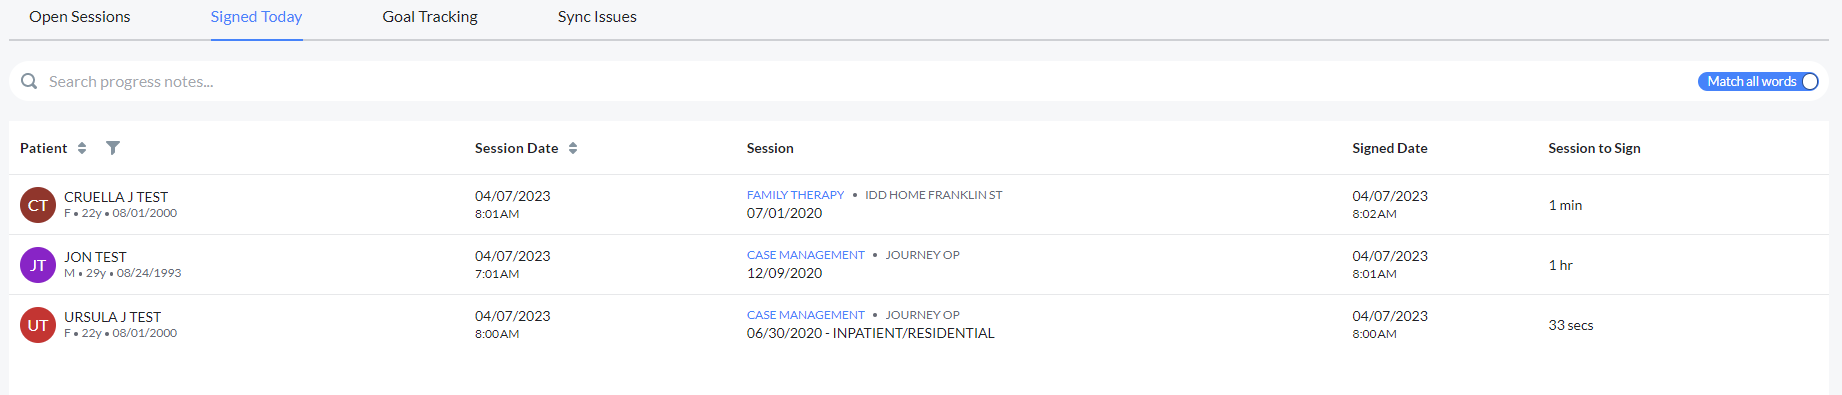
The Signed Today tab is visible when a user has signed a progress note on the current day, so they can easily view their signed notes across all patients.
Patient column displays the patient card including First Name + Middle Initial + (AKA/Nickname) + Last Name + Suffix, PatientID, Gender, Age and Date of Birth.
Session Date column displays the note's Session date and time. When accessed via the Chart icon in the left navbar or next to the recently accessed patient cards.
Session column displays the Service (or Note Type for Documentation Notes), Location, Enrollment date, and Program (if applicable) for the note.
 myAvatar users: Enrollment is called Episode and Service Type is called Service Code. myEvolv users: Service Type is called Service.
Signed Date displays the date and time that the note was signed.
Session to Sign displays the time between the session date/time and when the note was signed.
From the Signed Today display grid you can preview and print the progress note via the icons at the far right of the display when hovering on a record in the grid.
Sync Issues

The Sync Issues tab displays when a user has signed progress notes that could not sync to their EHR. These are typically business validations that are on the EHR end to prevent invalid data.
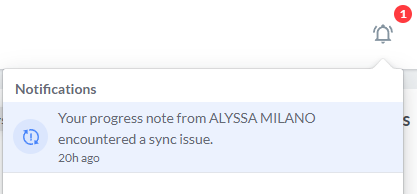
When a sync issue occurs, the user will receive a notification. This notification will include the Patient Name for the note that encountered the sync issue.
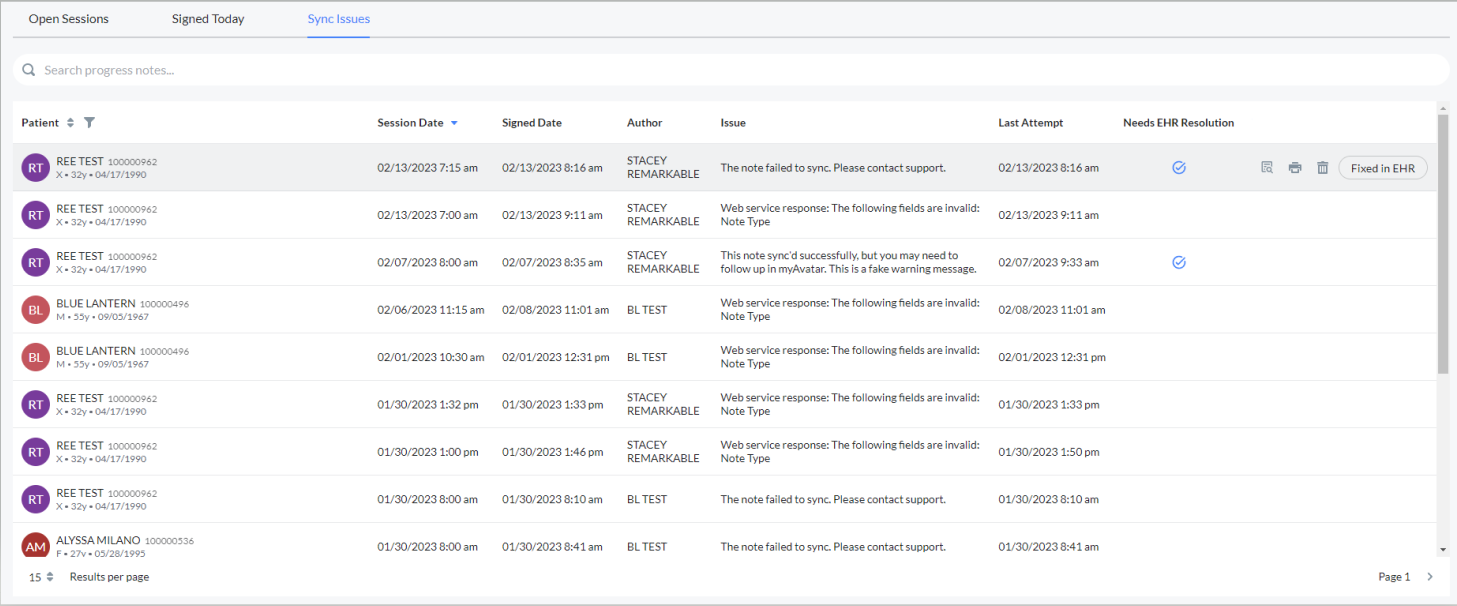
The Sync Issue tab displays a list of the notes that encountered sync issues. You can search the display by patient, author or even the sync issue text. The display includes the following details:
Patient column displays the patient card including First Name + Middle Initial + (AKA/Nickname) + Last Name + Suffix, PatientID, Gender, Age and Date of Birth.
Session Date column displays the note's Session date and time. When accessed via the Chart icon in the left navbar or next to the recently accessed patient cards.
Signed Date displays the date and time that the note was signed.
Issue displays a brief description of the issue encountered when the sync was attempted.
Last Attempt displays the date and time of when the note was last attempted to sync to the EHR.
Needs EHR Resolution displays a checkmark in the column when the user needs to complete the note in their EHR.
Hover action buttons will display to the right of the Needs EHR Resolution column depending on what type of issue occurred when the note attempted to sync.
Fixed in EHR button will show when a warning or partial save response is received from the EHR - an example of this can be when there is a note attached to the appointment from the EHR, and the user attempts to create a note for the same appointment in Bells. Clicking the Fixed in EHR button will remove the sync issue from Bells.
- In some scenarios a button for "Resolve" will show instead of the "Fixed in EHR" button. This likely happens when the appointment chosen for the note in Bells already has a note in the EHR, therefore Bells is unable to sync the note to the EHR. When "Resolve" is clicked the note will no longer be associated to the appointment in Bells and Bells will try to resync the note to the EHR.
- Administrators will see a button for “Clear Issue” instead of “Fixed in EHR”.
Ellipse Menu shows on hover of the row. In the menu users can Add Comment or Preview the note. If a comment is added, additional menu options for Edit and Delete show to further manage sync issue comments.

Common Sync Issues
There are four (4) common types of sync issues that can occur.
-
The note failed to sync. Please contact support.
- This issue type happens when the progress note cannot sync to the EHR.
- The only action that can happen for this issue type is to reach out to support. You will have the ability to delete the note that has this sync issue so it doesn't stay in the display forever.
-
There was trouble syncing this note. Please retry.
- This issue type happens due to a small failure in the sync process.
- You will have the ability to retry the sync.
-
This note sync'd successfully, but you may need to follow up in your EHR.
 This issue type was built for the myAvatar EHR.
- When possible, the status from myAvatar will be included in the Issue description.
- You will have the ability to dismiss the record in the display so it doesn't stay in the display forever.
-
Disassociate the note from the appointment and retry the sync.
-
 This issue type was built for the myAvatar EHR.
- This issue occurs when the appointment associated with the note in Bells already has another note associated with it in the base EHR.
- You will have the ability to delete the note that has this sync issue so it doesn't stay in the display forever.
-
OR You will have the ability to Resolve the sync issue.
- Clicking Resolve in the display will display a confirmation prompt - "The appointment linked to this note was already tied to a different note. Would you like to unlink the note from the appointment?"
-