
What is a Scribble?
A Scribble is simply some text you need to jot down. You can add images to your scribble. A scribble may, but is not required to be associated with a patient.
Accessing Scribbles
There are many ways to access your Scribbles
-
Via the Scribbles icon on the left navigation bar

-
Via the Scribbles tab on the Patient Chart

- Via the Progress Note Scribbles tab in the left pane
Left Navigation Bar- Scribbles icon
One of the ways you can access your scribbles is through the Scribbles icon in the left navigation bar:

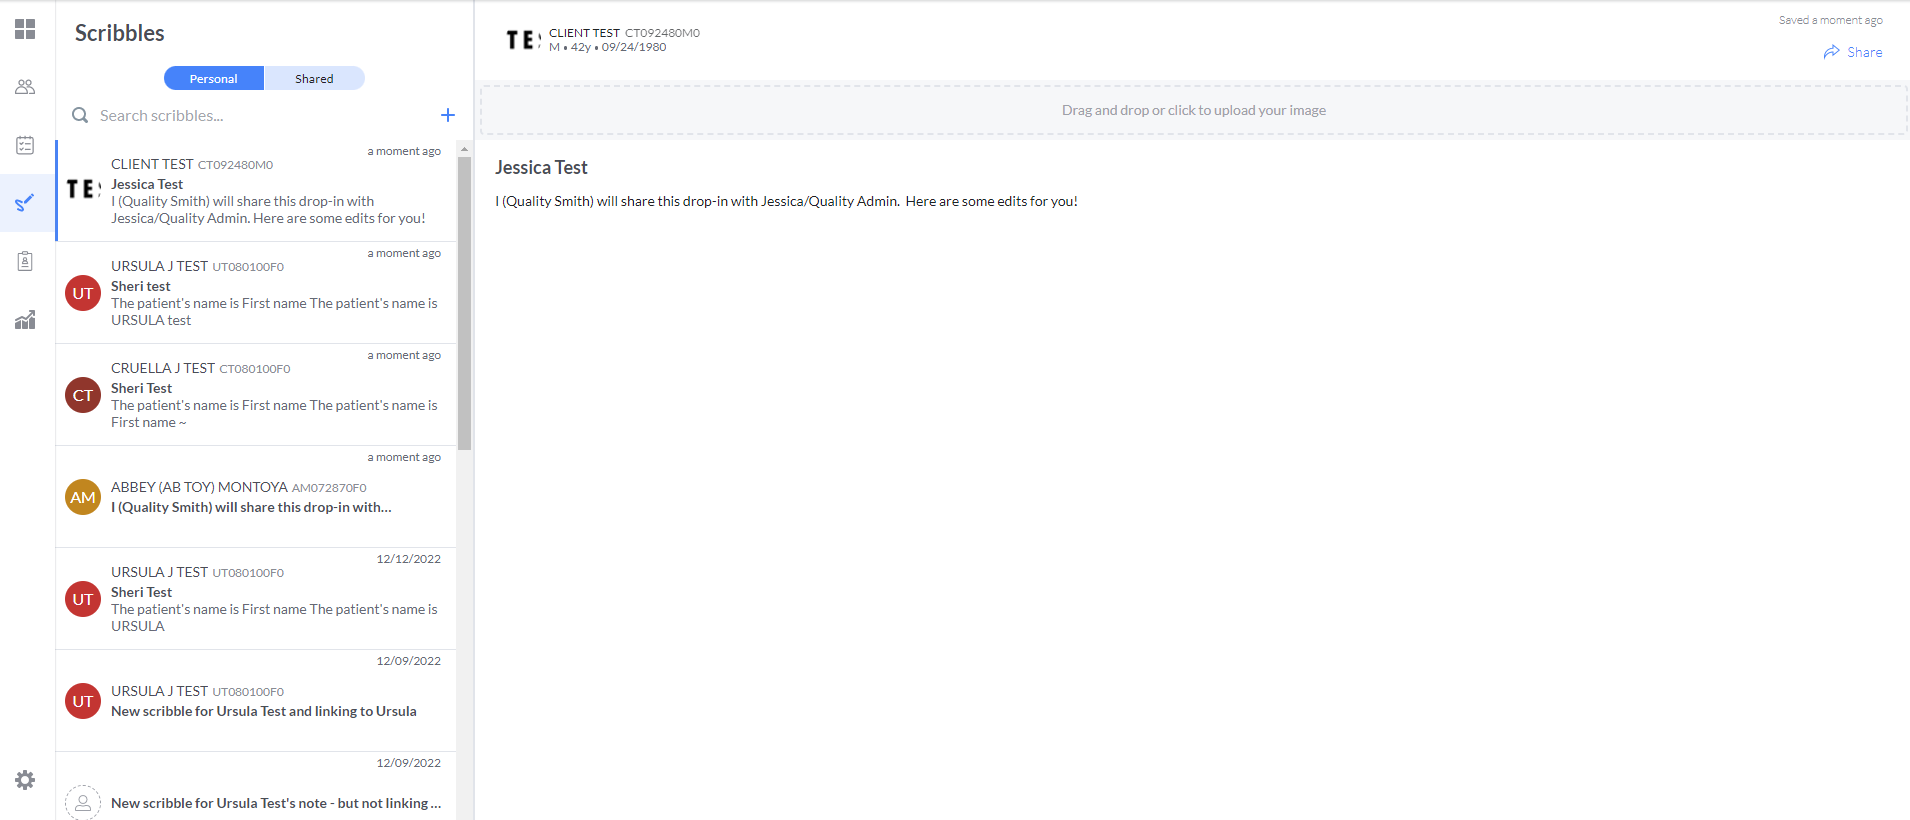
Clicking this opens the Scribbles List.
The Scribbles List gives you access to all of your scribbles, including scribbles linked to patients, scribbles not linked to patients, scribbles from the mobile Bells application, scribbles linked to sessions, and scribbles with images.
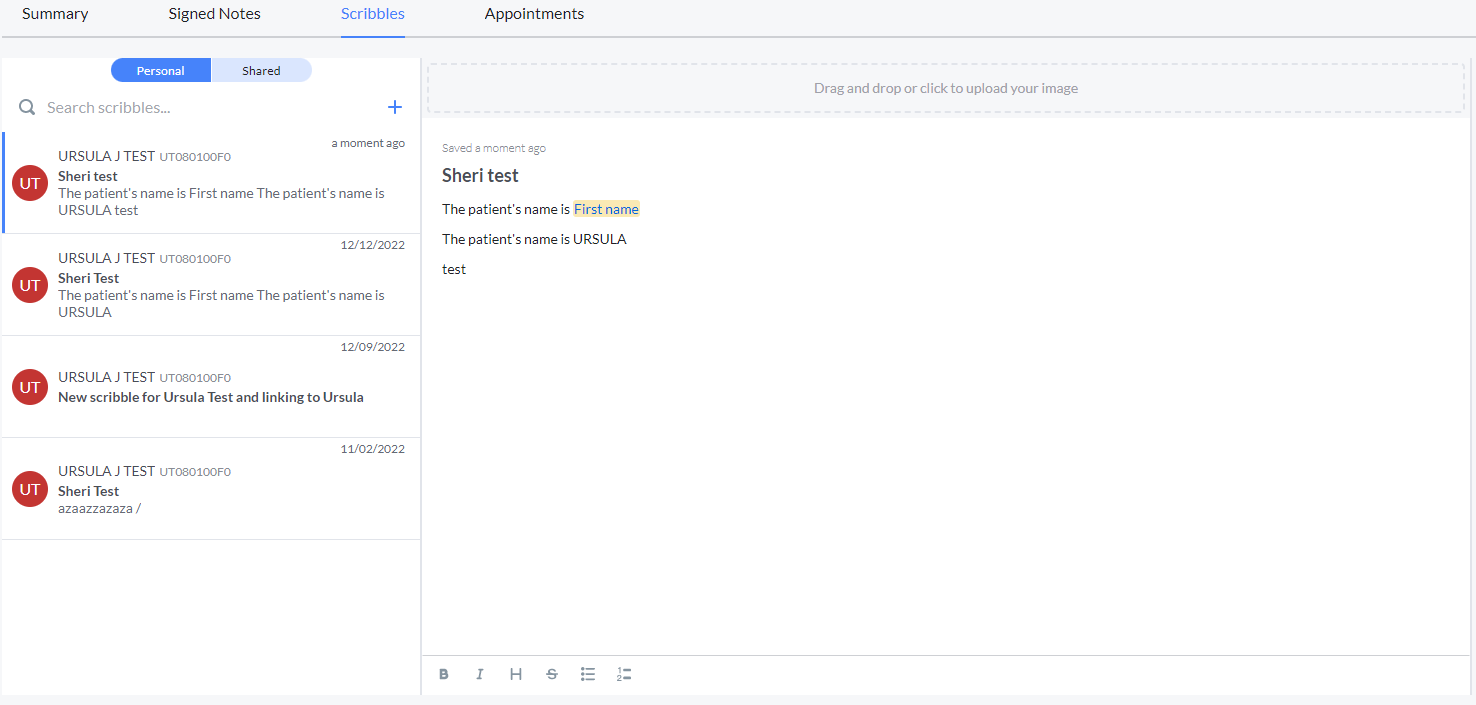
Patient Chart - Scribbles tab
When you access a patient's chart, you're by default placed on the Progress Notes tab of the chart, you have a second tab for the selected patient's scribbles.
This tab shows only your scribbles that have been linked to the selected patient.
Scribbles Search
At the top of the Scribbles list is the scribble search. This search field allows you to search for scribbles within the scribbles list to quickly access a specific scribble. You're able to search by patient name or scribble content to narrow down the scribbles shown. 
Scribbles List
The left side of the Scribbles section displays all of your scribbles.
This list will show the patient's
- Avatar (if linked to a patient)
- Minor indicator (if available)
- Full name
- PatientID
The list will also display the first few lines of the Scribble, when the scribble was last updated, if the scribble is linked to a session and if image(s) are attached to the scribble.

Session Icon

Clicking the Session icon at the far right of the scribble will open a right pane displaying the session details that are linked to that scribble.
This icon displays on the Dashboard, Scribble List, Scribble tab on Patient Chart and the Scribble tab of the Note Editor.
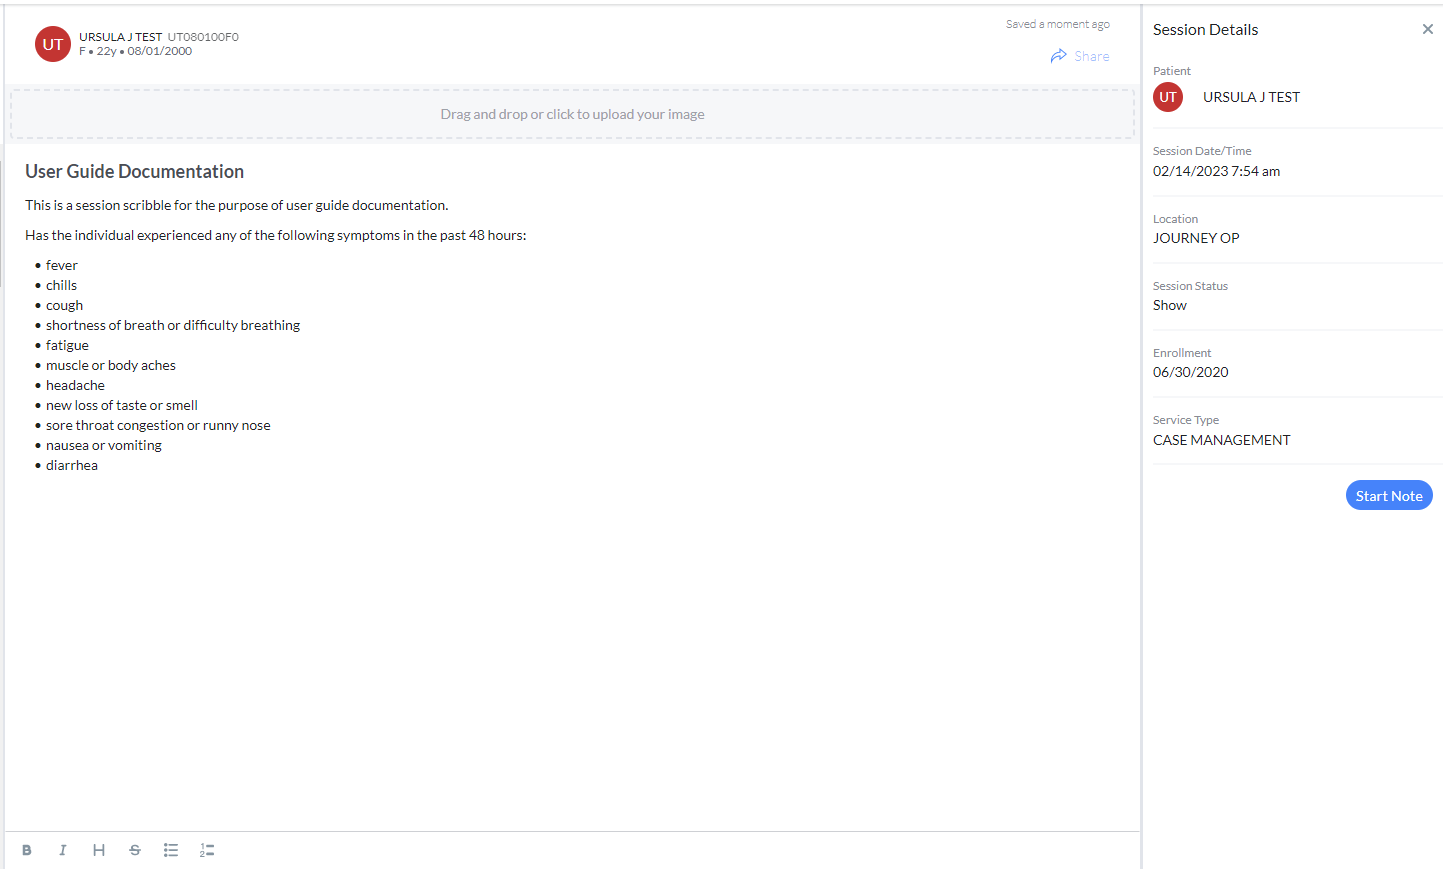
Depending on the status of the session/note linked to the session the following buttons/actions can occur:
- Start Note: If the Session status is Not Started, allows you to start the note from the Scribble Session Detail pane.
- Edit Note: If the Session status is Draft, allows you to edit the note that has already been started.
- Preview Note: If the Session status is Signed, clicking on this will open the Note in preview mode, similar to what is shown when clicking on the preview icon of the note grid.
The Scribbles List is sorted in order of when the scribble was last updated, with the most recently updated scribbles showing first.
Adding a New Scribble
Clicking the + icon next to the scribbles search will add a new scribble.

When in the Scribbles section, the new scribble will be blank and will not be associated with a patient.
When in the Patient Chart, the new scribble will automatically be associated with the selected patient.
Adding a Patient to a Scribble
Clicking the person plus icon allows you to associate your scribble with a patient.

If you find that you've associated the incorrect patient, you can click the X in the top right corner of the patient card at the top of the scribble to remove the associated patient.

 myAvatar users can only search by the last name due to functionality available from myAvatar.
Adding Text to a Scribble
Simply start typing to add text to your Scribble.
The text of a scribble can be formatted with headers, bulleted list, bolding or italics.
Formatting Text
Formatting Text Bells gives you several text formatting options. You can acces...
Text Formatting
Bells gives you several time-saving text features for adding text to scribbles and progress notes.
You can access these features in several ways:
- via a Formatting Bar
- Action commands
Formatting Bar
The Formatting Bar is visible at the bottom of your text editor in
- Drop-Ins
- Scribbles
- Progress Notes
Examples:


Using items on the formatting bar is easy - simply click the tool and start typing! You can also select text and click the tool to apply the feature to the selected text.
| Undo | |
 |
Bold |
 |
Italic |
 |
Heading (larger font, bold) |
 |
Strike-through |
| Highlight | |
 |
Numbered list |
 |
Bulleted list |
 |
To-Do/Task list |
 |
A T@g, which allows you to select a member of the patient's care team if a patient is associated with the text you're editing |
 |
Drop-ins |
 |
Add to dictionary |
 |
Turn on native language mode |
| Speech to Text |
You can quickly access bulleted and numbered lists by:
- Putting your cursor on a new line
- Typing * (bulleted list), - (bulleted list) or 1 (numbered list)
- Hitting the space bar
Your list will start and if you hit enter you can continue the list on each new line.
When you wish the list to stop, hit your backspace key.
MOBILE: The mobile formatting bar also has an option for selecting Drop-Ins. This will include any drop-ins that have been shared. This includes drop-ins with the options placeholders which allows you to make selections from configured values set up in the web.
Actions
Actions save you time by allowing you quick access to functionality in a few keystrokes.
Use Actions to access
- Drop-Ins
- A Date Picker
- T@gs
- A Bulleted List
- A Numbered List
- A Task List
/ Commands
The slash ( / ) command allows you to access Actions.
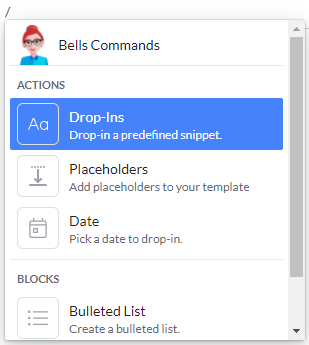
As soon as you type a /, the menu of actions appears:
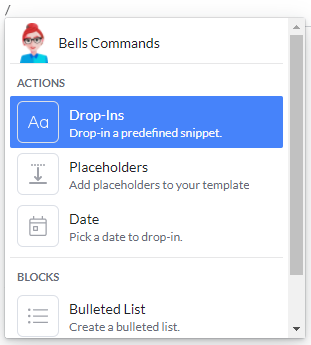
You can use your arrow keys or click on the action you want.
MOBILE: / Commands are not available on Mobile. Drop-ins are available via the  toolbar.
Drop-Ins
Previously named Text Snippets - Drop-Ins are configured in your User Settings, a Drop-In is a pre-defined set of text that is inserted when you select it.
To use a Drop-In
- Select Drop-In from the Actions list
-
Your list of Drop-Ins appears:

- Select the specific Drop-In you want to insert.
- If you change your mind, you can use ctrl-Z (Undo) to remove the Drop-In.
Tip: You can also access Drop-Ins directly by using the ~ key, located in the top left of your keyboard just under the esc key. Once you type ~, you'll be taken directly to your list of Drop-Ins.
Placeholders
Placeholders allow you to set up parts of a sentence that can be altered by the application based on the patient or user for the progress note template or drop-in being used. Placeholders can also be added into the custom note section configuration.
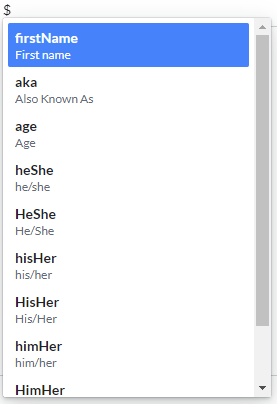
Placeholders can be access by typing $ followed by the placeholder text or via the / command menu.
As part of drop-ins, you can set up a singlechoice or multichoice placeholder. This placeholder lets users configure options to select within a drop-in. These drop-ins can then be used in scribbles, templates and progress notes, as well as on the Mobile application.
Available Placeholders in Bells
- First Name - Shows the patient's first name with the first initial capitalized and the rest of the text lower case
- Last Name - Shows the patient's last name with the first initial capitalized and the rest of the text lower case
- Also Known As - Shows the patient's AKA or nickname
- Age - Shows the patient's age
- he/she - sets the appropriate pronoun in lower case based on the patient's gender
- He/She - sets the appropriate pronoun in upper case based on the patient's gender
- his/her - sets the appropriate pronoun in lower case based on the patient's gender
- His/Her - sets the appropriate pronoun in upper case based on the patient's gender
- him/her - sets the appropriate pronoun in lower case based on the patient's gender
- Him/Her - sets the appropriate pronoun in upper case based on the patient's gender
- Guardian - shows the patient's guardian
- Single Choice Placeholder - lets users configure options to select within a drop-in.
- Multiple Choice Placeholder - lets users configure options to select within a drop-in.
- Patient Noun - inputs the patient label substitution configured in organization settings.
- User - shows the logged in user.
- User Role - shows the configured User Role for the logged in user.
- Patient Street - shows the patient's street portion of their address.
- Patient City - shows the patient's city portion of their address.
- Patient State - shows the patient's state portion of their address.
- Patient Postal Code - shows the patient's postal code portion of their address.
- Patient Home Phone - shows the patient's home phone (where applicable).
- Patient Work Phone - shows the patient's work phone (where applicable).
- Patient Mobile Phone - shows the patient's mobile phone (where applicable).
- Patient Gender - shows the patient's gender.
- Patient Email - shows the patient's email (where applicable).
- Location - shows the Location selected for the note.
- Place of Service - shows the Place of Service selected for the note (where applicable).
Date Picker
The Date Picker allows you a quick view to a calendar so you can quickly pick a date that is yesterday, today, next week, or whenever you want.
To use the Date Picker:
- Select Date from the Actions list
-
The Date Picker appears:

- Select the date you want or use the arrows to change the month or year as necessary.
- The date shows in colored text and if you move your mouse over it, the pointer changes to a hand. That is your cue that it's from the date picker.
- You can click on a date from the Date picker and the Date picker will appear.
- If you change your mind, you can use ctrl-Z (Undo) to remove the Date you inserted.
T@gs
Previously named Mentions - T@gs allow you to quickly select a member of the patient's care team. If your text field is not associated with a patient, T@gs will tell you that you have to have a patient to see T@gs.
To use T@gs:
- Select T@gs from the Actions list
-
The T@g list appears:

- Select the person from the list.
- If you change your mind, you can use ctrl-Z (Undo) to remove the T@g you inserted.
Tip: You can also access T@gs directly by using the @ key. Once you type @, you'll be taken directly to your list of T@gs.
Note: T@gs will not display on notes that sync to CT|One as part of the progress note, or in the printout of the note in CT|One.
MOBILE: T@gs are not available in Mobile.
Bulleted List
Select this option to start a Bulleted List.
To use Bulleted Lists:
- Select Bulleted List from the Actions list
- Start typing your list.
- If you change your mind, you can use ctrl-Z (Undo) to remove the Bulleted List you inserted.
- Every time you type return to start a new row, your list continues.
- When you are done with your list, press return followed by the backspace key to end the list.
Tip: You can also access Bulleted Lists directly by typing a * or - on a new line. Once you type * or - and hit your tab key, the list begins.
Numbered List
Select this option to start a Numbered List.
To use Numbered Lists:
- Select Numbered List from the Actions list
- Start typing your list.
- If you change your mind, you can use ctrl-Z (Undo) to remove the Bulleted List you inserted.
- Every time you type return to start a new row, your list continues.
- When you are done with your list, press return followed by the backspace key to end the list.
Tip: You can also access Numbered Lists directly by typing a 1 on a new line. Once you type 1 and press your tab key, the list begins.
To-Do/Task List
Select this option to start a Task List.
To use Task Lists:
- Select Task List from the Actions list
- Start typing your list.
- If you change your mind, you can use ctrl-Z (Undo) to remove the Task List you inserted.
- Every time you type return to start a new row, your list continues.
- When you are done with your list, press return followed by the backspace key to end the list.
Tip: You can also access To-Do/Task Lists directly by typing [ and ] on a new line. Once you type [] and press your tab key, the list begins.
Text Expansions
Configured in your User Settings, Text Expansions are a way to automatically expand a few letters into longer text.
Some examples:
- IPO = In the presence of
- BP = biological parent
- RH = Remarkable Health
- FH = Foster Home
Key features:
- Automatic
- Can be enabled/disabled
- Available in Scribbles and Progress Notes
- Available on the Mobile app
To use a Text Expansion,
- Type the name of the expansion (such as IPO, BP, etc)
- Once you type a space after the last character of the name of the Text Expansion, your text is automatically expanded to the full text of the Text Expansion (such as In the presence of)
-
If you want to undo the Text Expansion,
-
Click the dotted lines under the Text Expansion and click Undo.
 -OR-
-OR-
- Type Ctrl-Z to Undo the Text Expansion.
-
Click the dotted lines under the Text Expansion and click Undo.
Note: Scribbles do not include spelling and grammar recommendations. Scribbles can hold up to 50k characters.
Adding an Image or PDF to a Scribble
You can add as many images or PDFs to your Scribble as you wish.
Your scribble will look slightly different depending on whether you have added an image/PDF to the Scribble.
Adding an image or PDF to a Scribble that has no image attached.
At the top of the scribble, you will see a rectangle for adding an image to your scribble. You can add a scribble a couple of ways
-
Clicking in the image/PDF box opens a computer file explorer window for you to select an image/PDF to insert.
- Navigate to your image/PDF, click the image, and click Open.
- Navigate to your image/PDF and double-click it.
- Drag and drop the image/PDF into the box.
Resize the image as desired and click Finish to upload it.
Adding an image or PDF to a Scribble that already has an image attached
Once a Scribble has an image/PDF attached, you'll see a plus sign at the top of your Scribble:
You can add additional scribble(s) a couple of ways
-
You can click the + sign to add an image/PDF to the scribble. Clicking the plus sign opens a computer file explorer window for you to select an image/PDF to insert.
- Navigate to your image/PDF, click the image and click Open.
- Navigate to your image/PDF and double-click it.
-
Drag an image/PDF to the grey area at the top of the scribble. A text box will appear to allow you to drop the image/PDF.

Resize the image as desired and click Finish to upload it.
Once it's uploaded, you'll see a thumbnail of the image when you view the Scribble.
A Scribble in the Scribble list with an image/PDF:
A Scribble with an image/PDF displayed at the top of it:

Viewing an image attached to a Scribble
To view an image attached to a scribble,
- Click on the Scribble
- Click on the thumbnail version of the image at the top of the Scribble.
- A full-screen version of the image displays.
In the full-screen version, you can download or delete the image, as well as close the full-screen image.
 |
Click to Delete the image from the Scribble |
 |
Click to download the image from the Scribble to your computer |
 |
Click to close the full-screen image |
Deleting an image attached to a Scribble
Hovering over an existing image will display an X in the top right corner of the image. Click the X to remove the image.
Optical Character Recognition (OCR)
Optical Character Recognition (OCR) allows you to take the text that is in an image, like when you snap a photo of your patient's medication bottle or doctor's note and put that text into your Bells Scribbles and Progress Notes.
When you view an image on the scribble, there is a blue button in the top right corner of the image pane for "Get Image Text".

When clicked, the text that can be detected in the image gets added to your Scribble with the heading "Image Text". From there, the text can be used as reference or inserted into a note from the Scribble just like all other Scribble text does today.
Writing Assistant
For information, check out the Writing Assistant article.
Scribble Sharing
Personal Scribbles can be shared with other Bells users.
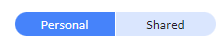
At the top of the Scribble display you will see a pill-style toggle for Personal and Shared.
- When toggled to Personal, your personal (non-shared) scribbles will show.
- When toggled to Shared, the Scribbles you've shared or the Scribbles that have been shared with you will show.
To share a scribble, click the 3 dot menu in the top right corner of the scribble card. Clicking the Share value in the list, or via the share icon  in the top right of the scribble.


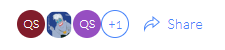
When the share icon is clicked, the Share Scribble display will show. You can search for the Bells users to share the scribble with and select share. Once all the users are added to the display, click Done. The scribble will be shared with the selected users. The avatar for those users will display in the top right corner of the scribble to the left of the Share icon.
When users are viewing/editing the scribble, a highlight circle will appear around the avatars for the users currently accessing the shared scribble.

If the Scribble being shared is associated to a Patient, you can share to the entire care team for the patient with the +Add Care Team selection.
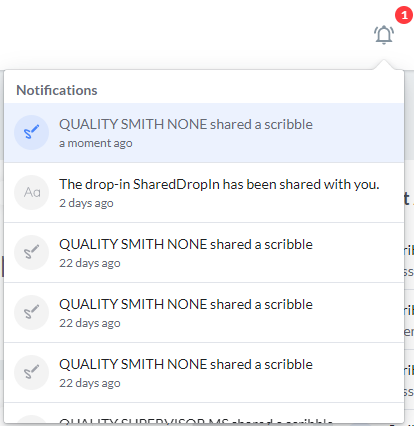
When a scribble is shared, a notification will display at the top right of the Bells application.

Clicking the notification bell icon will open your list of notifications. Notifications will show for shared Scribbles or shared Drop-Ins.
Scribbles that are linked to a session can also be shared with other users. Shared scribbles can be viewed on the mobile application but cannot be edited.
Scribble Pinning
If you want to favorite or prioritize a scribble you can pin the scribble so it shows at the top of your scribble list. Clicking Pin in the 3 dot menu of options on the Scribble card lets you Pin the Scribble.

Pinned scribbles are sorted first, followed by unpinned scribbles sorted by date. The pin/unpin option is available from a new three-dot menu on each scribble card, which also consolidates the existing Share, Archive, and Delete/Leave actions.
Archiving a Scribble
If you're done with a scribble but maybe you might need it again in a couple days, or are just not sure about deleting it just yet, you can archive the Scribble in Bells.
When hovering over the scribble card on the Scribble section or the Patient Chart Scribble tab, you will see the 3 dot menu in the top right corner. The Archive value is available in the menu. Clicking the value archives the scribble. When clicked, the scribble will display or not depending on your Scribble filter settings. You can check your Scribble filter settings by clicking the filter icon in the top right of the scribble list, to the right of the add icon.

When toggled off, archived scribbles will not show in the scribble list. When toggled on, all scribbles show in the list.
Deleting a Scribble
Once you are completely done with the information in a Scribble, you can delete it. When hovering over the scribble card on the Scribble section or the Patient Chart Scribble tab, you will see a 3 dot menu, the trash can icon/delete value is in the list. Clicking the value deletes the scribble, the link of that scribble to the patient, and any images included in the scribble. When clicked, you will be prompted if you're sure that you want to delete. This prompt will also indicate if there are images attached to the scribble being deleted.
Caution: Once deleted, you cannot recover a Scribble!

Starting a Note from a Scribble
If your scribble is associated to a patient, you can start a note from the scribble with or without a session from the mobile application.
In the top right corner of your patient linked scribble either the session icon shows or the start note icon shows.
With a Session:
Clicking the session icon, shows the session details and allows you to start, edit or preview the note.

Without a Session:
Clicking the start note icon, opens the start note display with the same defaulted note details that would show when starting the note from anywhere else in Bells.
