
Organization Settings
Organization settings are managed by your organization's Administrator. In fact, if you are not configured as a Bell's Administrator, you won't even see this option in the left navbar when you click on the Settings gear.
Organization settings apply to everyone in the organization.
 myAvatar users: Service Types are called Service Codes and Enrollments are called Episodes. myEvolv users: Service Type is called Service.
Accessing Organization Settings
To access your Organization Settings,
- Click the Settings Gear in the left Navbar:

-
You see a second left navbar:
-
Organization settings are in the lower section of the Settings Navbar.
Configuring Organization Preferences
The organization preferences are broken up into tabs. Configurations, Compliance, Emails, Appointments (myAvatar and myEvolv only) and Audit.
Configurations Tab

Sync Issues - determines if the sync issue widget displays on the User Dashboard. This is turned off by default. When set to on, if the signed in user has sync issues the widget will show on their user dashboard. If the user does not have sync issues, the widget will not display just like the tab on the user's chart display. If the signed in user is a Bells administrator, all sync issues for the organization will display.
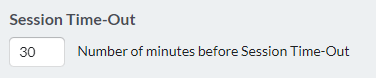
Session Time-Out - sets the threshold for your organization for the number of minutes until a user's session will time-out. This is set to 30 minutes by default. This setting will also be respected in Mobile.
NOTE: Session time out must be sixty (60) minutes or less.
Guardian Display - determines if the Patient's Guardian information is included in the Patient Chart or not. This setting is for web and mobile application.

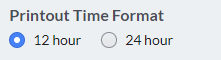
Time Format - sets whether progress notes use the 12-hour format (AM/PM) or the 24-hour (military) format when printing progress notes from Bells. This setting does not affect the individual user's Time Format Preference setting.
Mobile Call Masking - Determines if the call masking capability is set for all users across the organization or controlled by the user in the mobile application.
- When toggled on, call masking will apply for all users. The setting in the mobile application will no longer show.
- When toggled off, call masking will not apply across the organization. Mobile application users can set in the mobile application if their phone number will mask or not.

Allow Patient Signatures on Mobile - Determines if signatures can be captured in the mobile application.
- When toggled on, the Signature button will show in the mobile application unless the service selected for the session is configured as an exclusion.
- When the toggle is enabled, a button to Configure Exclusions shows. This allows Bells administrators to configure services that do not need signatures and therefore the Signature button on the session in the mobile application will not show.
- When toggled off, the Signature button will not show in the mobile application to be able to capture signatures. This is the default setting.

Show Problems or Diagnoses - Determines if the Patient Chart Sidebar and the left pane in the progress now will show Problems for the patient or Diagnoses.

Notes Tab

 Discharged Episode/Enrollment Documentation - this setting is for myAvatar and myEvolv only. It enables the ability and sets the number of days users can write progress notes for patients after their episode is expired. The allowed range is from 1 to 180 days.
When “Doesn't apply to billable note types” is configured, note types that are configured with “Save as Independent Note” will be hidden when starting the note.

Default Start Note Action - this setting is for myAvatar only. It determines which type of note is started by default within Bells.
- When set to Start Note (this is the original functionality and default), the start note button throughout Bells will show as “Start Note” and when clicked will start a standard progress note that includes location and service code.
- When set to Start Documentation Note, the start note button throughout Bells will show as “Start Documentation Note” and when clicked will start a simplified Documentation Note that doesn't need location or service code. When a Documentation Note is started, the note types that will be available are the ones set to “Save as Independent Note” on the note type configuration.
- Whatever isn't set as the default will still be available in a drop down menu on the start note button to be able to get to the other type of note flow.
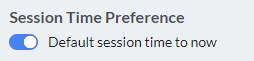
Session Time Preference - sets whether the progress note session date/time will default to now or if it will be blank, requiring the user to set it each time. When toggled on, the session date/time for notes will default to the current date/time. If toggled off, the session date/time will be blank and users will need to select it each time for notes.
Note: Notes that are started from appointments will continue to default the appointment date/time for the note, regardless of this preference.
Note: This session time preference is not supported for Documentation Notes for myAvatar users.
Available Programs - Limit Note Programs allows Bells Administrators to configure to allow or not allow specific programs to have notes written for them in Bells.

Group Note Edit - sets whether group administrators have the ability to edit patient notes as part of the group.

Default Group Attendance Status - defaults the note status when starting group notes. You can choose between Show, No Show, Cancelled (CT|One and myAvatar only) and Note Not Needed.

Group Summary- One summary for all session statuses determines if the user will be able to set different summary text for each show status in the group or if they will be the same across all statuses. This is defaulted to off.
- When toggled off, the group summaries across show, no show and cancelled (where applicable) will be separate and the copy summary functionality is available.
- When toggled on, the group summaries across all statuses will be the same and changes to the summary will reflect in all group summaries. The copy summary functionality will not be available.

Group Note Force Service Override- sets whether No Show or Cancelled group notes are required to have a different service than the show group note service. This configuration will not be available to myEvolv users.

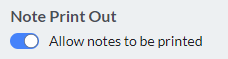
Note Print Out - controls whether users are allowed to print progress notes from within Bells. When toggled on, the user will see the print icons throughout the application including note displays, note previews, and reports. When toggled off, the user will not see the print icon and will be unable to print notes from Bells.
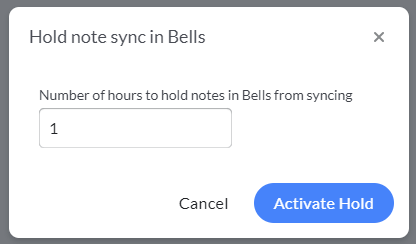
Configure Note Hold - allows administrators to pause the note sync in Bells to the EHR. When clicked users can configure the amount of time in hours the notes in Bells will be held. This can be as short as an hour and up to 72 hours. When configured, notes in Bells will not sync to the EHR and will show with a stop-watch icon in the note grids. Once you're ready for the notes to sync again, you can click the red Stop note hold button so notes will start syncing to the EHR again. NOTE: After turned off, notes will not sync again until the first minute of the next hour after the button was clicked.
 Program Filter - controls the display of selectable diagnoses for the patient in the progress note. When set to off, the Select Diagnosis window will only show the diagnosis associated with the program that was selected on the Session Information screen of the progress note. When set to on, the diagnosis will not filter based on the selected program and will show all active diagnoses for the patient within the enrollment.

 myAvatar and myEvolv administrators will not see the Program Filter for Diagnosis.
Note Header - Allows you to customize the header for your progress note printouts. For myAvatar users, the header will show the default header as configured in myAvatar. This header can be edited/changed and is the header that will show on the generated PDF in myAvatar for Bells notes.

Place of Service - allows myEvolv admin users to set if the Place of Service selection (part of the Session Information for a progress note) is required or whether the Place of Service should be hidden all together.
This is only visible to myAvatar administrators.
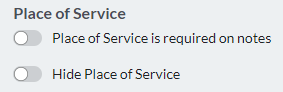
Place of Service is required on notes - when toggled to on, requires the Place of Service to be selected as part of the Session Information for a progress note. When toggled to off, the Place of Service is optional.
Hide Place of Service - when toggled to on, Place of Service will not show as part of the Session Information. When toggled to off, Place of Service will show as part of the Session Information.
When both settings are turned off, on the Note Type editor Bells administrators can configure the note type to still require the place of service. This setting is only available when it is not required at the organization level and the Place of Service is not hidden at the organization level. When configured at the note type to be required, the Place of Service selection will be in the footer after the note type selection and will be required to start the note.
When changes are saved, a Date/Time/User stamp shows to the left of the Cancel button in the footer of the configuration display.
Example:

Compliance Tab
Substitutions
Substitutions allow you to substitute core Bells labels with language more relevant to your organization. For example, you may prefer to refer to Patients as Clients or Consumers.

-
To edit a label, click Customize on the far right side of the row:

-
To revert a label back to its original value, click Set to default at the far right side of the row:

"Location" label locations that respect the Organization's preference:
- Settings - Agency Settings - Location
- 1st label under Settings - Agency Settings - Location- "Locations"
- 2nd label under Settings - Agency Settings - Location- "Associate the location..."
- Search bar under Settings - Agency Settings - Location- "Search locations..."
- Column header "Location" under Settings - Agency Settings - Location- "Location"
- Start Note window - Session Information - Location
- Progress Note - Header - Location
- Progress Note - Preview - Location
- Progress Note - Print - Location
- CT|One - Bells Note - Transcription of the note into the General Tab - Location
-
CT|One - Bells Note - Printout/Report - Location
"Session" label locations that respect the Organization's preference:
- Chart Section - Display grid - Session Date
- Patient Chart - Display gird - Session Date
- Start Note window - Session Information
- Start Note window - Session Date/Time
- Start Note window - Session Status
- Start Note window - default message on right prior to making selections
- Progress Note - Header - Session Date/Time
- Progress Note - Preview - Session Date/Time
- Progress Note - Print - Session Date/Time
- CT|One - Bells Note - Transcription of the note into the General Tab - Session Date/Time
- CT|One - Bells Note - Printout/Report - Session Date/Time
- Settings - Agency Settings - Note Types - New Note Type or Edit existing Note Type - Session Status label
- Settings - Agency Settings - Note Types - New Note Type or Edit existing Note Type - Session Time section label
- Settings - Agency Settings - Note Types - New Note Type or Edit existing Note Type - Session Time section - Information icon text - Session time - (2 places in this text)
- Settings - Agency Settings - Note Types - New Note Type or Edit existing Note Type - Session Time section (after being dragged over to the left) - Section Name - Session Time
- Settings - Agency Settings - Note Types - Display grids (Both Active and Archived) - Session Status header
- Settings - Agency Settings - Note Types - Display Grid - Configure Service Type - Note Type Services window - Session Status label (3rd label of the window)
- Settings - Agency Settings - Service Types - Configure Note Type window - Session Status column header
- Settings - Agency Settings - Service Types - Configure Note Type window - Click + Add button - Visit Status column header
myAvatar and myEvolv administrators will see an additional label substitution for “Problem”.
"Problem" label locations that respect the Organization's preference:
- Note Type Editor - Selected Section
- Note Type Editor - Available Section
- Note Type Editor - Available Section - hover tooltip
- Patient chart - Patient Side bar - Problems section
- Patient chart - Patient Side bar - Problems section - No problems documented sub-text
- Progress Note Editor - + Select Problems button
- Progress Note Editor - + Select Problems button - Problem List display header
- Progress Note Editor - No problems documented sub-text
- Progress Note Editor - + Other - Enter Problem placeholder text in the field
The Problem label is also respected in the Mobile application.
Practitioner label locations that respect the Organizations preference:
- Group Notes - starting, preview and print
- Appointment details
- Supervisor Dashboard
- Staff Service Usage report
- All report labels for columns and filters
- Supervisor (Individuals) Dashboards - User Distribution widget
- Recommendation Summary - User Distribution widget
- Mobile - Agenda - Appointment details
Restrict Patient Access - controls all users' patient access. When set to Care Team Level Access, all users will only be able to access Care Team patients. When set to All Patients all users will be able to access All Patients. This Organization-Level setting can be overridden at the User level and the Patient Level.

Please refer to the Patient Population Management article for more information.
Session to Sign Hour Threshold - sets the threshold for your organization for the number of hours until a note is considered late. This is set to 36 hours by default. Updating this setting will update the display of the session to sign alerts throughout the application (dashboard, chart, patient chart) based on the updated hour setting.
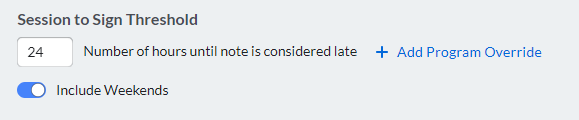
+ Add Program Override allows administrator users to configure programs and place of service/location exceptions for different hour amounts until the note is considered late. When clicked, the program overrides display shows and includes “Include Weekends”, Number of hours per program, multi-select program selection field, Number of hours per place of service and multi-select place of service selection. On the Compliance tab, a grid will show with the program override configurations.


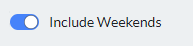
The Include Weekends toggle allows the late note calculation to include weekends or not. This can be set at the organization level or program level when an override is configured.
Auto-Deletions - allows Bells administrators to configure auto-delete capabilities for Scribbles, Progress Notes and Patient Data.

When toggled on, you can configure the number of days/months for Bells to retain data.
Auto-delete Scribbles

The auto-delete scribble setting defaults to the minimum of 15 days. This functionality is for scribbles that were not associated to a note and is based on when the scribble was last updated.
When configured, Bells archives the scribble based on the days configured, if the scribble is still not updated, the scribble will be deleted after another period of the configured days.
Example: My Bells administrator has configured Scribbles to be auto-deleted after 10 days. If my Scribble that is not tied to a note was last updated on 1/1/2025, my scribble will be archived after 10 days on 1/10/2025. If I still do not update/unarchive the scribble, it will be deleted in Bells another 10 days later on 1/20/2025.
Auto-delete Notes

The auto-delete note setting defaults to the minimum of 15 days. This functionality is for progress notes based on the date the note was signed.
This is only for signed notes. Draft/unsigned notes will not be deleted. Group notes will only be deleted after all of the notes for the group are signed.
This toggle can not be enabled if the Auto-delete patient data toggle is enabled.
Example: My Bells administrator has configured Notes to be auto-deleted after 10 days. I signed my note on 1/1/2025, my note will be deleted after 10 days on 1/10/2025.
Auto-delete Patient Data

The auto-delete patient data defaults to the minimum of 1 month.
This toggle can not be enabled if the Auto-delete notes toggle is enabled.
Based on the date of the most recent draft, signed note or mobile session for the patient. Bells will delete the patient data based on the configured number of months.
Example: My Bells administrator has configured patient data to be auto-deleted after 2 months. I have a note that I haven't signed for the patient on 1/1/2025, Bells will delete the patient data after 2 months on 3/1/2025.
Bulk Sign Mark All Review - controls the ability to Mark All on the Bulk Sign window rather than requiring the user to go through each note individually.
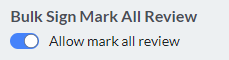
This setting is not available for myAvatar users.
Writing Assistant - controls the availability of some of the writing assistant tools.

The “Allow make longer” determines if users will have access to the “Make longer” option in the writing assistant when writing progress note. When toggled off the “Make longer” option is not available. When toggled on the “Make longer” option is available.
“Generate sections” determines if users can generate a section with the writing assistant and what section options are available.
When no sections are selected, the “Generate section” option will not present in the writing assistant menu.
When sections are selected, only the selected sections will be available to generate a section.

Profile
Allow email override - controls if users will be able to edit their email address for use within Bells through their user profile. Note: emails edited in Bells are only for use within Bells and do not sync to the EHR.

Emails Tab
Email Reports - controls whether users are allowed to configure a report for email distribution.
Send unsigned note reminder - Under the Email Report section there is a setting for Send unsigned note reminder. This toggle will determine if the unsigned note reminder email is sent. The unsigned note reminder email sends to all users with late unsigned notes. Late notes are determined by the Session to Sign Hour Threshold value further up in the display. When toggled on, additional configuration for the frequency and if the user's supervisor should be copied on the email displays.

Note - If the user has not signed into Bells within the last 30 days, they will not receive the Unsigned Note Reminder.
Refer to the Bells Emails article for more information.
Send monthly usage email - This toggle will determine if the Monthly Usage email is sent. When toggled on, the monthly usage email sends to all users for the organization. When toggled off, the email is not triggered to send. 
Refer to the Bells Emails article for more information.
Allow Reports to be emailed - This displays the Email Report button on the supported reports. It also enables the Report Delivery Schedules report. 
Restrict emailing reports to admins - This determines whether only administrators can configure a report for email distribution. 
Refer to Scheduling a Report for more information.
Appointments Tab
Appointment Management - Controls the ability to create or cancel appointments.
myAvatar and myEvolv administrators are the only ones who will see this section.

 Allow an appointment to be created from a session: users can create appointments from notes that are not linked to an appointment. This setting is myAvatar and myEvolv only.
- When turned on, if the note is not started from an appointment and the note includes a session time section, when the user goes to sign a note, they can check a box and select a location to create an appointment from the note.
- If the note does not meet the following requirements, the create appointment check box will also not be available
- Start Time
- End Time
- Location
- Place of Service (where applicable)
- Episode/Enrollment
- If the note does not meet the following requirements, the create appointment check box will also not be available
- When turned off, the check box to create the appointment on the sign note display will not be available.
- When the Allow an appointment to be created from a session is enabled, additional settings display
-
“Default Appointment Creation”
- When toggled on, the Create appointment for the note checkbox when signing the note will be checked by default. Users can still change the checkbox setting.
- When toggled off, the Create appointment for the note checkbox is not default checked when they go to sign the note. Users can still change the checkbox setting.
- “No Appointment, No Note validation takes priority”.
- When toggled on, services configured under the No Appointment, No Note validation cannot be started when not from an appointment.
- When toggled off, the validation does not take priority and the organization preference comes into play.
- This means a note can be started when not from an appointment but Bells will force the appointment creation when the note is signed.
-
“Default Appointment Creation”
Allow appointments to be cancelled: users can cancel appointments from anywhere in the application they can view appointment details.
Allow notes to be created from appointments: This setting allows Bells Administrators to configure if users can start a note from an appointment.
- When toggled on - notes can be started from an appointment regardless of service.
- When toggled off - notes cannot be started from an appointment. This can be further configured to be service based. If no services are selected no notes can be started from an appointment. If services are configured, notes for the selected services cannot be started from an appointment.

Do not update the appointment status on note sync: Determines if the appointment and note sync updates the appointment status during the note sync when the note is tied to an appointment. This setting is for myAvatar only.
- When toggled on, the appointment status is not updated during the note sync when the note is tied to an appointment.
- The cancelled status dropdown when starting a note no longer shows.
- When toggled off, the appointment status is updated during the note sync when the note is tied to an appointment.
- The cancelled status dropdown when starting a note shows for the user to select the appropriate status when more than one status is configured in the Appointment display of Organization Settings.
Appointment Status Mapping - allows myAvatar admin users to configure how the myAvatar appointment statuses map to the Bells session statuses. This mapping will be respected when notes sync from Bells to myAvatar.
This is only visible to myAvatar administrators.

Only a single “Show” status may be selected, multiple “No Show” or “Cancelled” statuses can be selected.
Appointment Display - allows users to configure if No Show and Cancelled appointments show in Bells.
This setting is available to myAvatar and myEvolv users.

When toggled off - all appointments show in the agenda and associated widgets.
When toggled on - No show and Cancelled appointments will be filtered out of the agenda display and associated widgets.
- Locations:
- Agenda
- Dashboard - Upcoming Agenda widget
- Patient Chart - Summary tab - Upcoming Appointments
- Patient Chart - Appointments tab
- Note Editor - Left Pane - Appointments tab
For now this is only respected in the web application, the mobile app will be updated soon.
Audit Tab
The audit tab gives Bells administrators the ability to globally configure settings related to Note Audits.

Note Similarity Exception allows Bells Administrators to configure service based exceptions in the Similar Note Content check. When services are configured for the exception, progress notes with those services will not be included in note similarity checks within Bells.
Time Overlap Exception allows Bells Administrators to configure services to be ignored in the Time Overlap check. These are services that are allowed to have an overlapping session time with other notes.
For myEvolv users, the Time Overlap Exception is not available. Time overlap is not supported in myEvolv and therefore cannot be supported in Bells.
Clicking + Add in the top right corner shows a Configure Overlap Exception display that allows the selection of a service and then the services that are allowed to overlap with the selected service.
Clinical Pathways Tab
For myAvatar/myEvolv administrators, the Clinical Pathways tab is available.

Clinical Pathways will sync over from your EHR or can be created within Bells. Clinical pathways show under the tab for Clinical Pathways.
In the display is an alphabetized list of all of the available Clinical Pathways for your organization, including the name and type as well as how many patients for your organization are associated to that Clinical Pathway.
Clinical Pathways created within Bells can be added, edited or deleted. Clinical Pathways that sync'd from your EHR cannot be edited or deleted within Bells.
Clinical Pathways can be added through this display for use within Bells by clicking the + Add Clinical Pathway button in the top right corner.


Pathways that are added can be tied to a myAvatar Modeled Form which drives the available values for the Is Enrolled, Date Enrolled and Date Discharged.
When the Pathway is configured with a myAvatar Form, the Date Enrolled and Date Discharged is required.
Note Types
The Note Types section of the Organization Settings handles the configuration for Note Types and Group Note Types. Click the following link to learn more about Configuring Note Types.
Custom Note Section
The Custom Note Sections section of the Organization Settings allows the set-up and configuration for Custom Note Sections - the questions and the answers as well as the settings for those questions. Click the following link to learn more about Custom Note Sections.
Programs
The Programs section of the Organization Settings shows the active programs for the organization. This section is only available for myAvatar and myEvolv users. Clicking a program in the display allows you to configure filters of the locations or places of service (depending on your EHR) available when starting an individual or group note based on the patient's program selected.
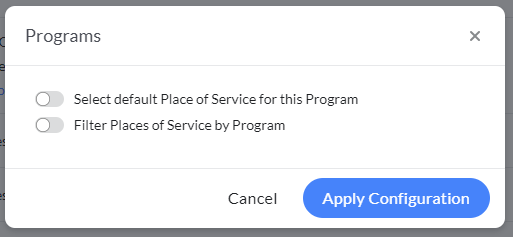
In the display are two toggles.
- “Select default (Place of Service or Location) for this Program”
- When toggled on, a single select drop down shows for you to select a default place of service or location (depending on your EHR) when that program is selected.
- The default will show in the session information on the note when the program is selected for the patient.
- “Filter (Places of Service or Location) by Program”
- When toggled on, a multi-select drop down shows for you to select the filtered places of service or locations (depending on your EHR) that will be available for the user to select when the selected program is chosen for the patient's note.
Locations
The Locations section of the Organization Settings displays the Locations and Location Roles for your organization. Click the following link to learn more about Locations.
myAvatar and myEvolv users will not see the Locations section in the Organization Settings.
Documentation Recommendations
The Documentation Recommendations section of the Organization Settings displays the Documentation Recommendations and rules configured for your organization. Click the following links to learn more about