
Configuring Note Types
The Administrator's primary task in Bells is to configure Note Types and associate them with Service Types.
 The Note Types created in Bells are only available in Bells. They are different than the note types you have in CT|One.
 Caution: If you have renamed the Narrative section in myAvatar, that's where the Bells notes will display in myAvatar. For example, renaming to Intervention makes the Bells note show up in the Intervention section.
To configure Note Types,
-
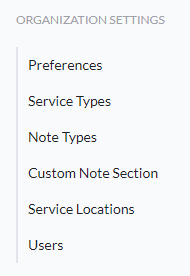
Click the Settings Gear in the left Navbar:

-
Click Note Types in the left navbar:
- You now see a list of all the progress note types configured in Bells.
Note Types

 myAvatar and myEvolv users will not see the Non-Billable column in the display.
 myAvatar and myEvolv users will see a column for the selected myAvatar or myEvolv Progress Note.
myAvatar and myEvolv users will not see the Signatures column in the display.
The display grid is default sorted by the Type Name column.
The far right space includes tags based on the settings for the note type. These tags will give visibility to Bells administrators on what settings have been configured for the note type without having to click into each note type in the grid. The settings that are supported are for Group Note and Multi-service note types. Additionally, we're adding support for the following tags based on your EHR
- For myAvatar users: Independent Note and Missed Visit
The list of Note Types has several key features
- Sortable Columns
Sorting
Column names that are followed by an arrow are sortable. Simply click the arrow t...
Column names that are followed by an arrow  are sortable. Simply click the arrow to sort.
- Filterable Columns.
Filtering
Column names that are followed by a funnel are filterable. Bells uses two differe...
Column names that are followed by a funnel  are filterable.
Bells uses two different types of filters - List filters and Search filters.
List Filters
List filters are used when there is a very small set of options for your filter. Simply select the options you want and filter.
Examples:
- Billable/Non-billable
- Show/No Show status
To use a List Filter, click the funnel and
- Check the boxes for the filters you want
- Uncheck the boxes for any filters you do not want
- Select All: Checks all checkboxes
- Clear: Clears out any checkmarks you've made
- Filter: Filters the Note Type List so that it only displays the items you've checked
Search Filters
Search filters are used when there is a large set of options for your filter. Search for and select the options you want and filter.
Examples:
- Location Roles
- Note Types
To use a Search Filter, click the funnel and
-
Initially, you'll see 'No Note Types selected'. That means no filters are selected and active.

-
Search for items to add to the filter
-
Enter search text to find items to add to your filter.

-
Click to select an item to add to the filter.

-
Enter search text to find items to add to your filter.
- To remove any individual items from the filter, click the X for the item
- Clear: Removes all items from the filter.
- Filter: applies the filter to the list behind it so that it only displays the items you've selected.
The Note Type display is broken into tabs. These tabs control whether you're viewing Active Note Types for individual progress notes, Note Types that are configured for Groups or Note Types that are for myAvatar Modeled Assessments.
- Note Type
- Note Types are for the Individual progress notes.
- Group Note Types
- Organizations that utilize Groups will have a tab for Group Note Types, where group note types can be created and configured.
- Assessment Note Types
- The Assessment Note Type tab is for myAvatar Modeled Assessments. Assessment custom note sections tie to their own note type and this is where those are created and configured.

Note Types that have been archived can be filtered in the list with the Active vs. Archived Filter in the search.

The note type display can be exported to an excel. The excel shows the name of the note type, session status, section, service, if there's templates, if it's configured for group notes or multi-service.
Signatures
CT|One and myEvolv users can apply additional signatures to their notes.
CT|One signatures are configured per note type via the Note Type display.
Clicking the number in the Signatures column of the display shows the signature configuration for the selected note type.
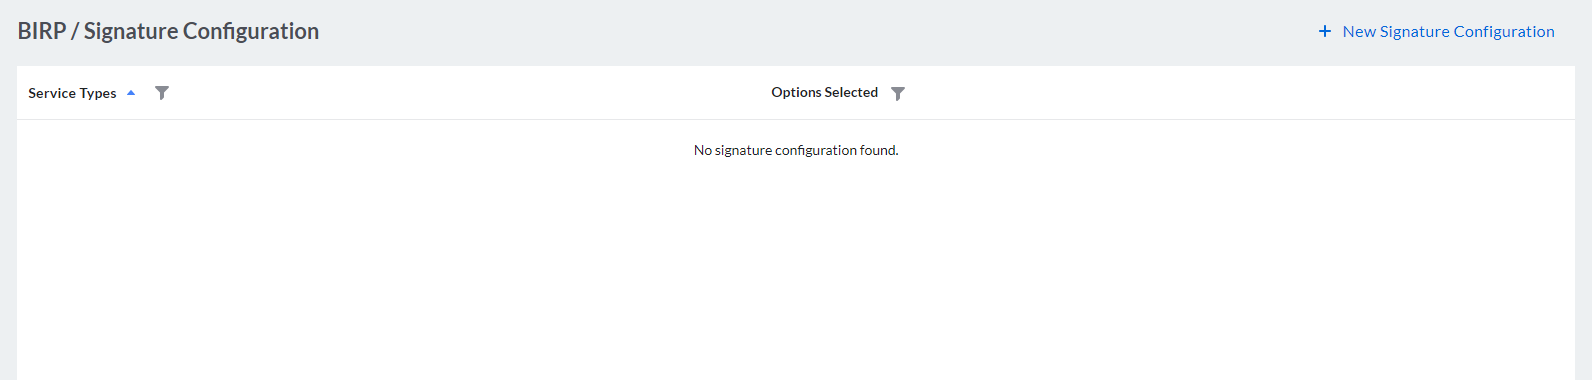
Clicking the + New Signature Configuration button in the top right corner opens the configuration display for the signatures for the selected note type.
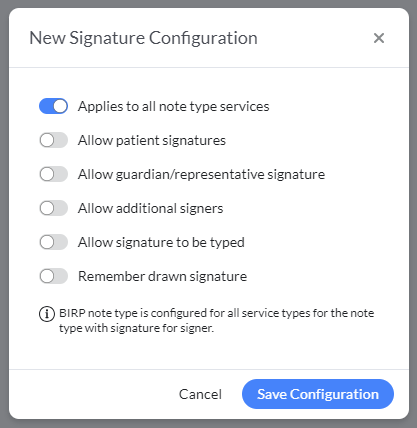
By default, the Applies to all note type services toggle will be set to on. This means the configuration will apply to all service types for the note. When toggled off, a dropdown of available services for the note shows. This is a multiple-choice field. Only one configuration can be in place per service for the note type.
Additional settings in the configuration display:
- Allow patient signatures - Does the note need a patient signature? When toggled on, you can additionally require the signature.
- Allow guardian/representative signature - Does the note need a guardian/representative signature? When toggled on, you can additionally require the signature.
- Allow additional signers - Does the note need to allow additional signatures beyond the patient/guardian/representative? When toggled on, the user can select to add additional signers in the note.
- Allow signature to be typed - Can the signatures be typed or do they have to be drawn?
- Remember drawn signature - Allow signatures to be remembered. This means that the patient/guardian/representative do not need to manually sign each time. These signatures can be cleared if a fresh signature is needed.
Helper text follows the configuration toggles to provide a plain text description of the configuration being applied.
Once signatures are configured, the column in the Note Type display grid will be updated to the number of configurations for the note type.

Editing a Note Type / Note Type Editor
To Edit a Note Type
-
Click the Settings Gear in the left Navbar:

-
Click Note Types in the left navbar:

- You now see a list of all the progress note types configured in Bells.
-
Click the row for the Note Type you want to edit. The Note Editor opens.
Note Type Editor
Note Type Name
Give your Note Type a name. Keep in mind that the Note Type name must be unique.
 myAvatar and myEvolv users will see a field to select a Form. The selection in this field will pair with the selection on Custom Note Sections to drive filtering functionality. If the Note Type and Custom Note Section selection match, or if the Custom Note Field is left blank, the Custom Note Section will show as an available section for the Note Type. The form field is required and is searchable. This field on the note type and custom note sections includes validations to check when the Note Type's Form selection does not match the Form selection for any Custom Note Sections in the Note Type. Also, there is a check when saving the Note Type, which validates that when the Form selection includes required SSSM questions, there is a custom note section with those questions included in the note type.

Configurations Tab
The Note Type Editor is split into 3 tabbed sections. The Configurations tab will be slightly different depending on your EHR:
Description
Provide a description of the Note Type. The description will make it easier for direct care providers to know if this is the appropriate note type for the service they're providing.
Visit Status
Select the Visit Status for the Note Type. You can select one or more visit statuses for the Note Type.

Multi-Service Notes
The “Available for multi-service” toggle is available for all EHRs. By default this toggle is set off.
When toggle off, the note type's services will not be available when starting a multi-service note in Bells. The note type will not be available for use in multi-service notes.
When toggled on, the note type's services will be available when starting a multi-service note in Bells. The note type will be available for use in multi-service notes.
For more information, check out the Multi-Services article.
 CT|One Bells admins:

CT|One users have the ability to limit the note type to specific programs. By selecting programs in the Limit by Program field, the note type will only be available for patients with the selected program.
 myAvatar Bells admins:

 myAvatar users will not see the Billable toggle on the Note Type editor.
myAvatar users will see a setting to Override Narrative Destination. This field is for organizations that do not have a place for the Bells narrative to go on their notes in myAvatar. This field presents with a dropdown of imported long text fields from the EHR that are configured in the Custom Note Sections selected for the note type. Selecting a long text field will map the Bells narrative to that field when the note syncs to myAvatar.
 myAvatar users will also see a toggle setting for Save as an Independent Note. By default, this will be toggled off. When toggled on, any progress notes for that note type with that setting go to myAvatar as an Independent note. This toggle determines if the note type is available for Support Documentation notes.
When the note type is set up for No Show or Cancelled status, a “Missed Visit” setting will display. When set, the missed visit service code will be updated on the appointment for the note. This configuration applies to individual as well as group notes.
myAvatar Note Types must include at least one text section or the Custom Note Section associated with the Note Type must have the "Include in EHR note narrative" toggle set to on. Bells includes a warning to the user when the note doesn't include what is needed.
myAvatar users have an additional setting for Limit myAvatar Note Types. When a note is started, if configured, Bells will limit the list of myAvatar Note Types available to only show options that are both in this list and the list myAvatar provides based on the session details for the note.
myEvolv Bells admins:

myEvolv users will not see the Billable toggle on the Note Type editor.
myEvolv users, when both settings for Place of Service are turned off on the Organization Preference setting, on the Note Type editor Bells administrators can configure the note type to still require the place of service. This setting is only available when it is not required at the organization level and the Place of Service is not hidden at the organization level. When configured at the note type to be required, the Place of Service selection will be in the footer after the note type selection and will be required to start the note.
myEvolv users have the ability to limit the note type to specific programs. By selecting programs in the Limit by Program field, the note type will only be available for patients with the selected program.
myEvolv users will see a setting to Override Narrative Destination. This field is for organizations that do not have a place for the Bells narrative to go on their notes in myEvolv. This field presents with a dropdown of imported long text fields from the EHR that are configured in the Custom Note Sections selected for the note type. Selecting a long text field will map the Bells narrative to that field when the note syncs to myEvolv.
myEvolv Note Types must include at least one text section or the Custom Note Section associated with the Note Type must have the "Include in EHR note narrative" toggle set to on.
Billable/Non-Billable
 myAvatar and myEvolv users will not see the Billable/Non-Billable toggle in the display.
Select the Billable/Non-Billable toggle appropriately for your Note Type.
NOTE: Billable Note Types will be associated with Billable Services as part of the Note Type configuration. The same is true for non-billable services.
Billable: 
Non-Billable:
If the Note type is billable, only billable Service Types will successfully flow through to billing. And vice versa. If you accidentally configure a mismatch between billable/non-billable Note Type and Service Types, Bells will warn you and you can correct the issue later. If the service type is set to billable, regardless of the note type being billable or non-billable the note will go through billing due to the billable service type.
Pull Forward
Pull forward allows admin users to set up Note Types to allow Custom Note Sections or progress note sections to pull forward. The pull forward functionality pulls forward content from the last 5 signed notes for the same patient and the same note type for the current and prior month, based on the session date for the note.
Also, there is an additional configuration at the Progress Note section and Custom Note Section question levels that will determine which notes are considered for “the last 5 signed notes”. When Pull Forward is enabled, a dropdown of choices will show. You will select between four (4) values for “Any service, any author”, “Any service, same author”, “Same service, any author” or “Same service, same author”. This selection will additionally control which notes to use when pulling content forward for the section.
By default, the Pull forward toggle will be turned off. If the toggle is not turned on, regardless of what is set for Note Type sections or Custom Note Sections, the content will not pull forward for the note type.
Pull forward functionality is only applicable for individual progress notes and will not work in group notes.
Note: Pull Forward content is the highest priority, followed by Template defaulted text and then the defaulted text for Custom Note Sections when configured.
Note Audit
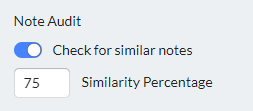
Note Audit allows administrators to configure note types and their text sections as well as Custom Note Section Long Text question types to include a percentage check for similar note content. When detected in progress notes, the notes with similar text show in the Audit Review display on the left navigation bar. Additionally, notes that have overlapping session date/time display here. This display is available to Bells administrators and supervisors only.
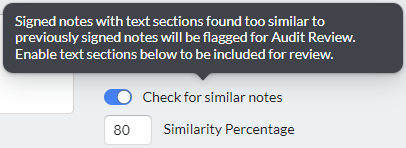
When toggled on, the toggle for Check for similar notes shows an additional field for entering the percentage of similarity to report. This field defaults to 80% based on best practices. The value in the field is editable to meet your organization's needs. On hover of the toggle setting is a tooltip explaining the Audit Review functionality and how to enable it. Individual text sections in the note can be enabled to be checked in the note type. Custom Note Section Long Text question types can also be enabled. There's a toggle for “Similarity check” on text sections when added to the note. In Custom Note Sections, configuration is part of the settings in the right-hand pane. When toggled on, the text section is checked for similar content to other notes. When toggled off, no check is performed.
Some best practices:
- Similarity percentage should be configured for 75% or more.
- We recommend not turning this functionality on for Case Management type notes.
Similar Note Check Criteria:
When a note type/text section is configured to check for similarity, the following criteria is used:
- The text section narrative must have at least 3 sentences to be considered for similarity.
- Only note types that have enabled the similarity check will be checked.
- Similarity is checked per section narrative or custom note section long text question type. In other words, the entire note's narrative is not checked as a whole.
- The similarity threshold must be met on at least one text section for an entry to appear in Audit Review. The results from all sections that were checked will be included in the audit, even those sections that did not exceed the threshold.
- Proper nouns (names, people) and numbers are not part of the similarity check.
- Various forms of the patient's name (First Last, Last First, nickname, etc) are removed before checking for similarity.
- Similarity check is case sensitive.
-
We only check against the most recent notes -- not all historical notes.
A search for similar notes is limited to one of the 3 following possibilities:-
Latest 5 signed notes that have the same author, same patient, and same note type.
Catches an author copying their last visit. -
Latest 5 signed notes that have the same patient and same note type.
Catches an author abusing the Pull Forward Past Visit for a patient. -
Latest 20 signed notes from the same author and same note type.
Catches an author who is copying content regardless of patient.
-
Latest 5 signed notes that have the same author, same patient, and same note type.
Limit by Program/Location/Insurance
Bells Administrators have the ability to limit the note type to specific Programs, Locations or Insurance. By selecting programs, locations or insurance in the Limit by Program/Location/Insurance fields, the note type will only be available for patients with the selected program/location/insurance.


When changes are saved, a Date/Time/User stamp shows to the left of the Cancel button in the footer of the configuration display.
Example:

Clinical Pathways
myAvatar and myEvolv users will see the Clinical Pathway filter in the display.

The drop down is a multi-select search of all available Clinical Pathways for the organization to filter for your note type. This will be based on the Clinical Pathway for the patient on the note.
Sections Tab
You must add at least one Section to your Note Type.
Select Sections from the right side Sections area and drag them to the Selected Sections area on the left. Once a section is in the list on the left, you can drag it to the area on the right to remove it. Once your pointer turns into a hand, you're good to move the section. You can also click the X in the upper-right of the section card to remove it from the Note Type.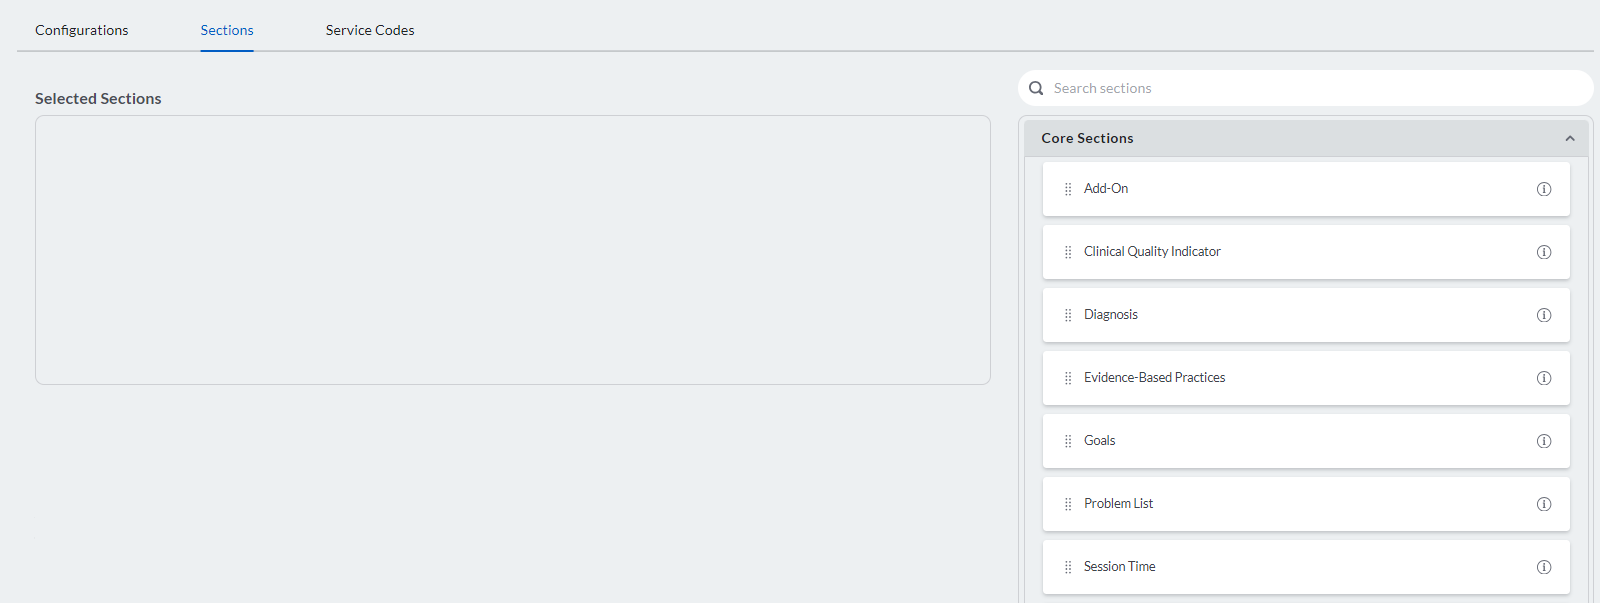
The right side sections display is split into different sections.
- Core Sections - shows the core note type sections available in Bells, including Text, Diagnosis, Goals etc.
- Form Sections - shows the Form type custom note sections.
- Import Sections - shows the Import type custom note sections.
- Narrative Sections - shows the Narrative type custom note sections.
These sections are collapsible. For myAvatar and myEvolv users, the Form and Narrative custom note sections are filtered based on the selected Form for the note.
Each section type has slightly different configuration parameters.
Each section has a little information circle on the right of it. Hover over it to see the rules that apply to that section.
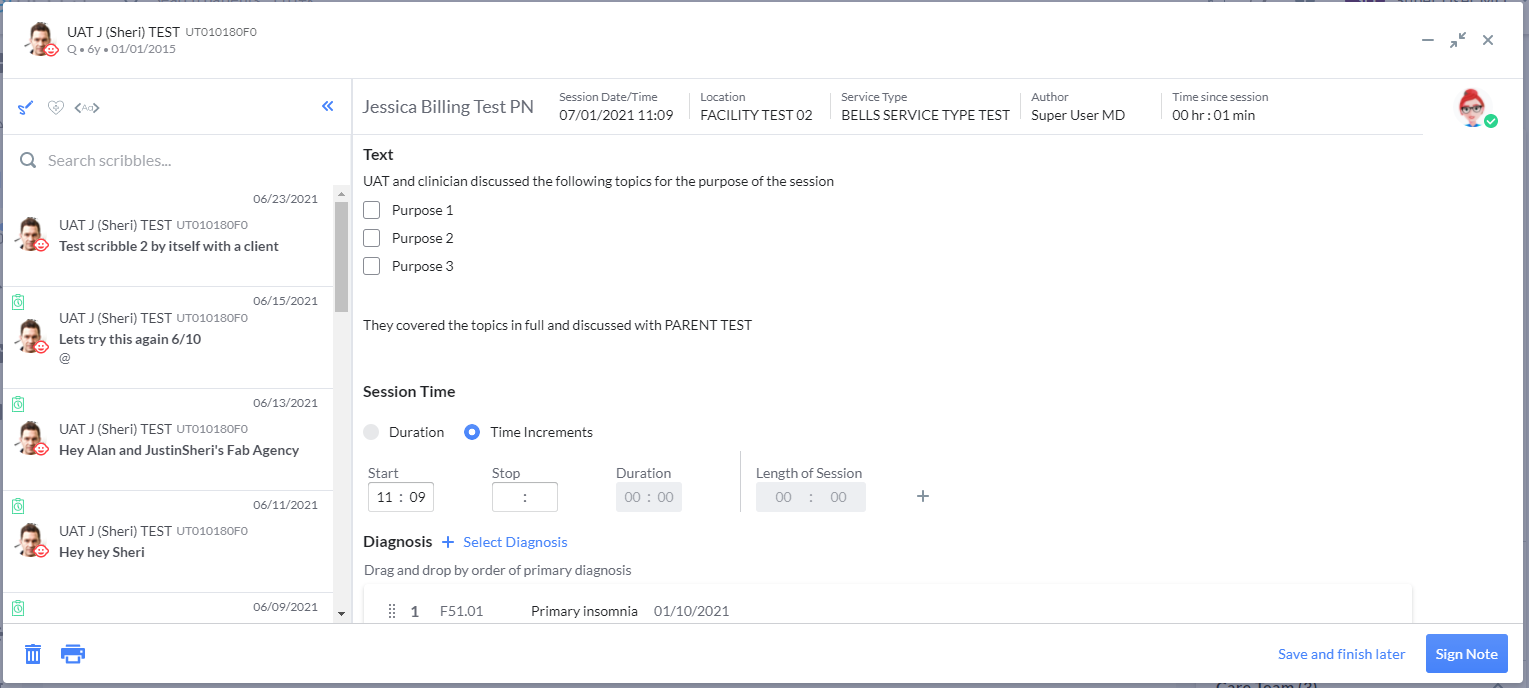
Text
You can add multiple Text fields to your Note Type. When you do, make sure to name each text section to reflect the information you want to capture in that section of the progress note.
 For myAvatar users, you can configure Text sections to be hidden on group notes.

When toggled on, text sections will be hidden for group notes where the note type is used. The individual progress notes will continue to include the text section. When toggled off, the text section will continue to show on group notes and individual progress notes.
You can only add the Diagnosis, Session Time, Goals/Objectives, Custom Drop Down and each Custom Note Section once to your Note Type. Once they're added, the section will no longer be available in the Available Sections area.
Diagnosis
Diagnosis can be configured to “Include in EHR Note Narrative”.
-
When toggled on, diagnoses that are selected in the note will show in the note narrative in the EHR.
- This is great when the EHR note does not include a field specifically for diagnosis, but you want to include it in the notes field in the EHR.
-
When toggled off - it depends on how many diagnoses are selected in the note.
-
When only one diagnosis is selected in the note, if the note includes a field for diagnosis the selected diagnosis will show in the field.
- If the note in the EHR does not have a field for the diagnosis, but you want to see the selection, you'll want to toggle this setting on.
- When more than one diagnosis is selected in the note, the diagnosis selections will show in the EHR notes field.
-
When only one diagnosis is selected in the note, if the note includes a field for diagnosis the selected diagnosis will show in the field.
Additionally, there is a setting to limit the diagnosis selection when in the progress note. There are three values to be aware of
-
Primary Handling
- When set, if the patient on the note only has one primary diagnosis it will default in the note. If the patient has more than one diagnosis, no default selection will occur in the note.
-
Include All Diagnoses
- When set, all diagnosis available or the patient will auto-populate in the progress note.
-
Restrict to One
- Users will be limited to one selection on the diagnosis section in the note. The primary handling described above will also be in place when this is set.
Session Time
Session Time can be configured to default to time segments or duration.
- Time Increments - staff enter a start time and an end time. Bells will calculate the duration.
-
Duration - staff enter a start time and duration. Bells will calculate the end time.
-
When set to Duration, an additional setting for Minutes only will show.
- When not enabled, the time entry on the note will be in hours and minutes.
- When enabled on, the time entry on the note will be in minutes only.
-
When set to Duration, an additional setting for Minutes only will show.
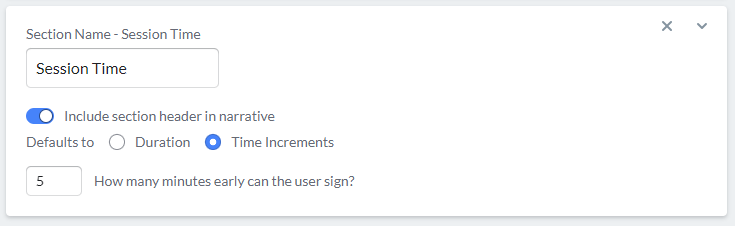
The Session Time section can also be configured with the number of minutes prior to the session start and end time that a user is allowed to sign their notes. If the note start or end time is within the number of minutes in the future configured Bells will allow the note to be signed. If the start or end time is further in the future than the configuration Bell will prevent the note from being signed.
myAvatar users: The Diagnosis section may not be available for use in your note types in Bells. Additionally, myAvatar users will see a section for Clinical Quality Indicators, Evidence-Based Practices, and Add-On that can be added to the Note Type. Please note, if the “Save as Independent Note” toggle is set, the Add-On section will not be available for the note type.
The Evidence-Based Practice section can be configured to be a single field or include the Elements selection. There is a toggle setting on the section card, when added to the note type that allows you to include the Elements selection or not.
 The Custom Drop Down section is only available to CT|One EHR users.
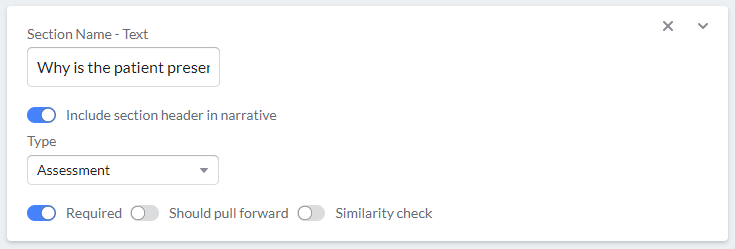
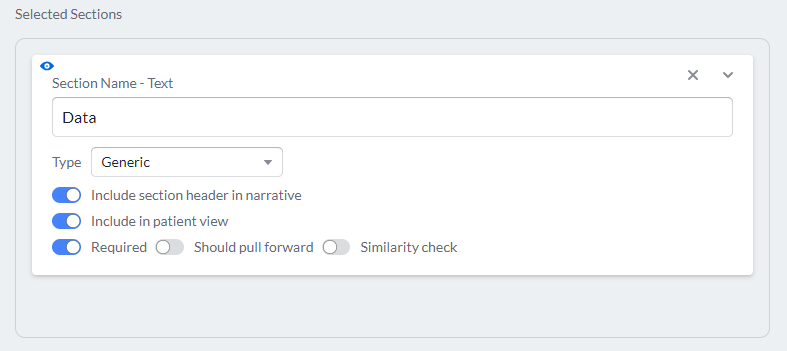
Once you drag a section into the Selected Sections area, you may rename the section (not including the Custom Drop Down or Custom Note sections) and set the toggles for Required/Not Required (not including the Session Time or Custom Note Sections), whether you'd like to include the section header in narrative, or if the section should pull forward.
When the "Include section header in narrative" toggle is turned on, the section name will show in the note. When toggled off, the section header will not display in the note. This only affects the narrative in the base EHR. The exception to this is the Custom Note Sections, where this setting pertains to the editor, preview, the print preview, and the base EHR narrative.
When Pull Forward is enabled, a dropdown of choices will show. You will select between four (4) values for “Any service, any author”, “Any service, same author”, “Same service, any author” or “Same service, same author”. The pull forward functionality pulls forward content from the last 5 signed notes for the same patient and the same note type. The dropdown selection will determine which notes are considered for “the last 5 signed notes”.
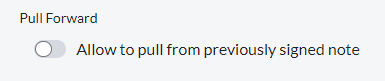
By default, the Should pull forward toggle is turned off. If the Allow to pull from previous signed note toggle at the note type level is not turned on, regardless of what is set for Note Type sections or Custom Note Sections, the content will not pull forward for the note type.
The Text, Diagnosis, Goals, Problem List, CT|One Custom Drop Down (for CT|One users), Clinical Quality Indicator and Evidence-Based Practices (for myAvatar users) sections allow for pull forward functionality.
Custom Note Sections
Custom Note Sections can be named per note type. When dragged to the Selected Sections on the left, a field for Display Name will show. The name entered in this field is what will show in the progress note. This includes the editor, the preview and print within Bells as well as the narrative in the base EHR.
Goals
Allow adding goals setting:
- When toggled off, if the patient does not have any active goals, users will not be able to add goals when writing progress notes.
- When toggled on, if the patient does not have any active goals, users will be able to add goals when writing progress notes.
The required setting on the goals section is different than any other section available for the note. Instead of a toggle, there is a dropdown with additional options.
- When set to Required, the goal section will be required.
- When set to Required when present, the goal section will be required when the patient for the note has treatment plan goals/objectives/interventions to select. If the patient for the note does not have treatment plan goals/objectives/interventions to select, the section will not be required.
- When set to Not required, the goal section will not be required.
Users will also see a setting to “Require comment”. This setting is controlled by the “Allow Comment” toggle.
- Allow Comment
- When toggled off, a comment cannot be added in the note editor.
- When toggled on, the Require comment setting is available. Users will be able to add comments in the note editor.
- Require Comment
- When toggled off, a comment will not be required on selected goals, objectives or interventions in the note.
- When toggled on, a comment will be required on selected goals, objectives or interventions in the note. Additionally, a drop-in can be set to default in the goal comment.
The Override Goal Comment setting allows users to configure a Custom Note Section in place of the Goal Comment.
- When toggled on, a dropdown selection for a Custom Note Section shows.
- In the progress note editor, the user will see the custom note section form instead of the long text field for the goal comment while filling out the note.
- Example:

 myEvolv users, goal comment will show on the lowest level in the goal selected. If you select a goal, your comment will show at the goal level, if you select an objective the comment will be at the objective level etc.
myEvolv goals/objectives are cross enrollment/program.
myAvatar users will also see an "Allow non-episodic goals" toggle on the goals section in the Note Type Configuration.
- If the "Allow non-episodic goals" toggle is on, non-episodic treatment plans and treatment plans linked to the selected episode on the session information will be available to select in the Progress Note Goal section.
- If the "Allow non-episodic goals" toggle is off, only treatment plans linked to the selected episode on the session information will be available to select in the Progress Note Goal section. Non-episodic treatment plans will not be available.
myAvatar and myEvolv users will see an additional toggle on the Goals section for “Include in EHR note narrative”. When toggled off, the Goal selections in the progress note will flow to their structured fields in the EHR. When toggled on, the Goal selection will be included in the EHR note narrative.
myAvatar and myEvolv users will see an additional dropdown for “Required treatment plan level.” The dropdown can be set to Goal, Objective or Intervention and will be used to limit the goal selections in the note as well as validate the note when it is signed. The validation will make sure that goals are selected at the configured level before allowing the user to sign the note. The default for the drop-down is Goal.
If Goal is selected, only the Goal must be selected for the note to be signed; the objective and intervention do not need to be selected for the note to be signed.
If Objective is selected, the Goal and the Objective must be selected for the note to be signed; the intervention does not need to be selected for the note to be signed.
If Intervention is selected, the Goal, Objective and Intervention must be selected for the note to be signed.
myAvatar: When Objectives or Interventions are not associated to a Goal, then the note can be signed as long as the configured level is selected. No higher level need be selected when writing a note.
myAvatar users will see an additional button for Filter by Plan Type. When configured Bells will restrict which Treatment Plan types are available in the Goal section. Configuration for “Filter by Plan Type” gives Bells Administrators the ability to configure what Plan Types should be available based on the myAvatar Field Number. In the progress note Goal section goals/objectives will be filtered based on the type of plan configured.
myEvolv users can select interventions when the service based treatment plan is being used and includes interventions.
You can also add additional Goals as part of the Bells progress note by clicking + Other.
Troubleshooting Tip: Each goal selected in the progress note will be evaluated separately. If a user says they cannot sign the note due to a goal, object, or intervention being required, check each goal selection in the note to verify that it has been selected at the appropriate level.
Problem List
 myAvatar and myEvolv users will see an additional section for Problem List. You can add one problem list section to the note type. Within the progress note editor, the Problem List section acts similarly to the diagnosis section which allows users to select problems from their list from the base EHR. This section also acts similarly to the Goals section and lets you add comments for each problem. You can configure if additional problems can be added through the note, if configured you can also add additional problems as part of the Bells progress note by clicking + Other.
For myEvolv users, Bells pulls in the full problem narrative to include all the goal information, instead of just the problem category. Bells also show the Problem/Need description when selecting in the note.
Caution: Name your section something that reflects what type it is so that its behavior in the resulting note makes sense! If they are named too generically, it may confuse your staff.
Caution: If the note type is billable, you will want to require a session time section or your note may not successfully bill.
You can adjust the order of your note-type sections by clicking the background white space in the Section card and/or by dragging the selection bar  and moving them up or down. Once your pointer turns into a hand, you're good to move the section.
Save the note by clicking Save Note Type: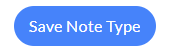
Discard your changes by clicking Cancel:
Services Tab
To associate services to the note type you'll access the Services tab.

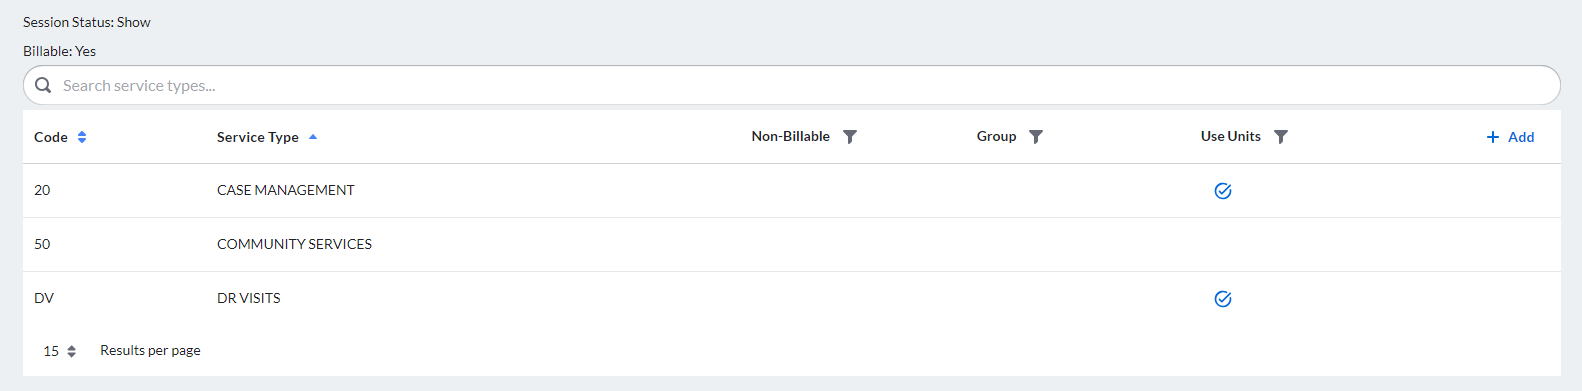
Clicking + Add in the top right corner of the grid header allows you to add services that will be tied to the note type to use in Progress Notes.
The Note Type Services window allows you to add as many Service Types to your Note Type as you wish.
 myAvatar and myEvolv users will not see the billable status for the note type, the Non-Billable column, or the Use Units columns in the display.
The display grid is default sorted by the Service Type name column.
 Caution: If the note type is billable, only billable service types will successfully flow through to billing. And vice versa. If you accidentally configure a mis-match between billable/non-billable Note Type and Service Types, Bells will warn you and you can correct the issue later.
  myAvatar and myEvolv users will not see the billable conflict warning in Bells.
If there are Services already configured for the note, they are listed.
Remove Services from a Note Type
To remove Services from the Note Type, click the X that appears when you point to the Service type you want to remove:
Add Services to a Note Type
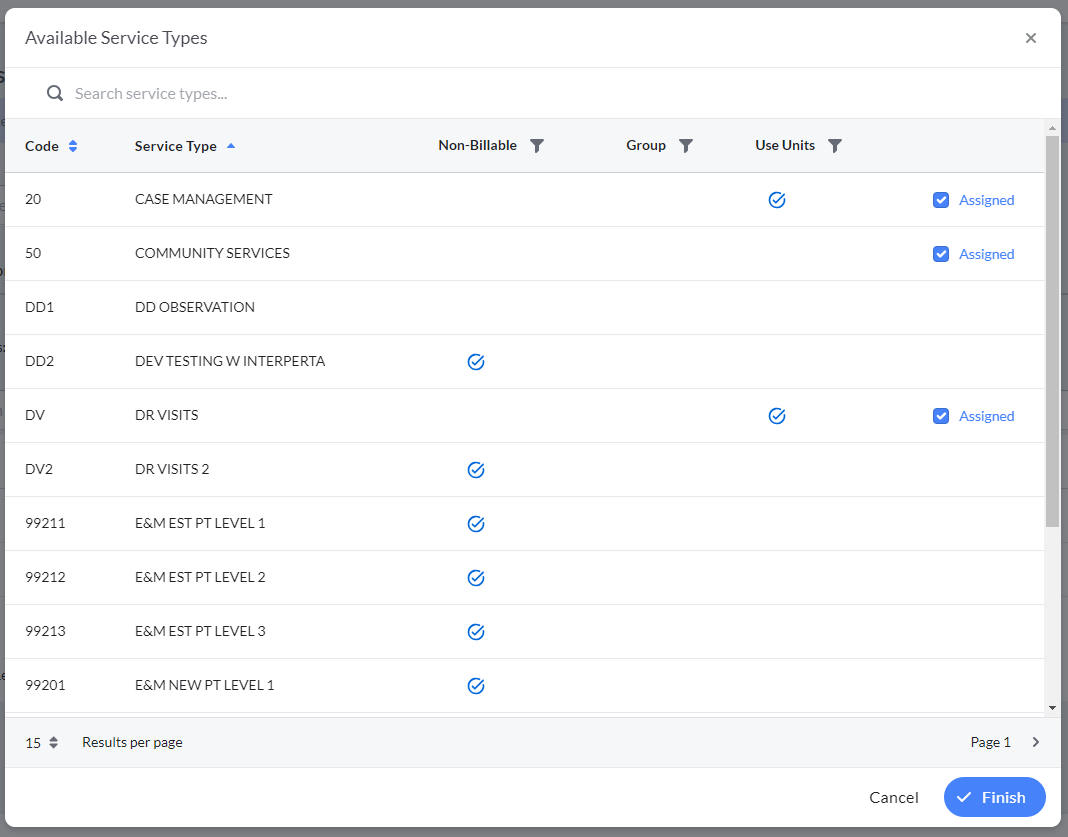
To add Services to the Note Type,
-
Click + Add:

-
The Available Service Type window opens:
 myAvatar and myEvolv users will not see the billable status for the note type, the Non-Billable column, or the Use Units columns in the display.
 Caution: If the Note Type is billable, only billable Service Types will successfully flow through to billing. And vice versa. If you accidentally configure a mismatch between billable/non-billable Note Type and Service Types, Bells will warn you and you can correct the issue later.
  myAvatar and myEvolv users will not see the billable conflict warning in Bells.
You can search by Service Type code or description.
- Enter search text
- The list filters to only show Service Types that match your search text.
- NOTE: The search is a "begins with" word search. That means that it checks each word of the service type description and if the word begins with the search text, the Service Type is included in the list.
-
If your Search returns Service Types
-
Click Add All to quickly select all Service Types to add them to the Note Type

-OR- -
Click Add for each Service Type you wish to add.

-
Click Add All to quickly select all Service Types to add them to the Note Type
-
When you are done selecting Service Types for the Note Type,
-
Click Finish to retain the list of Service Types you've selected. You will have the option to save them in the next step.
-OR- - Click Cancel to discard the list of Service Types you've selected.
-
Click Finish to retain the list of Service Types you've selected. You will have the option to save them in the next step.
If any of the Service Types you added do not match the Billable/Non-Billable field of the NoteType, you will see a warning triangle. 
To resolve this issue, you either must change the billable/non-billable toggle on the Note Type or remove the Service Type from the Note Type.
You will be allowed to save the configuration with the warning, but beware that the Note Type will not be selected when a direct care provider picks the Service Type when entering a Progress Note.
When the Note Type Services window shows all the services you wish to add to your Note Type, click Apply Configuration:
To discard your changes, click Cancel
When services are added, they'll show in the service grid.
Patient View
Sections include the ability to set the section as Patient Viewable.
When a section is set to Include in patient view, that section will show in the Patient View for notes that are configured with Signatures.
Patient view is additionally set for Custom Note Sections per question type. You will not see the Include in patient view setting when you select a custom note section for your note since these are done per question type in the custom note section configuration.
Copying a Note Type
You can quickly make a copy of a note type. This is handy when you have a note type that has most of what you want except for a component or two, such as billable/non-billable or the sections included in the note.
To copy a Note Type:
- Click the Settings Gear in the left Navbar:

-
Click Note Types in the left navbar:

- You now see a list of all the progress Note Types configured in Bells.
- Click the Ellipse on the far right of the note you want to copy.
-
Select Copy from the menu that pops up:

- The Note Type editor opens, populated with the Note Type info from the Note Type you copied.
- At a minimum, you must supply a new, unique name for the new Note Type.
- Make your changes to any other parameters of the Note Type and Save them.
Adding a Note Type
To add a new Note Type
- Click the Settings Gear in the left Navbar:

-
Click Note Types in the left navbar:
- You now see a list of all the progress Note Types configured in Bells.
-
Click New Note Type (upper-right corner of the Note Types page):

-
The Note Type Editor Opens.
Archiving a Note Type
To remove a Note Type from the list of Note Types, you archive it. For example, if you've previously used CT|One, you may find you have a lot of Note Types that you are no longer using. Archiving the unused Note Types will remove clutter from the Note Type list.
Archived Note Types can always be restored if you change your mind.
To archive a Note Type:
- Click the Settings Gear in the left Navbar:

-
Click Note Types in the left navbar:
- You now see a list of all the progress Note Types configured in Bells.
- Make sure you are on the Note Types tab
-
Click the Ellipse on the far right of the note you want to archive:

-
Select Archive from the menu that pops up:

-
The Note Type is moved from the Active Note Type list to the Archived Note Type List.
- This list is controlled by the Active vs. Archived toggle in the search bar of the display.
- Additionally, note types can be archived within the note type editor display via the footer.
Previewing a Note Type
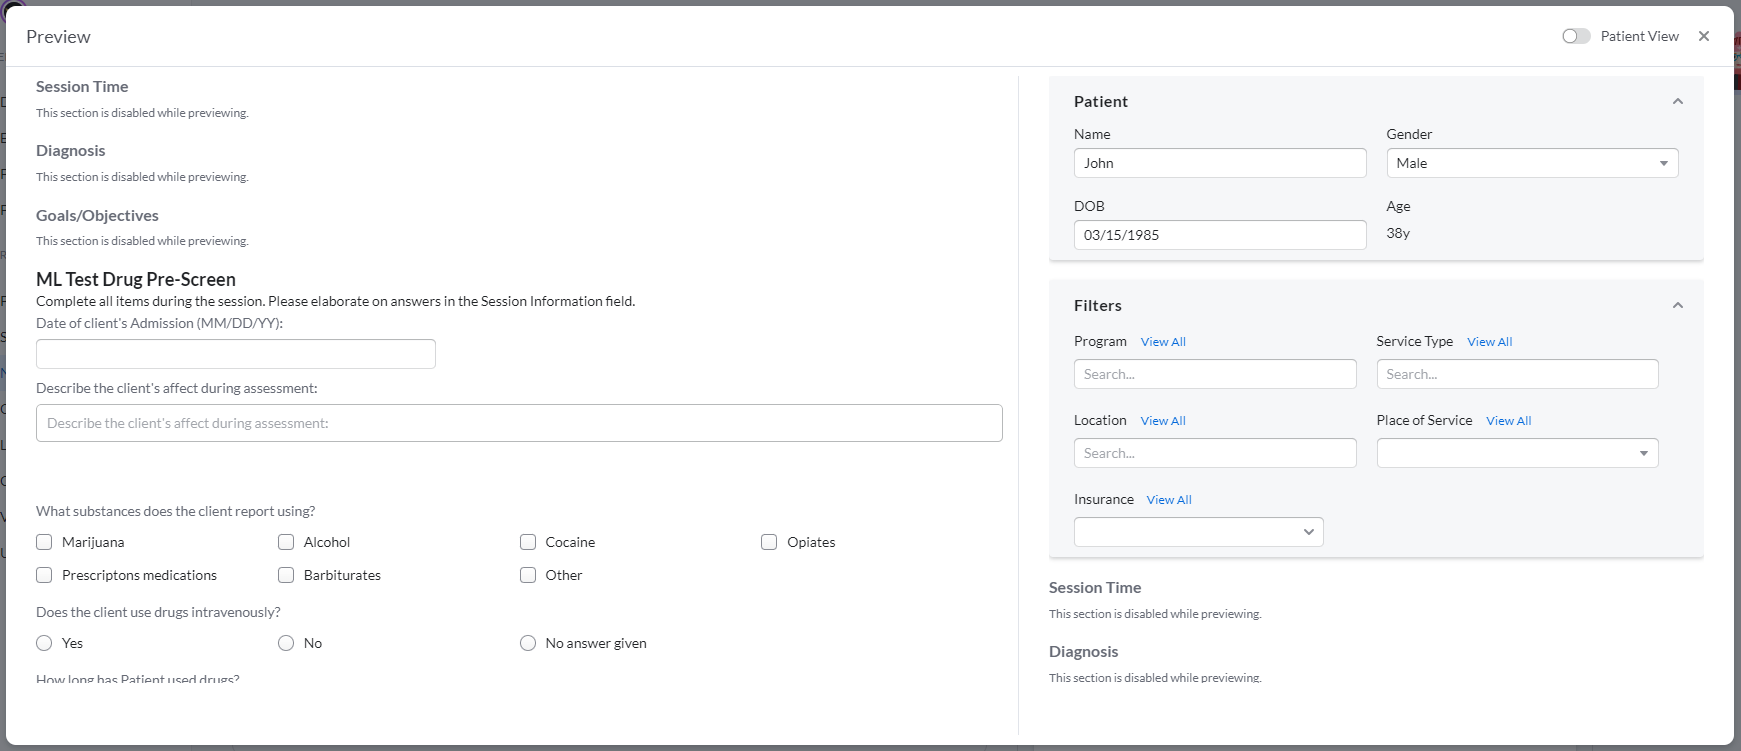
Clicking Preview at the bottom of the Note Type editor allows you to preview the created note type and all of the sections and custom note sections within it during the creation process.
You can fill out the note as if it was being written in a progress note and see the note output in real-time.
You can alter the details of the default patient, program, service, location, place of service or insurance in the preview to be able to see how the filtering/limits on the custom note section questions work when in the note.
Restoring an Archived Note Type
To restore a Note Type to the list of Note Types, you must restore it from the Archived list.
To restore an Archived Note Type:
- Click the Settings Gear in the left Navbar:

-
Click Note Types in the left navbar:
- You now see a list of all the progress Note Types configured in Bells.
-
Make sure you are filtered to the Archived Note Types.
- The Note Type list is filtered by the toggle in the Note Type Search.
-
Click the Ellipse on the far right of the note you want to archive:
-
Select Restore from the menu that pops up:

- The Note Type is moved from the Archived Note Type list to the Active Note Type List.
Adding a Template to a Note Type
A Note Type template allows the Bells Administrator to pre-fill sections of the note type to make it quicker and easier for the practitioner to complete the note, when appropriate. Templates utilize the same time-saving features that can be used in the progress note, including Drop-Ins, Expansions, Correctness for spelling and grammar, and Placeholders.
In the display grid for the Note Types is a column for Templates. That column displays a hyperlink number indicating the number of templates associated with that note type. Clicking the hyperlink will take you to a display of the templates for the note type.

On the template display, you will see the templates associated with the selected Note Type. From this display, you can edit any existing templates, or create a new template for the Note Type by clicking the + Note Template button.
Adding a new template
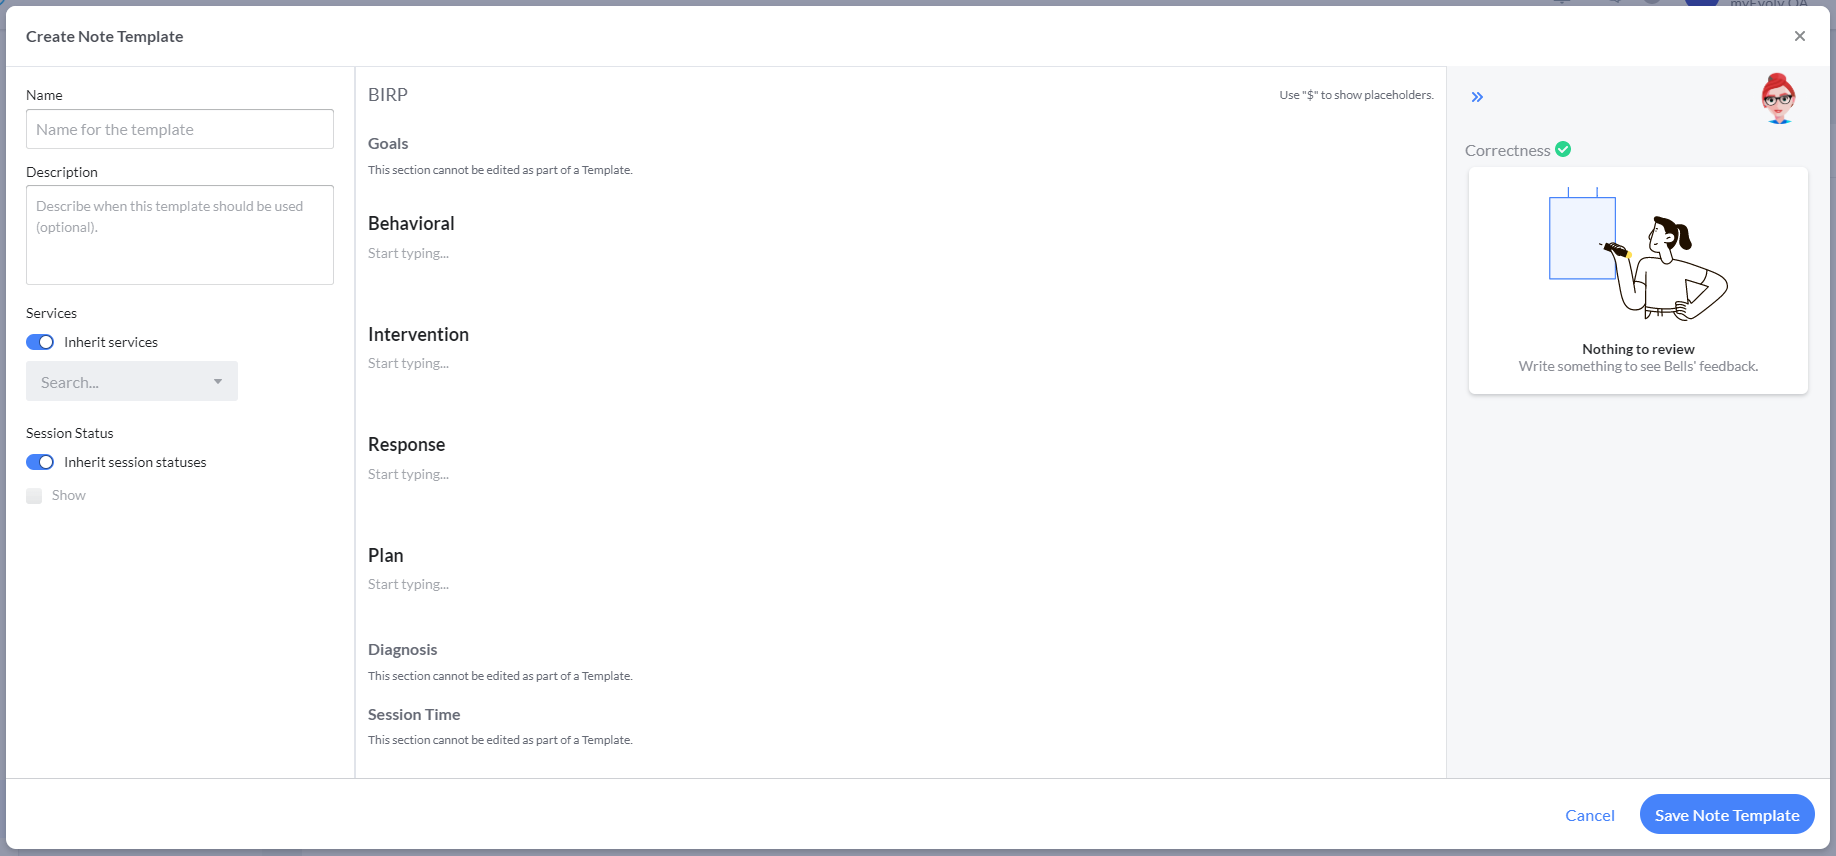
When creating a new template, it will look just like you're writing a progress note. The difference is that only certain note sections will be enabled to templatize.
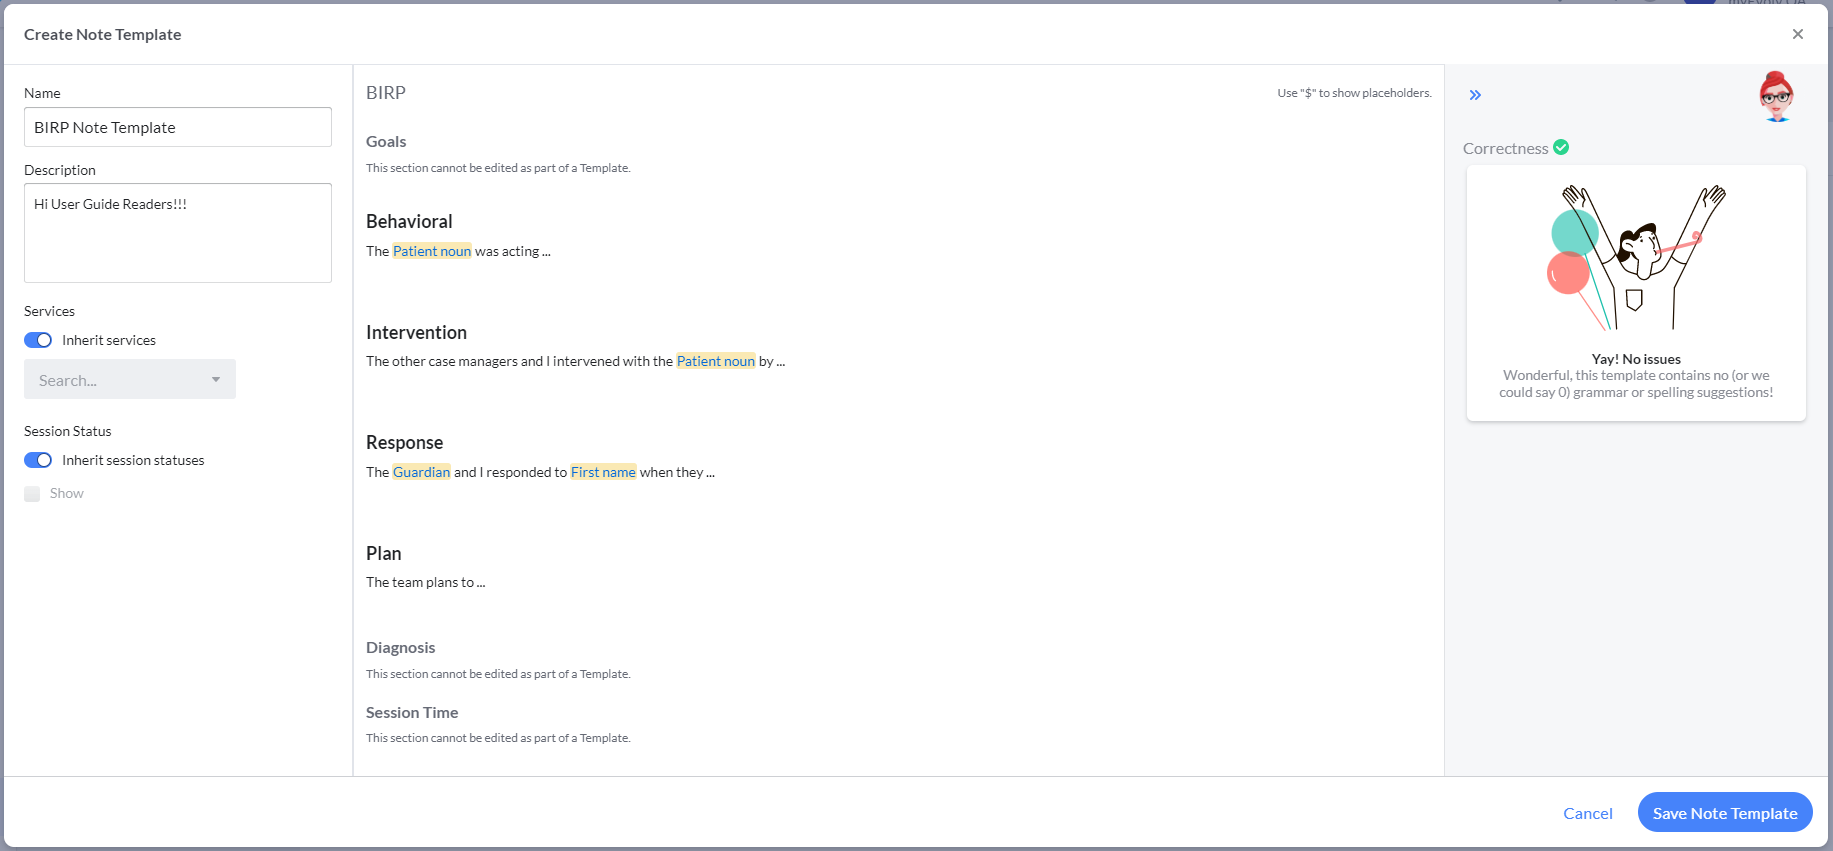
If you select Inherit services or Inherit session statuses, your template be associated with all of the same services and statuses as the parent note type. If you wish, can select a subset of the original note's services and status by searching/selecting them.
Several of the custom note section question types can be templatized as part of the note type including:
- Single Choice
- Multiple Choice
- Yes/No
- Checkbox
- Ranked List
- Short Text
- Long Text
- Numeric
Note: Pull Forward content is the highest priority, followed by Template defaulted text and then the defaulted text for Custom Note Sections when configured. If any field in the Custom Note Section is marked as pull forward and includes data from a previous note, then Bells will pull the answers for the entire section instead of the template.
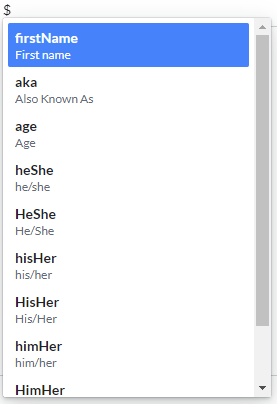
Placeholders
Placeholders allow you to set up dynamic parts of a sentence that the application then replaces with patient information. Placeholders can be used in drop-ins or when you are in a progress note.
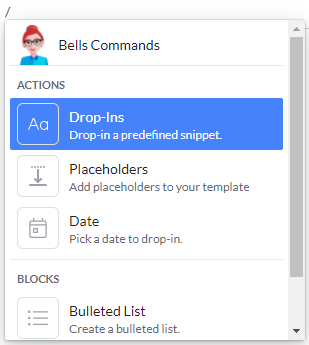
Placeholders can be accessed by typing $ followed by the placeholder text or via the / command menu when in the note template editor.
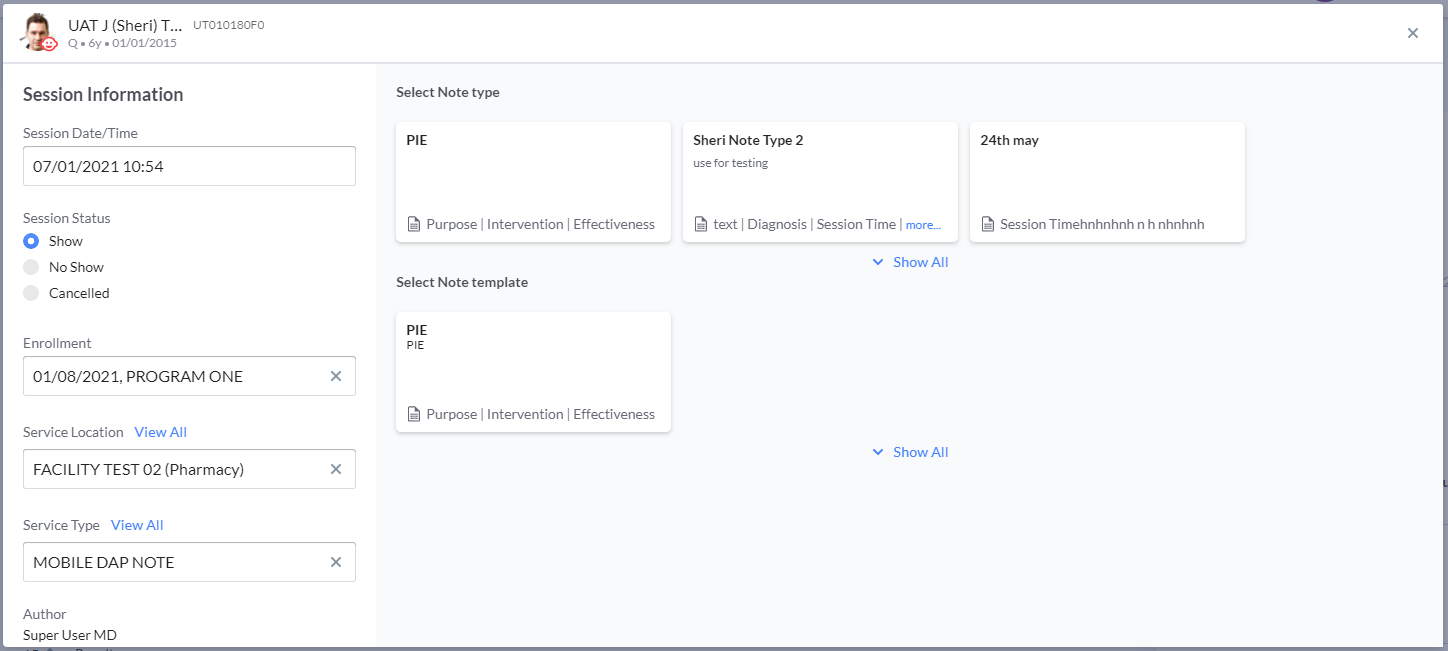
Using a template
Once set up, you can select the template from the Start Note screen. Templates allow the organization to set up pre-set text to assist their staff while writing progress notes.
Caution: Things to be aware of when updating things associated with templates:
- If the note type structure changes, the delete icon in the section is disabled if any templates have any content in the corresponding section. The application will auto-delete templates if you remove all the Text sections from the Note Type.
- If the Service Type or Visit Status mapping changes, there will be no archive or restore functionality. When the template is deleted, it is permanently deleted. The application will auto-delete the Service Type and Visit Status from the template mapping once removed from the Note Type mapping. The actions for this include removing the Service Type from the Note Type, adding a new Service Type, removing a Visit Status, or adding a Visit Status.
Group Note Types
Configuring Group Note Types
Configuring Group Note Types in Bells is a snap. To access it,
- Click the Settings Gear in the left Navbar
- Click Note Types in the left navbar
- Along the top of the Note Types display you will see three tabs, Active Note Types, Group Note Types, and Archived Note Types.
Once you click on Group Note Types, you see a list that looks something like this:
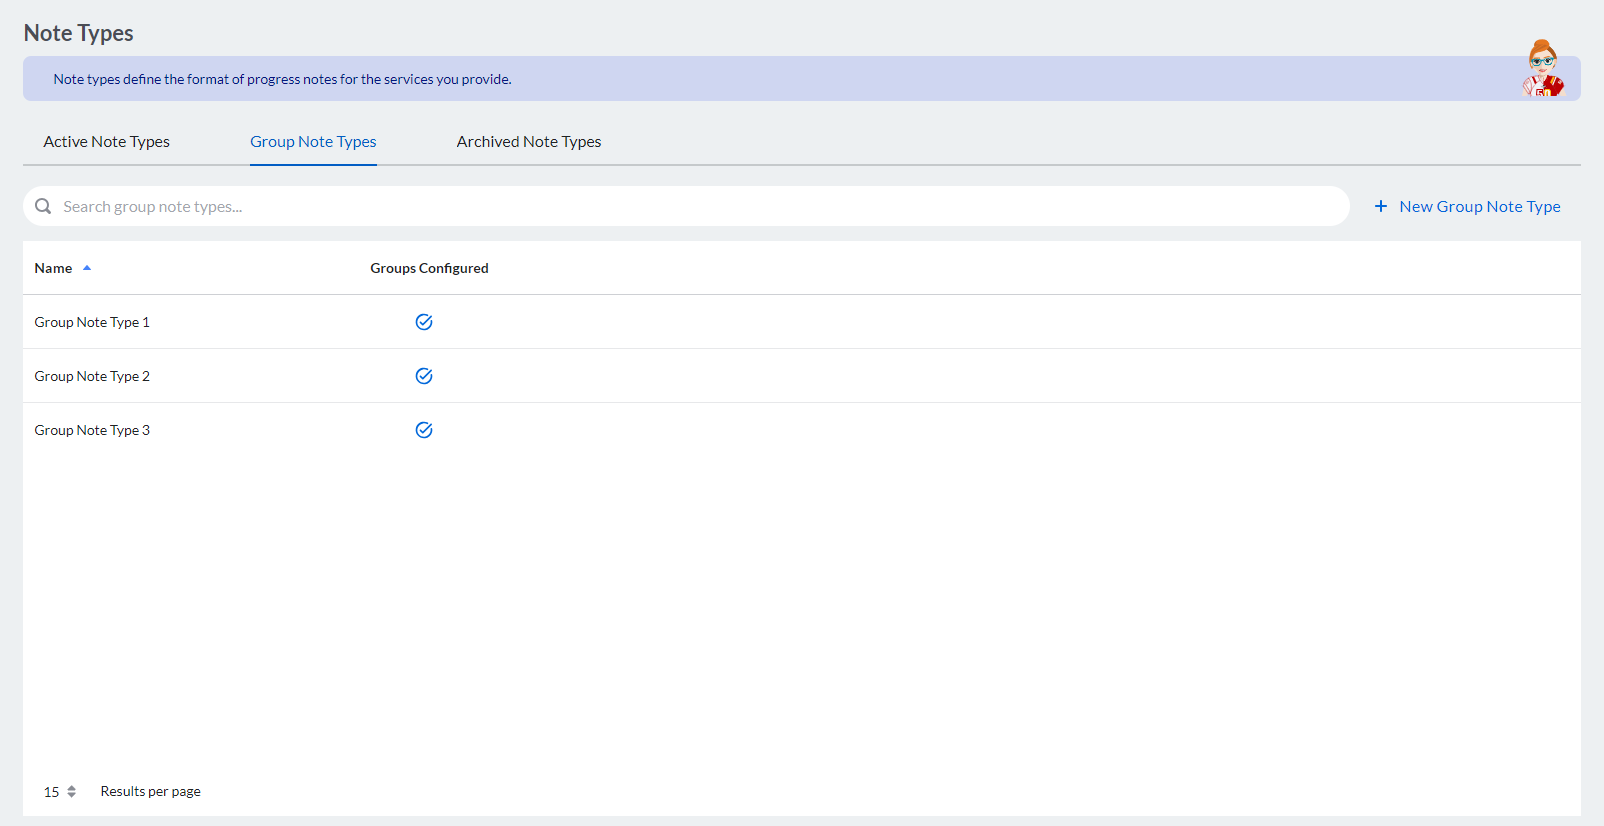
This display shows you a list of all group note type sets including the Name and if there are Groups configured for the group note type set.
Note: All configuration of ID, name, patient, and staff for the group is done within the EHR. However, you will be able to add staff to a group note, and may also be able to add patients to the group note (depending on your EHR).
Group Note Type Search Bar
At the top of the display, there is a search bar to allow you to filter the list of Group note types by the search text you type.

When you hover on a row in the list of groups, you will see additional actions on the right side of the grid.

Clicking a row in the display will take you to the configuration for the Group Note Type set. This is where you will associate what note types for the set and to what group(s) you'd like to use those note types.
This configuration determines which Note Types will be available for each show status, as well as what groups will use the note type set.
- From the appointment detail display for an Agenda item for the Group, or
- From the Groups tab on the Patients page of the Bells application.

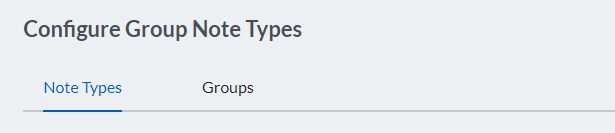
This display is separated with 2 tabs. One for the Note Type selections for the set, and one for the groups to use those note types.
To save the configuration display, a Name and Note Type for each status is required.
The name and combination of note types must be unique. Bells will not allow there to be duplicated configuration in this display.
If the note type field is gray and disabled, there are no note types configured for that show status. This has to be corrected before any group note configuration can be saved.
Users have the ability to filter the available services for the group note to only the services configured for the selected group's note types. This will help minimize or eliminate selecting the wrong service for the group note. When toggled on, you'll see the services that would be allowed based on the filter.
Additionally, a default group summary can be configured via the button in each status section in the display. This is tied to the note type and therefore a grouping configured to a group. When a group summary is configured to be defaulted, if all practitioners in the group are using the same group note type via the assigning display when starting the note, Bells will default the group summary text as configured. If practitioners are using different group note type, the default text configured to the Primary Note Type for the group will be used.
Bells administrators can configure text or a Custom Note Section or Narrative to be the Group Summary default. Only Custom Note Sections or Narratives will be available to select, Imports, Assessments and Subforms will not be available.
Here's an example of the display:

Some things to note about the Group Summary. Mainly, the Group Summary always shows last in the display.
- All EHRs
- When a custom note section is configured as the summary, the summary label and field does not show.
- When a custom note section is not configured as the summary, the summary label and field shows last, after group topics (if group topics are configured).
-
myEvolv users
- When an import form is configured in myEvolv for the group, the summary shows last, after group topics (if group topics are configured).
After the note status configurations there is a toggle setting to Default for new groups.

When toggled on, new groups that are added in your EHR and sync'd to Bells will be configured with the Note Type configuration in the display. Your organization can only have one default configuration set.
Administrator users have the ability to clear the selected note types and templates on the group note configuration. There's a button at the bottom left of the display for “Clear All”. 
When clicked, all of the selections for note types and templates will clear. When saved, this prevents users from starting notes for the group in Bells. This allows organizations to sunset a group from user in Bells.
If you have a No Show or Cancelled note type configured that does not include a session time section, an additional toggle setting displays to configure the default session duration. This will default to 1 minute and can be edited. When configured, the session time for the no show and cancelled group notes will be set to the configured minutes.

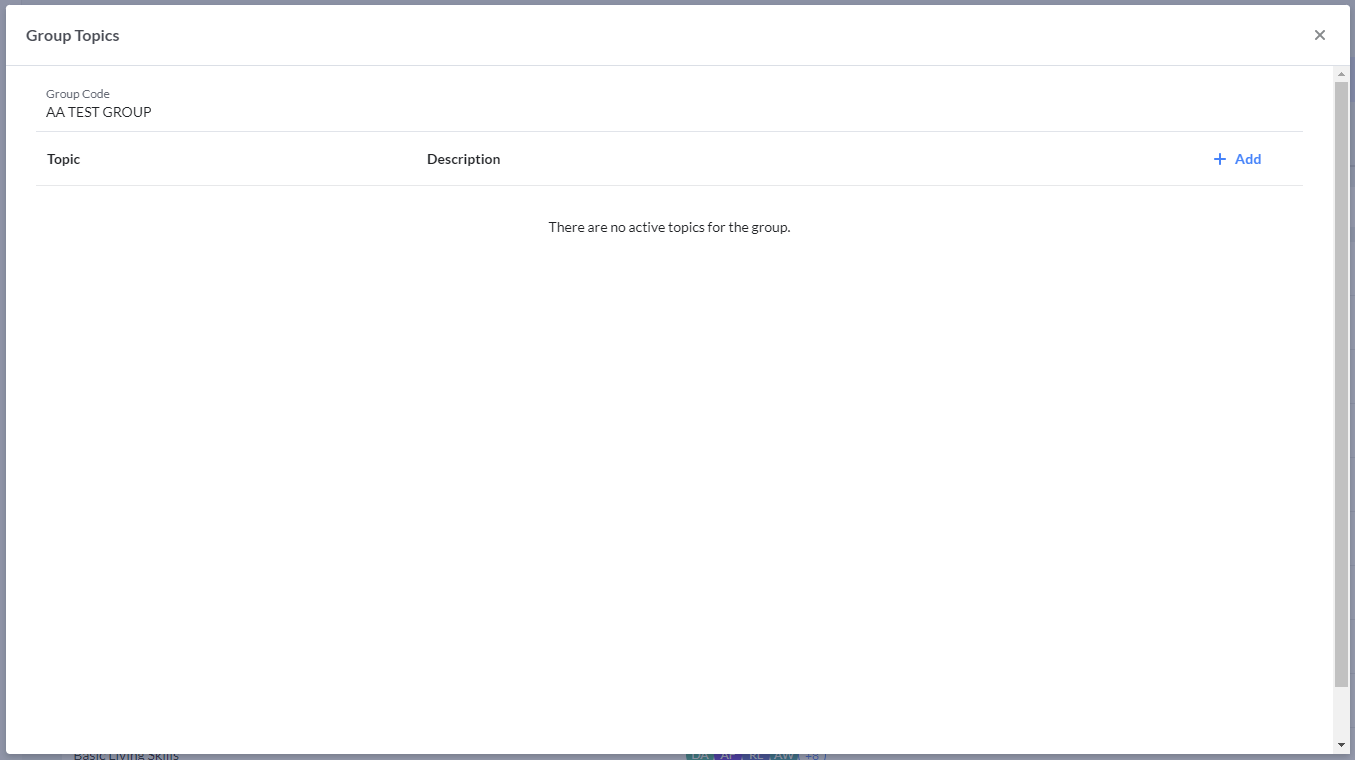
Group Topics
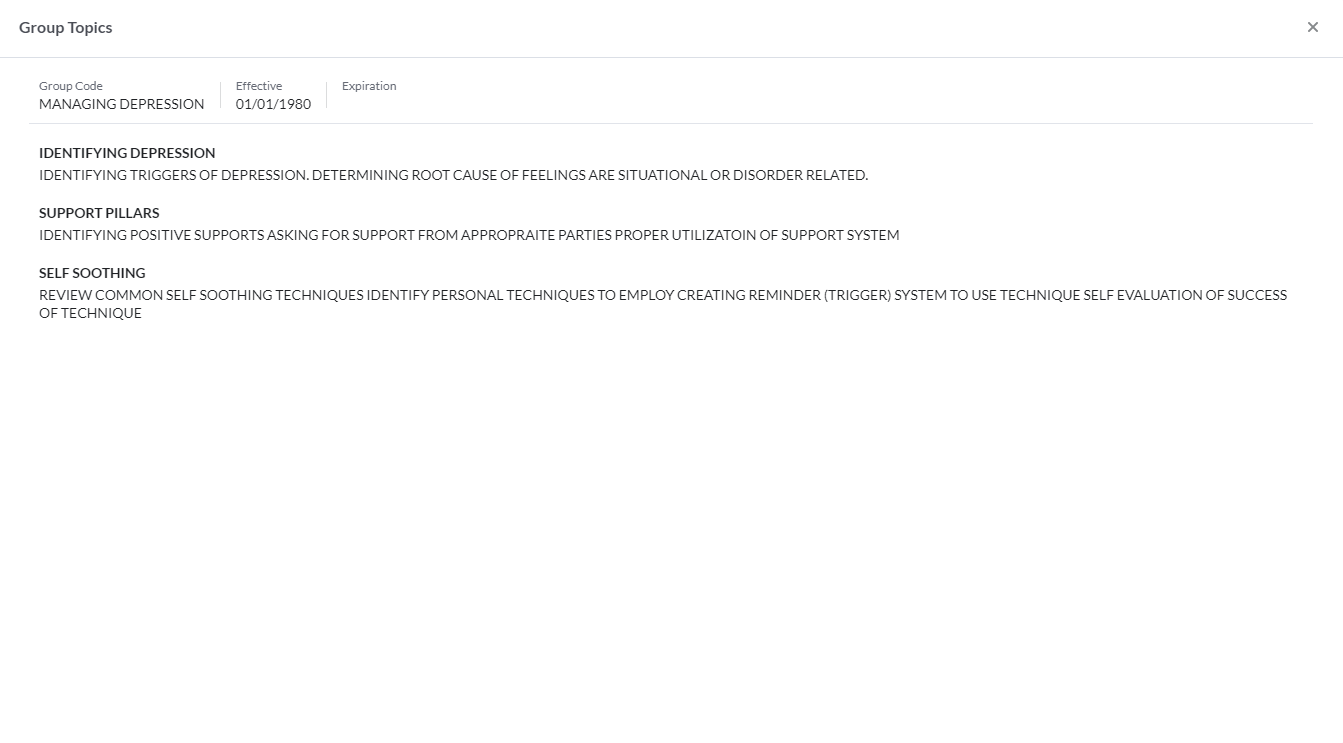
When you hover on a row in the list of groups, the other button/icon you see on the right side of the grid is Add/Preview Topics.
 |
Clicking the Add/Preview Topics button displays the Group Topics for the selected group and also shows the Name, Effective date, and Expiration date for the group (configured in CT|One). myAvatar and myEvolv administrators and supervisors can add Group Topics for use in the group progress note via this display by clicking + Add in the header on the right. side of the display. Group topics have a character limit of 15,000 characters. |
When changes are saved, a Date/Time/User stamp shows to the left of the Cancel button in the footer of the configuration display.
Example:
Assessment Note Types
Configuring Assessment Note Types
Configuring Assessment Note Types in Bells is a snap. To access it,
- Click the Settings Gear in the left Navbar
- Click Note Types in the left navbar
- Along the top of the Note Types display you will see three tabs, Note Types, Group Note Types, and Assessment Note Types.
Once you click on Assessment Note Types, you see a list that looks something like this:

This display shows you a list of all Assessment note type sets including the Name, the myAvatar Assessment Form the note type is associated to and the sections for the Assessment.
The Assessment note type display can be exported to an excel. The excel shows the name of the note type name, myAvatar Assessment Form and sections.
Clicking + New Assessment Note Type allows you configure the new Assessment Note Type with a name and appropriate settings as well as select the Assessment Custom Note Sections to use in the note type. Only Assessment sections can be added to an Assessment Note Type.

When changes are saved, a Date/Time/User stamp shows to the left of the Cancel button in the footer of the configuration display.
Example: