
Patient Population Management - PPM
Patient Population Management (PPM) allows your Bells administrators to set up a global organization setting to further restrict or enable patient access in Bells. Prior to PPM, Bells administrators could set patient restrictions at the user management level. The settings can additionally be set at the organization level as well as at the patient level.
Permission Hierarchy
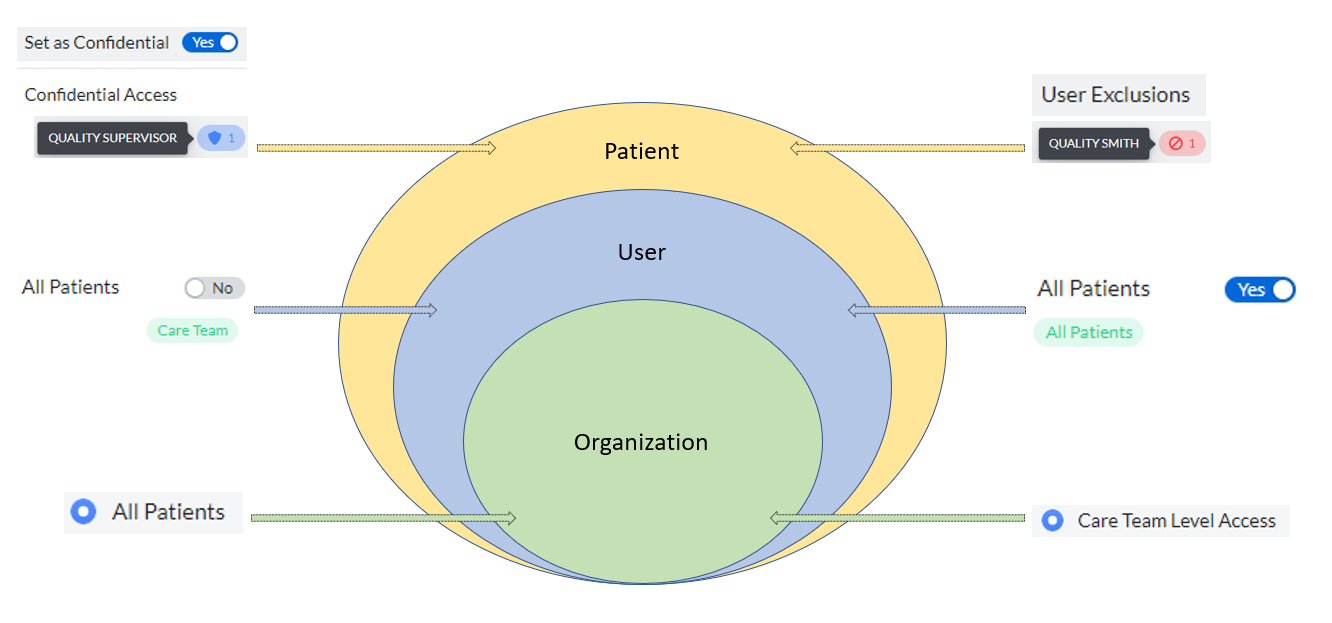
In the image below - you will see the hierarchy of permission levels and what the setting looks like in Bells.
The Patient-Level Access setting overrides the User Level and Organization-Level Access settings, and the User-Level Access setting overrides the Organization-Level Access setting. The Organization-Level Access setting is the lowest in the permission hierarchy and is overridden by both of the other access settings.
Organization Settings
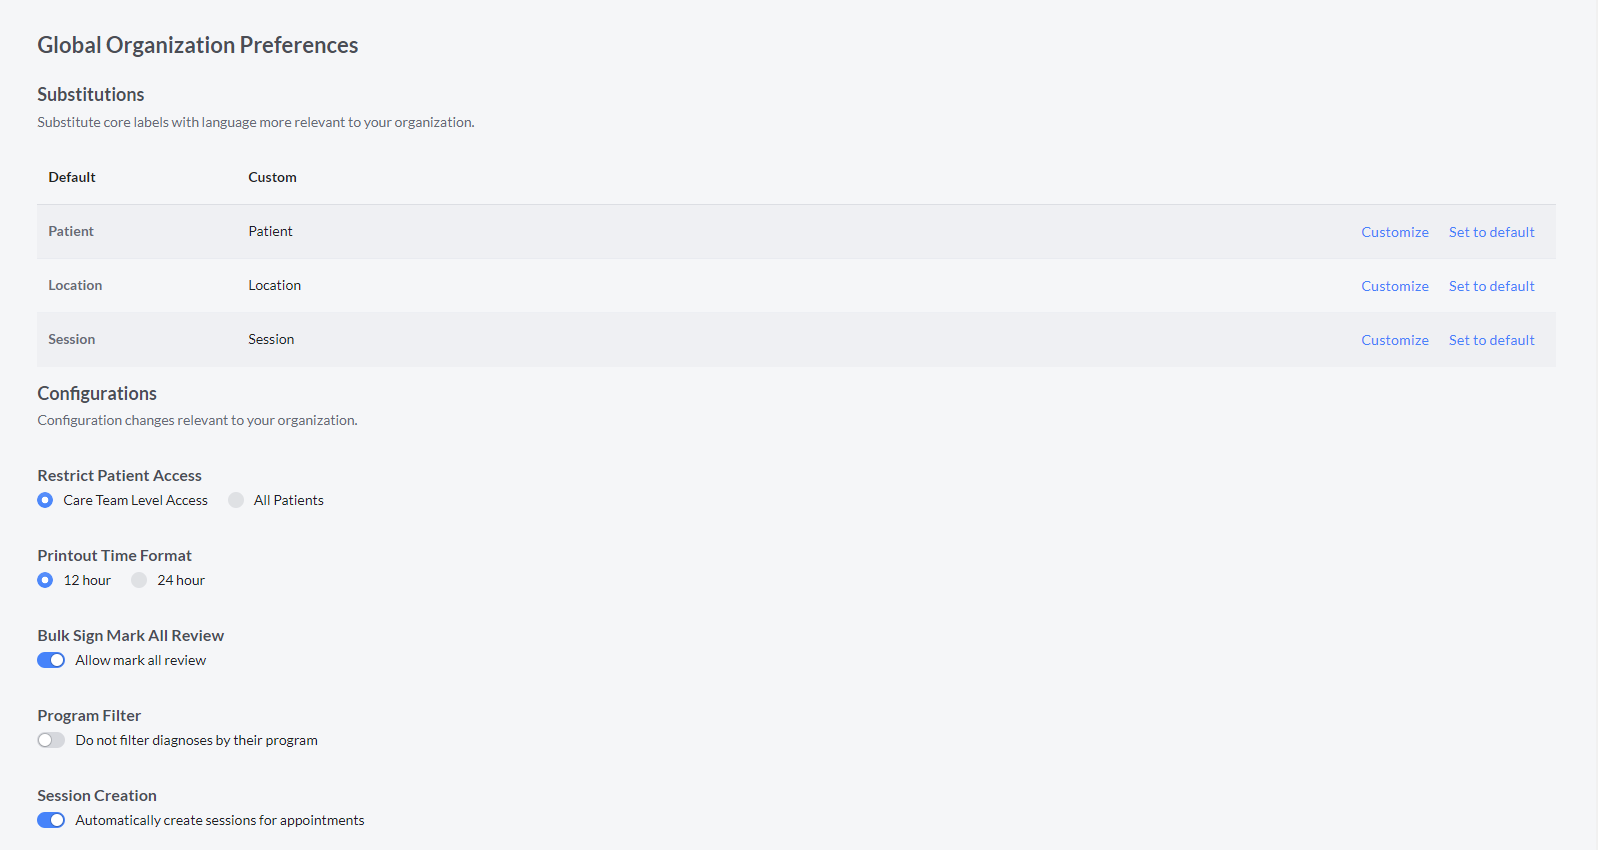
Under Organization Settings, Bells administrators will find a new configuration "Restrict Patient Access".
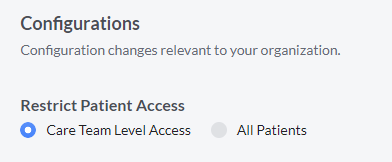
Setting the Restrict Patient Access setting to Care Team Level Access limits all users for the organization to only be able to access the patients that they are set up as the Care Team for in CT|One.
When the All Patient Access limit is set, all users for the organization will be able to see all patients.
User Management
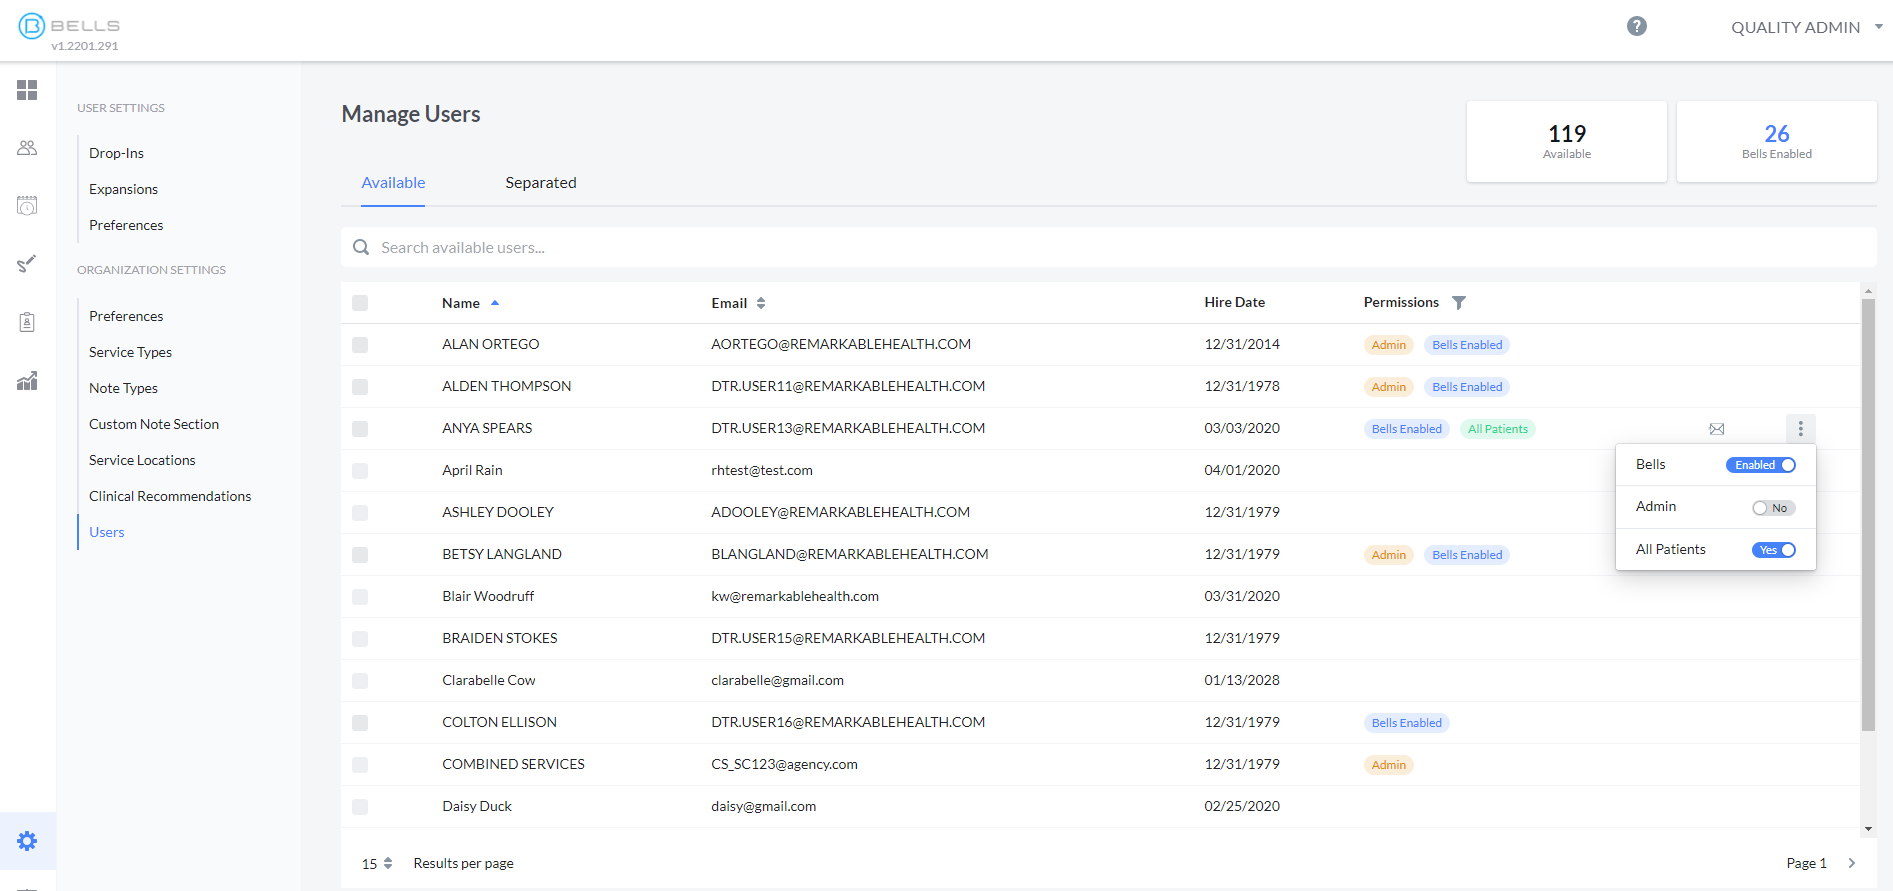
The User-Level permission setting in User Management overrides the Organization-Level Access setting. This setting can be found in the More menu that appears as an ellipse when you hover on a user in User Management. User Management can be found under the Organization Settings.
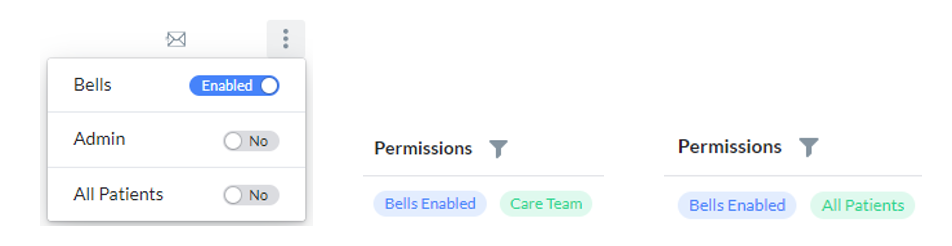
The Care Team tag will show in User Management under the Permissions column of a staff member when
- the Organization-Level Access is set to All Patients, and
- the User Management toggle for the individual user is set to No for All Patients.
The All Patients tag will show in User Management under the Permissions column on a staff when
- the Organization-Level Access is set to Care Team, and
- the User Management toggle for the individual user is set to Yes for All Patients.
"Break the Glass" Functionality
We understand there are times in your day-to-day workflows that you might need to have access to a patient when you're not part of their care team. For those rare situations, we've incorporated the "Break the Glass" workflow.
You will only see this functionality when the Organization- or User-Level access (for the person performing the action) settings are set to Care Team.
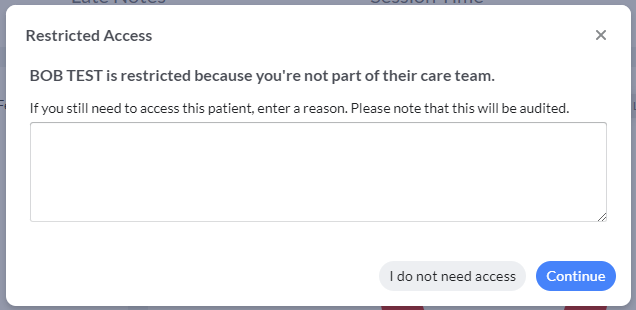
When you search for a patient in an individual Progress Note, in a Group Note, on an appointment, in Bulk Sign, etc, and you do not have access to that patient because of the Care Team Access settings, the "Break the Glass" prompt will display.
This prompt tells you the name of the patient you're restricted from, why you are restricted, and asks you to enter a reason why you're accessing the restricted patient. This reason is included in the Audit Logs Report (details below) so admins can see who was accessed, what was done, and why.
Patient List
The Patient List displays the patients for the user. The display depends on the Organization-, User- or Patient-Level access settings. The toggles that show in the Patient List setting also depend on those settings.
 When All Patients is set for the Organization or the User, you will see the All Patients/My Patients toggle as well as the Active toggle. These toggles allow you to filter the display to all patients for the organization or just your Care Team patients as well as Active or Inactive patients.
 When Care Team is set for the Organization or the User, you will only see the Active patients toggle in the Patient List section. This toggle will allow you to filter the patient list to show Active or Inactive patients.
 For CT|One users, User/Patient Lookup limits are respected. Bells allows you to view the CT|One limits directly from the Patient List.
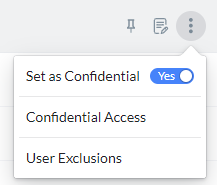
When Bells administrators hover on a row in the patient list, they can select items in the ellipses menu to set a patient to confidential access or see the user restrictions for the patient. Non-admin users in Bells will not be able to see the ellipses menu to make these selections or review the lists.

Confidential Access

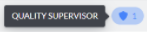 Setting a patient to Confidential in Bells will restrict all users from accessing the patient unless they are granted Confidential Access. When the toggle for Set as Confidential is turned to Yes, an additional Confidential Access menu option will appear. Once users are added to the Confidential Access list a blue shield tag will show on the patient in the list. Hovering on the tag will show the users that are allowed to access the patient.
Once the toggle is set and users are added to the Confidential Access list, no other users besides those listed will be able to search or access the patient.
 myEvolv users do not have access to the Confidential Access list.
User Exclusions

 User Exclusions for CT|One users are read-only. If changes need to be made, these limits must be set in CT|One.
 User Exclusions for myAvatar users are completed in Bells. In the 3 dot menu on the hover of a patient in the patient list, clicking the User Exclusions menu option opens the User Exclusion list.
Bells administrators will be able to see a patient in Bells unless explicitly excluded for the patient.

 User Exclusions are the User/Patient Lookup limits being respected in Bells. When there are users that have access to a patient in Bells that another user cannot access, you will see a red restricted tag on the patient in the list. Hovering on the tag in the list shows the restricted users. Excluded users will not be able to search for the patient in Bells; it will be as though the patient doesn't exist for the user.
There are additional patient limitations from myAvatar that are supported in Bells. Check out the myAvatar FAQ article for more information.
myEvolv users do not have access to the User Exclusion list.
Audit Logs Report
The Audit Logs report allows you to see all audited Patient Access events. Additionally, when a user "Breaks the Glass," the reason for accessing a restricted patient can be reviewed.
This report includes the Patient that was accessed, the Access Date/Time, the Staff that accessed the patient, the Type of Access and any details it can include for the event.
The Access Type filter allows you to narrow down the results to specific events. The filter is broken into 4 categories.
- Data Access
- Includes patient access actions like appointment details, notes, chart, and scribbles.
- Restricted Access
- Audits when break-the-glass functions were done in the application.
- Data Changes
- When things in the application like a note are created, updated or deleted.
- Other Activity
- Includes anything that isn't captured in the categories above.
Just like the Signed Note report, filters can be set to narrow the results returned and those filters can be saved to be utilized again in the future.
The Audit Logs Report can be scheduled to send out in an email by clicking the Email Report button in the top right of the report. Once the report has been scheduled, you will see 'Report email scheduled' underneath the report title. For more information on Scheduling a Report, refer to Scheduling a Report.
This report can also be exported.
Mobile
The Bells - Assisted Documentation mobile app also respects the Patient Population Management functionality, including the ability to "Break the Glass."
Troubleshooting Workflow
With all of these permission settings, sometimes it can be a bit confusing to determine why a person can't access (or even see) a patient.
The image below shows you the steps to take when you can't find a patient in Bells.
Tip: Due to the width of the above workflow image, downloading the image and viewing it outside of this User Guide may make it easier for you to read.