
Start Note
From a patient's chart - you can click the Start Note button on the chart header to start a progress note.

Clicking the Start Note button initiates the Progress Note workflow.
 If the patient you've selected does not have an active enrollment in CT|One, you will not be able to start a note. A message will come up that states the patient does not have an active enrollment.

 For myAvatar users, the type of note that defaults when the Start Note button is clicked on the patient card is determined by an organization preference.
- If set to default to Start Note a standard progress note will be started for the patient including all the session details.
- If set to default to Start Documentation Note a simplified support documentation note will be started and doesn't include setting the Location or Service Code in the session details
Session Information

-
Documentation Type
- At the top of the Session Information pane is a new selection for Documentation Type. Depending on your EHR or add-on solutions the values in this dropdown may differ from what is described below.
- Progress Note - starts the standard progress note and session information selections.
-
Documentation Note -
 myAvatar only - starts a documentation note type and is only available if your organization has documentation note types configured. Not an available option when starting the note from an appointment. The “Documentation Note” documentation type will not be available in the drop down and “Save as an Independent” note types will be filtered out when starting a note from an appointment.
-
Assessment Note - myAvatar only - starts an assessment note type and is only available if your organization has assessment note types configured.
- Multi-Service - starts the multi-service note flow and is only available is your organization has multi-service note types configured.
- The Documentation Type drop-down includes defaulting and remember functionality.
- In the following priority order:
- Patient User Combination remembering - remembers the previously started note documentation type for the Patient + User combination.
-
myAvatar only - Organization Preference on the Configurations tab - Default Start Note Action.
- If there is no previously started note for the Patient + User combination, the Organization Preference default comes into play.
- If neither of the above apply, the Documentation Type will default to Progress Note.
- In the following priority order:
- At the top of the Session Information pane is a new selection for Documentation Type. Depending on your EHR or add-on solutions the values in this dropdown may differ from what is described below.
- Session Date/Time defaults to the current date and time for the user. The date and time can be altered to past or future dates and any time.
- Session Status captures the show status of the patient for the note. This selection will help filter down the Note Types available once the Service Type is selected and coordinates with the Visit Status selections made when configuring your Note Types.
-
Enrollment will display the patient's Enrollments in date format based on the effective date of the enrollment as well as any programs or sub-programs within that enrollment. If the patient only has one enrollment with no programs this field will be read-only and show the date for that enrollment. If the patient has more than one enrollment, or programs within the enrollment the field will be editable for you to make the appropriate selection. This display mimics the Patient Chart sidebar
-
 Enrollment is optional for GEHRIMED.
-
-
Location displays the active locations for the agency including the Location Code. These locations are what currently show in the Facility drop-down of the Progress Note Session Information tab today in the EHR. This selection will help filter down the Place of Service and Service Types that will be available to the locations configured to the service type in the Service Type configuration.
- If your organization has less than fifty (50) locations the Location selection on the start note display is not changing, it'll continue to be a dropdown selection with View All option to see and select location.
- If your organization has more than fifty (50) locations the Location selection will be a search field for the user to type in their location to search along with the View All option to see and select location.
- Place of Service displays the active Places of Service based on the Location selection. These Places of Service are what currently show in the Place of Service dropdown in the Progress Note Session Information tab today in the EHR.
-
Service Types sync to Bells from the EHR and are configured to use Note Types in the Service Type configuration. The selection of the service type is the final step to enable the note type you select to write the progress note. The values in this drop-down are narrowed down by the Location selection as well as previous sessions with the patient, based on the configuration done in settings.
- Services that do not have note types associated will be disabled in the selection.
- Author is the user writing the note, this is defaulted to the user signed in and is not editable at this time.
Session information fields are live calls to the EHR that provide up-to-date values in real-time.
If the note is started from an appointment, the Location will be filtered to only show the Location Roles based on the appointment Location and Service Type.
Notes from Mobile Sessions with Signatures
If the note is started from a mobile session that includes signatures there is additional requirements and handling to consider.

The session details are read only. At this point, the patient has signed off on these details from the Mobile Session and therefore cannot be edited without removing the acquired signatures.
Only note types that have a patient-viewable session time section will be available. If the note type selected includes other patient-viewable sections the user will be prompted to remove the acquired signatures since the patient has already signed and therefore wouldn't be able to review the patient view of the additional sections. The same handling occurs if the note type has Validations configured that would require changing session details.
myAvatar Session Information additional details
myAvatar users: Service Types are called Service Codes and Enrollments are called Episodes.
The Episode and Program fields are separate since myAvatar does not combine them; they will need to be individually selected. The episode field will show the episode number, episode date, and the program. Example: "#35 - 03/24/2021 - Case Management"
Additionally, myAvatar users will need to make a selection of a myAvatar Note Type to link the Bells note type to a myAvatar note type for the sync. The myAvatar Note Type field is in the footer of the start note display and depend on the Bells note type to select. The myAvatar note type field is filtered by the staff starting the note and the Bells note type selection.
myAvatar users can select a Co-Practitioner as part of the Session Information. This selection will show in the header of the progress note and will sync on the note to myAvatar.
When a Support Documentation note is started, the note types available will only be the ones set to “Save as Independent Note” in the note type configuration. These notes will flow to myAvatar to support the Independent Note workflow.
When co-practitioner(s) are selected, (up to 2 co-practitioners can be selected)
- Bells will check that the program for the note is appropriate for the Co-Practitioner as well.
- A field will display as part of the Session Time section for “Co-Practitioner Duration”
- Allows separate documentation of the Co-Practitioners time for the note
- Does not impact the overall duration or length of session for the note
- Is not required
- When the note is signed, the co-practitioner duration will be checked that it does not exceed the total duration for the note.
In Individual Progress notes, when a Bells Note Type is selected and the form data from myAvatar has the facility set to required, an additional drop down shows in the footer when starting the note for “Additional details”. When selected, the user can enter Facility data for the note. The "Additional Details" dropdown at Session Information is configurable per agency. Agencies can control which location codes trigger the facility address requirement, preventing unwanted mandatory fields from appearing on their notes. This configuration is done in myAvatar.

This facility data shows under the progress note header in the note preview. The Facility Location address will include the 4 digit zip code suffix.
myEvolv Session Information additional details
myEvolv users: Service Types are called Services.
The Enrollment and Program display in the same field. The enrollment field shows the enrollment date and program name. Example: "1/20/23 - Case Management"
If the note is not started from an appointment, the program will default from the Program Admission's Assigned Location from myEvolv.
Location and Place of Service
Pictured above is the default for when a patient's progress note is being written for the first time in Bells. If a patient has already had a progress note written in Bells, the Location and Place of Service default to the last one used for the patient and user combination.
For example, if you last saw John Smith at Outpatient Facility A - Location 1, the next time you write a note for John Smith, the Location selection and Location Role will default to Outpatient Facility A - Location 1.
For CT|One users, there is also configuration on the Location display under Organization Settings to override the Places of Service available per Location as well as setting a default selection for the Place of Service. The defaulting behavior mentioned above is taken into account prior to the configuration defaults.
Even with the defaulting behavior (regardless of previous selections or configuration), the selection will remain editable so you can change it, in the event you are not meeting the patient in the same location and location role combination.
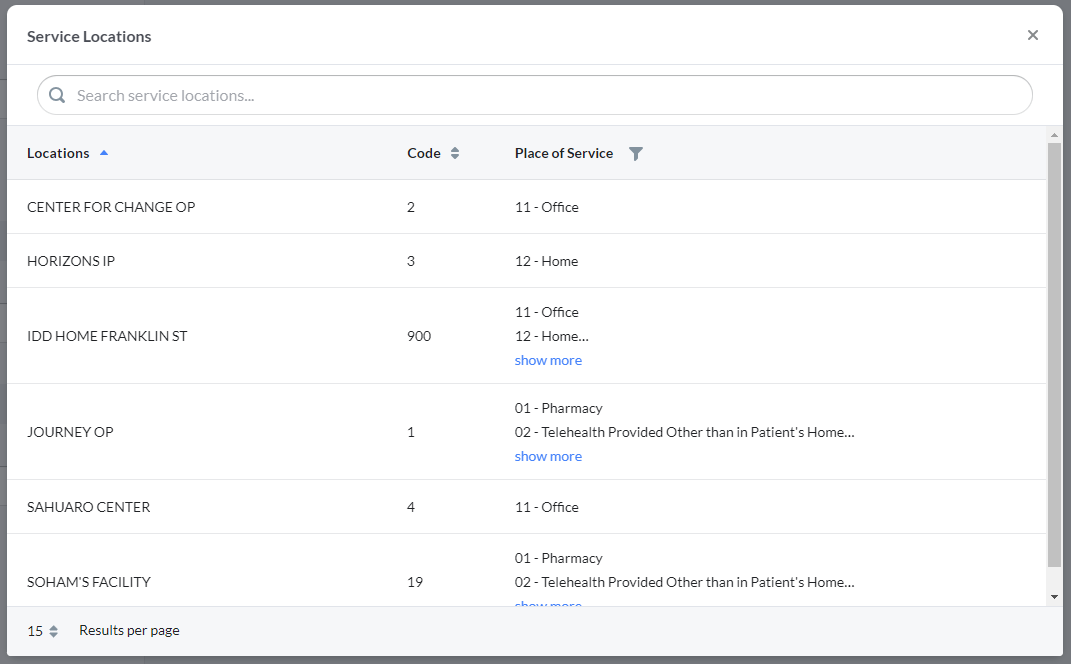
Clicking View All link next to the Location or Service Type field labels will launch a window that displays all of the Locations or all of the Service Types.

In individual progress notes, Session information can be updated after the progress note has been started by clicking the pencil edit icon in the progress note header. The icon will appear when you hover on the progress note header. If the note is from a template, when the edit session occurs, the template options will not be available on the edit session display. This is by design, Bells is not able to decipher what content was template versus what was added by you.

In Group Notes, session information can be overridden by checking the Override group session information checkbox. 
Only the author of the progress note can make edits and sign the progress note in Bells.
Note Type or Template Selection
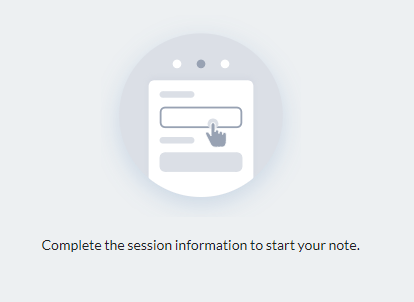
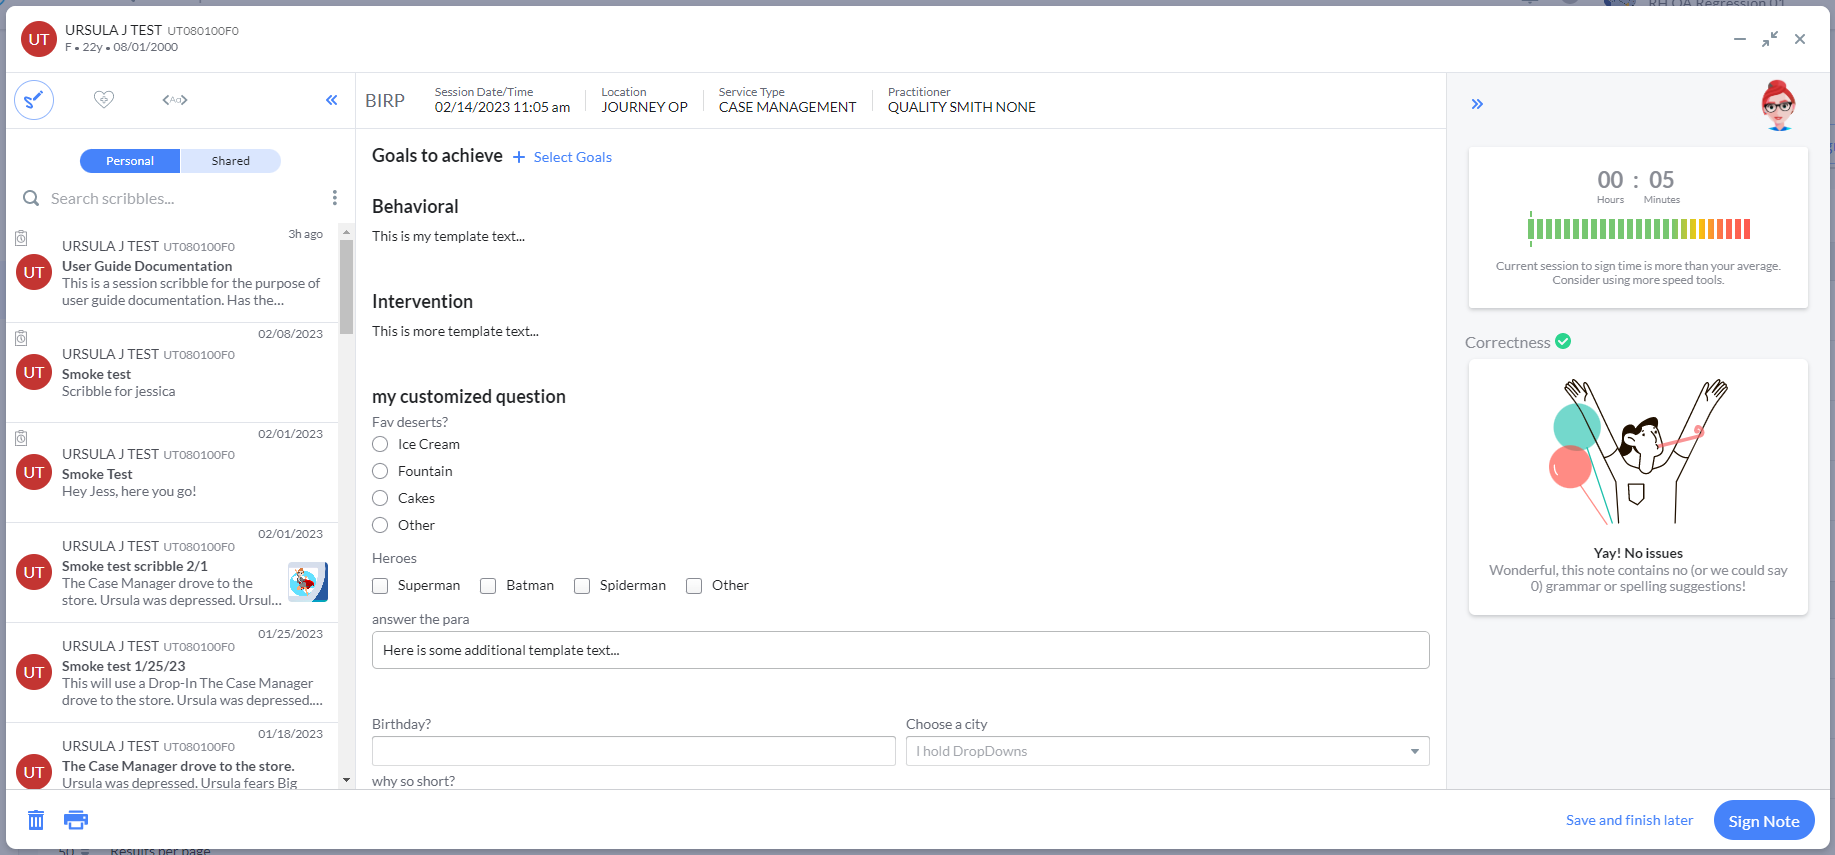
When starting a new note - the right side of the Start Note screen will look like the image below. This indicates that you need to fill out the Session Information on the left side to be able to select a note type to start the note.
If, after filling out the left side Session Information of the Start Note window, you still do not have a note type to select, this could be a configuration issue and you will see something like the image below. The message should tell you what is wrong.

Example - The combination of a Location and the selected Service type does not have a note type configured.
If you are a Bells administrator, the message will also give you a button you can click to link a Note Type to the service.
When there are no note types associated to your location and service type, your Bells Administrator will need to go into the Organization Settings and review the configuration for that Location or Service Type.
If everything is correctly set up, after filling out the Session Information on the left side you will see Note Type(s) and Templates to select on the right.
Tip: A note template contains text and content pre-configured by your Bells administrator and can save you time entering your progress note!
These note types and templates display based on the Location and Service Type selected in the Session Information, and the configuration for what note types and templates are allowed for what service types, or locations is based on organization settings in Bells.

Template selection now happens on the Note Type card. The note type drop-down includes Note Types as well as Note Types appended with their respective Templates.
For example below, the BIRP note type shows as well as the BIRP - Demo and BIRP - SmokeTest templates.
You can preview a template before selecting it by clicking the icon that displays in the top right corner of the template card when you hover over the template card.

Clicking the icon will open the template in preview view, it will display the placeholders as the intended text based on the patient selected. You can start the note from the preview of the template.
Example of a Note Type
Example of a Template
Disabled Note Types
If the patient for the note does not have active diagnoses or goals/objectives and a note type requires those sections, the note type will be disabled from selection. We prevent the selection of the note type if the user does not have active diagnoses or goals/objectives.
Minimize/Mini Window/Close Actions
In the upper right corner of the progress note, you see three icons.

 |
Clicking the dash in the top right corner of the progress note will minimize the progress note completely. When minimized, the note is visible in the lower-right of your window. This allows you to review this note alongside other information in Bells. |
 |
Clicking the inward-pointing arrows in the top right corner of the progress note will change you from the Full Note editor view to the Mini Note editor. This allows you to review this note alongside other information in Bells. |
 |
Clicking the X arrow in the top right corner of the progress note will close the progress note. If changes are pending, you will be prompted for whether to save them. |
To learn more about the Mini Note Editor and Minimized Note View, see Mini Note Editor and Minimized Note View later in this article.
Save Note as Draft
Progress notes that are not signed are saved in the Bells applications as Drafts and will be tagged as drafts or displayed as drafts throughout the Bells application. Clicking the "Save and finish later" button in the lower right corner on the progress note will save the note as a draft.

Sign Note
Once a progress note is signed, Bells shows the note tagged as Signed throughout the Bells application.
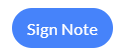
Clicking the "Sign Note" button in the lower right corner on the progress note will take you into the Sign Note workflow.
If the note being signed overlaps with another signed note for the patient or the user, the user will be presented with a Review time overlap display. This checks against signed notes in Bells only.
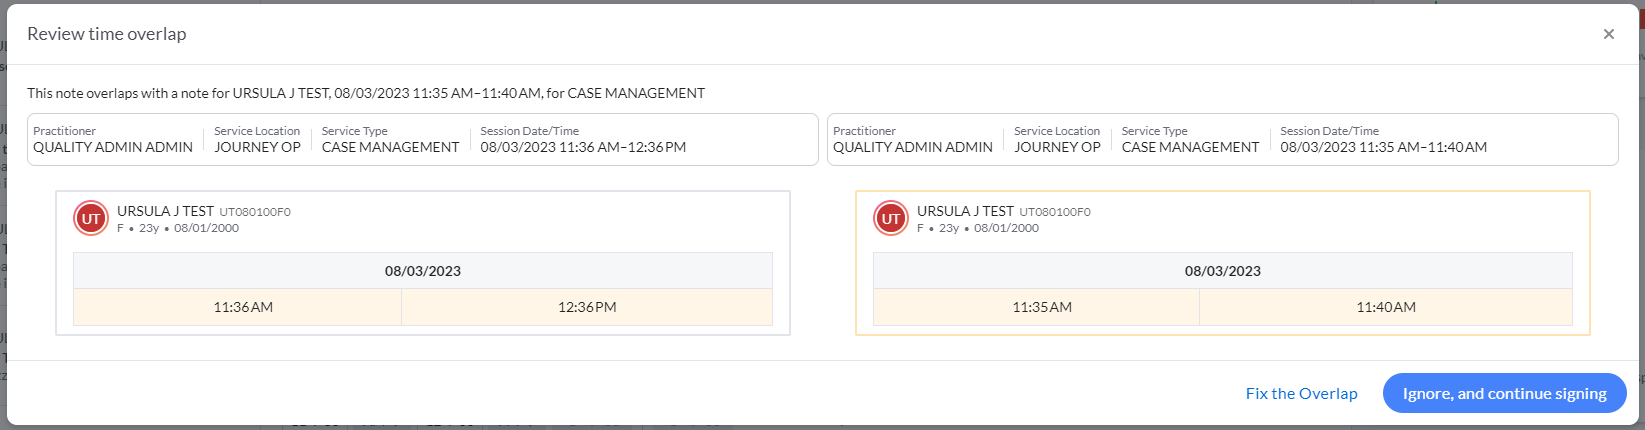
The user can correct the overlap by clicking the Fix the Overlap button or ignore the overlap and continue with signing the note. Supervisors and Administrators will be able to review which overlaps were ignored.
No Show or Cancelled notes will not be considered in the overlap check.
Notes that are part of the Support Documentation Note flow, i.e do not include Location or Service Code will not be considered in the overlap check.
If there are missing required patient/guardian/additional signatures, the note is considered incomplete. These signatures must be included prior to the author signature.
Signing a Note with your Signature/PIN
 If you have an existing signature and PIN in CT|One, your signature and PIN are automatically imported into Bells. Simply use the same PIN for Bells as you would in CT|One.
 myAvatar and myEvolv users' progress notes will not include a signature image or the Bells-drawn/typed signature image. The signature will show as the text name of the user who signed the note, including credentials and the date/time stamp of the signature.
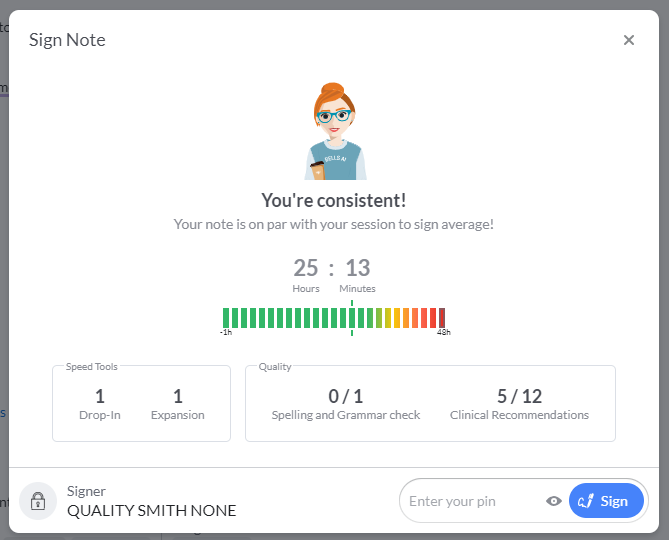
After clicking Sign Note, you will see the Sign note window.
In this display we show
- Rotating images and messaging based on the session to sign time for the note being signed.
-
Metrics for speed tools and quality improvement features for the note being signed.
-
This includes
- Number of drop-ins and expansions used
- Spelling and grammar corrections accepted and seen
- Clinical Recommendations accepted and seen
-
This includes
In the footer of the display, you must enter your PIN to sign the note.
After successfully entering your PIN and clicking Sign, the sign note and progress note windows will close and you will see the "Note Signed successfully" message at the top of your Bells application.
 Bells progress notes will transfer into CT|One to continue through Note Audit, Progress Note Billing, and other progress note workflows once the note is signed in Bells. The signature will be present on the preview and the print, including the signer's printed name, credentials and the signature image as well as the date and time of the signature.
 myAvatar/myEvolv Appointment Creation
myAvatar/myEvolv users can create an appointment when signing the note. This only occurs when the organization preference for "Allow an appointment to be created from a session" is turned on, the note doesn't start from an appointment, and when the note includes a session time section in the note. On sign, when applicable, a new check box shows on the Sign Note display. When the checkbox is checked, the user must select an appointment site. When the PIN is entered and the sign button is clicked, a new appointment linked to the note will show in Bells and the Care Record.

The appointment creation functionality is not supported through Bulk Sign. If the appointment being created overlaps with an existing appointment, the user will be prompted to select the existing appointment or create a new appointment.
Bells will check to confirm if a note already exists for the associated appointment in myAvatar/myEvolv. This same check happens when starting a note from an appointment in Bells.
When signing the note, Bells will check if an appointment for the user overlaps with the note's session time. If an appointment without a note associated exists Bells will ask the user signing the note if they want to link the note to the appointment, continue signing without linking or cancel signing.
If your note is for a Cancelled status or is a Support Documentation Note, i.e doesn't include location or service code, the Create appointment for the note will not be included in the sign note display.
 Depending on your EHR, you may need to route your note for approval back in the EHR. For more information regarding Document Routing, check out the following Document Routing articles.
Adding your Signature/PIN
If you do not have a signature or PIN set up, you will see the Capture Signature window the first time you click Sign Note. This window allows you to capture and save a signature without a signature pad, right in the Bells application.
myAvatar and myEvolv users will not have the ability to add a Signature image as part of the note sign workflow. If you do not have a PIN, or the PIN has been reset, you will be prompted to add a PIN. Your Bells Administrator can reset your pin or you can reset it yourself on your user profile.
The Capture Signature window has two tabs. You will use one of these tabs. When you click the Save Signature button on the tab, that becomes the signature that will be captured and used for all of your progress notes.
 This signature will also sync back to CT|One for use there.
Typed Signature
The first tab is the Type tab and it allows the user to use a set font and see their name in that font.

Drawn Signature
The second tab is the Draw tab and it allows the user to draw their own signature using their mouse.

Saving the Signature
When you click the Save Signature button, the signature that is saved will be the signature visible on the tab that you're on when you click the Save Signature button. 
Adding a PIN
After the Signature is captured, the Bells application will ask for you to set up a PIN to go with the signature. The PIN that you enter will be used to sign all progress notes in Bells.
PINs must be 5 to 8 digits long.
Enter your PIN, Confirm the PIN to make sure it's correct, and click Create PIN.

Once you've established your PIN, the note is signed.
This PIN will also sync back to CT|One for use there.
Signed notes are sent to the EHR. Bells progress notes will transfer into CT|One to continue through Note Audit, Progress Note Billing, and other progress note workflows once the note is signed in Bells.
Required Note Type Section
The sections you see in a progress note may vary depending on the note type you are entering. Your Bells Administrator configures which sections are included in each note type, as well as whether the section is required or optional.
When you click Sign Note on a progress note, Bells will validate the note to ensure all of the required sections have been filled out. If all of the required sections have been filled out, the sign note workflow will proceed. If any of the required sections need to be filled out, you will see a red toast message telling you required information is missing. Bells will scroll you to the first section that is not filled out.
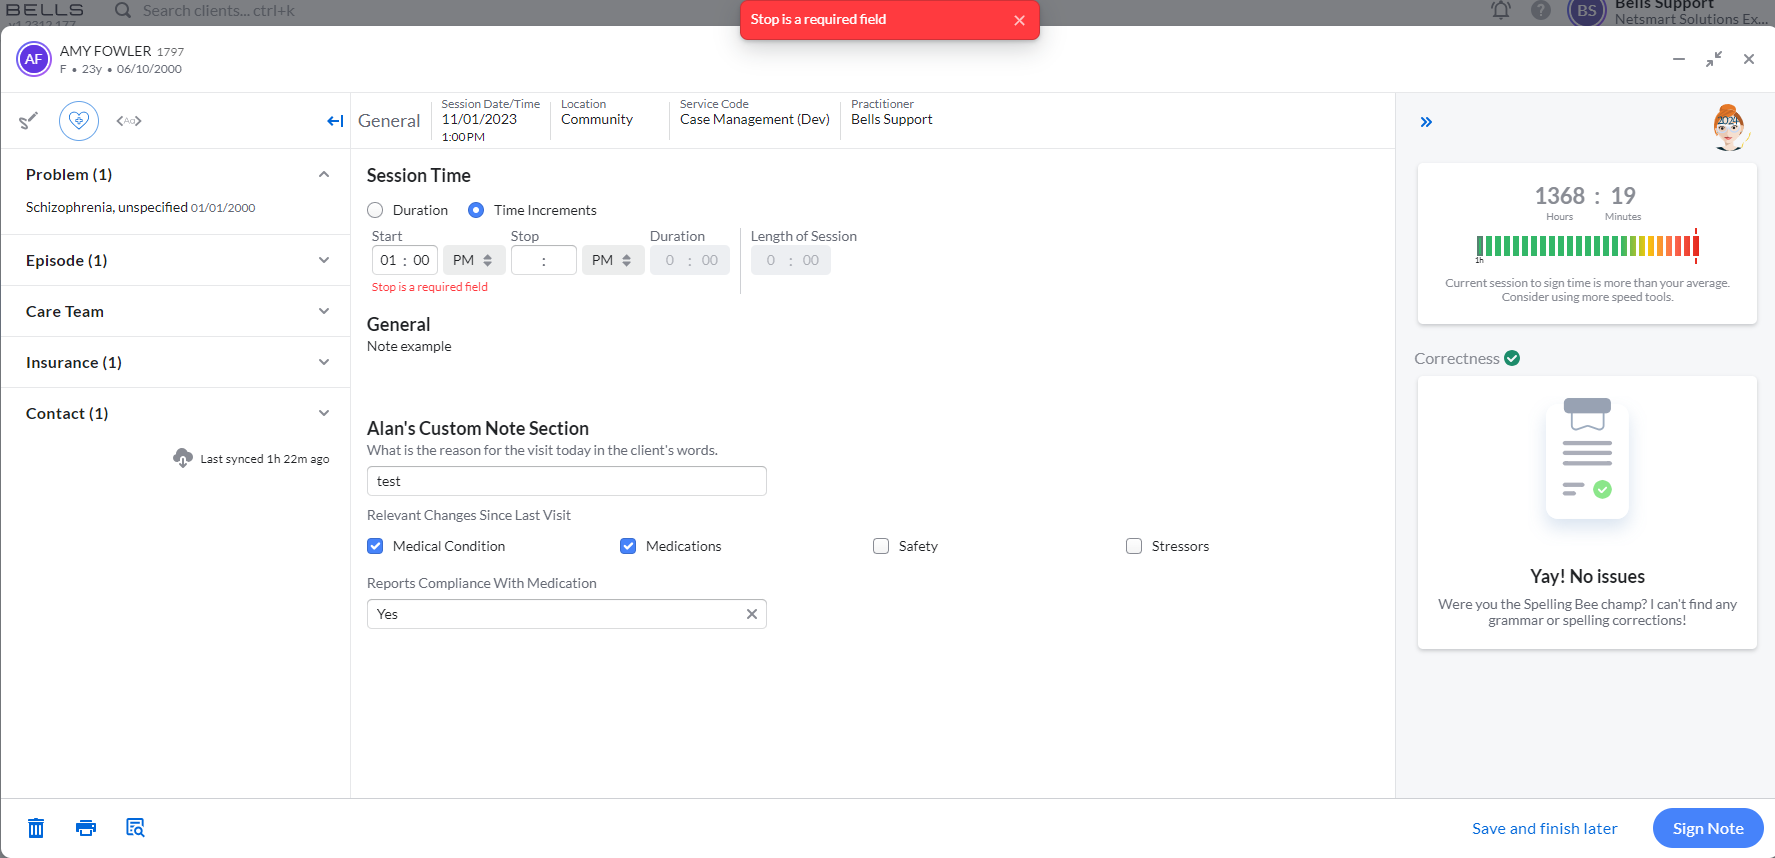
In the screenshot above, when signing the note, an alert appeared because the Session Time was incomplete. The note scrolled to the Session Time section and there is a reminder that the Stop Time is required.
If there are additional required sections that are not completed when attempting to sign the note, you will continue to see alerts and be taken to the necessary sections until all of the required sections of the note are completed. Then you will able to sign your progress note.
Deleting a Draft Note
You may delete any of your own progress notes that are in Draft status. Deleting a draft removes it completely from the system; the draft record will no longer be present in the chart or any of the other draft locations such as the Chart section or the Dashboard.
Bells Administrators also can delete draft notes.
There are three places you can delete a draft note:
-
Click the Delete icon in the Progress Note List

-
Click the trash can in the lower left corner of the progress note when you have it open.

-
In the Unsigned Notes report, hovering on a row in the Progress Note List in the report.

When you click to delete the progress note, you will be prompted to make sure you want to delete the note.
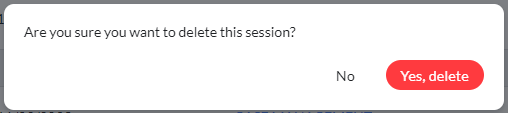
Click Yes to permanently delete the note.
Click No will keep the progress note, cancelling the delete.
Unsigning a Note
 myAvatar and myEvolv users do not have the ability to unsign a note in Bells unless the note fails to sync.
 CT|One users have the ability to unsign a note in Bells, subject to a few rules.
Progress Notes that have been signed in the Bells application can be Unsigned within a 72 hour time period.
Only the author of the progress note can unsign the progress note.
If the progress note has gone to a Charge Batch in CT|One as part of the billing process, it can not be unsigned, regardless of the age of the note.
To Unsign a note, open the signed progress note and click Unsign.
Clicking Unsign within the progress note will prompt you confirm:
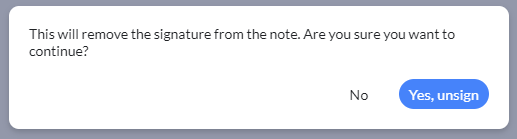
Click Yes, unsign to remove the signature from the note and return it to draft status.
Click No to cancel the action.
If the progress note fails to sync to the base EHR, the Unsign Note button will show for these notes regardless of time limit/note restrictions.
Preview Note

In the progress note list on the Chart or within the patient's chart you can click the Preview icon on the note to preview that progress note. This can be done for Signed Notes and Draft Notes. You can preview your notes and notes that other users have authored.

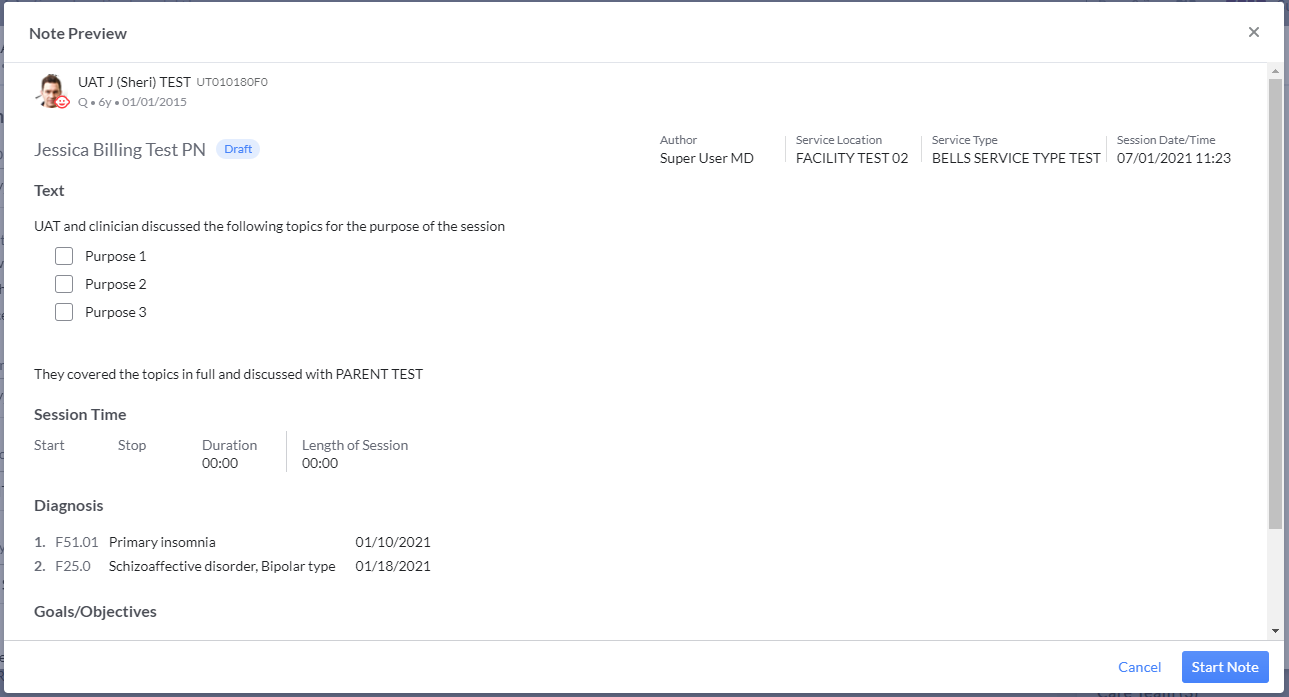
Additionally, users can preview their note while in the progress note editor. An icon for preview is available to the bottom left of the note editor.
When clicked the user can see the full preview of the note, including any custom note section output. This will allow users to preview their notes prior to signing for any content that may not align with the configured output.
The Note Preview:

 Your Bells administrator controls whether you are allowed to print notes from within Bells or whether you will need to print the note from your EHR. When available, in the bottom left corner of the preview, regardless of whether you're the author of the note or not, you can print from the preview screen by clicking the Print icon.
![]() The clock icon allows users to see the history of the note. This is available via the Note Preview on signed and draft notes. When clicked, the Note History for the note shows. The left pane shows the note preview content. The right pane shows a list of the revisions for the note and the date/time of the revisions. Clicking revisions from the list on the right shows the changes made as part of that revision.
The clock icon allows users to see the history of the note. This is available via the Note Preview on signed and draft notes. When clicked, the Note History for the note shows. The left pane shows the note preview content. The right pane shows a list of the revisions for the note and the date/time of the revisions. Clicking revisions from the list on the right shows the changes made as part of that revision.

For myAvatar and myEvolv users we also show the myAvatar/myEvolv Note Type in the header of the preview displays.
Admin users will see a trash can icon to the left of the print icon which allows them to delete a signed note. When clicked, a prompt will display to make sure the user wants to continue with deleting the signed note and includes handling for when the note exists in the EHR.
For myAvatar and myEvolv administrator users, if there is a sync error for a note associated with an appointment, there may be a Resolve button with the option to resync the note without a link to the appointment and optionally convert the note to a Documentation Note and resync it.

Once you click Resolve, you have the following options:

Note Preview and additional content displays
If your organization utilizes Bells Virtual Scribe, Audit Review (overlapping sessions and similar note content) or Bells Quality Coach, additional tabs will show in the note preview to show the additional content.
Here's an example of a note preview with the Bells Virtual Scribe tabs

Here's an example of a note preview with the Audit Review or Bells Quality Coach tab for Quality Assurance included

Print Note
 Your Bells administrator controls whether you are allowed to print notes from within Bells or whether you will need to print the note from your EHR. When available, while on the progress note list on the Chart, within the patient's chart, or within the progress note you can click the Print icon to Print the progress note. This can be done for Signed Notes and Draft Notes. When available, you can print your notes and notes that other users have authored.

Mini Note Editor
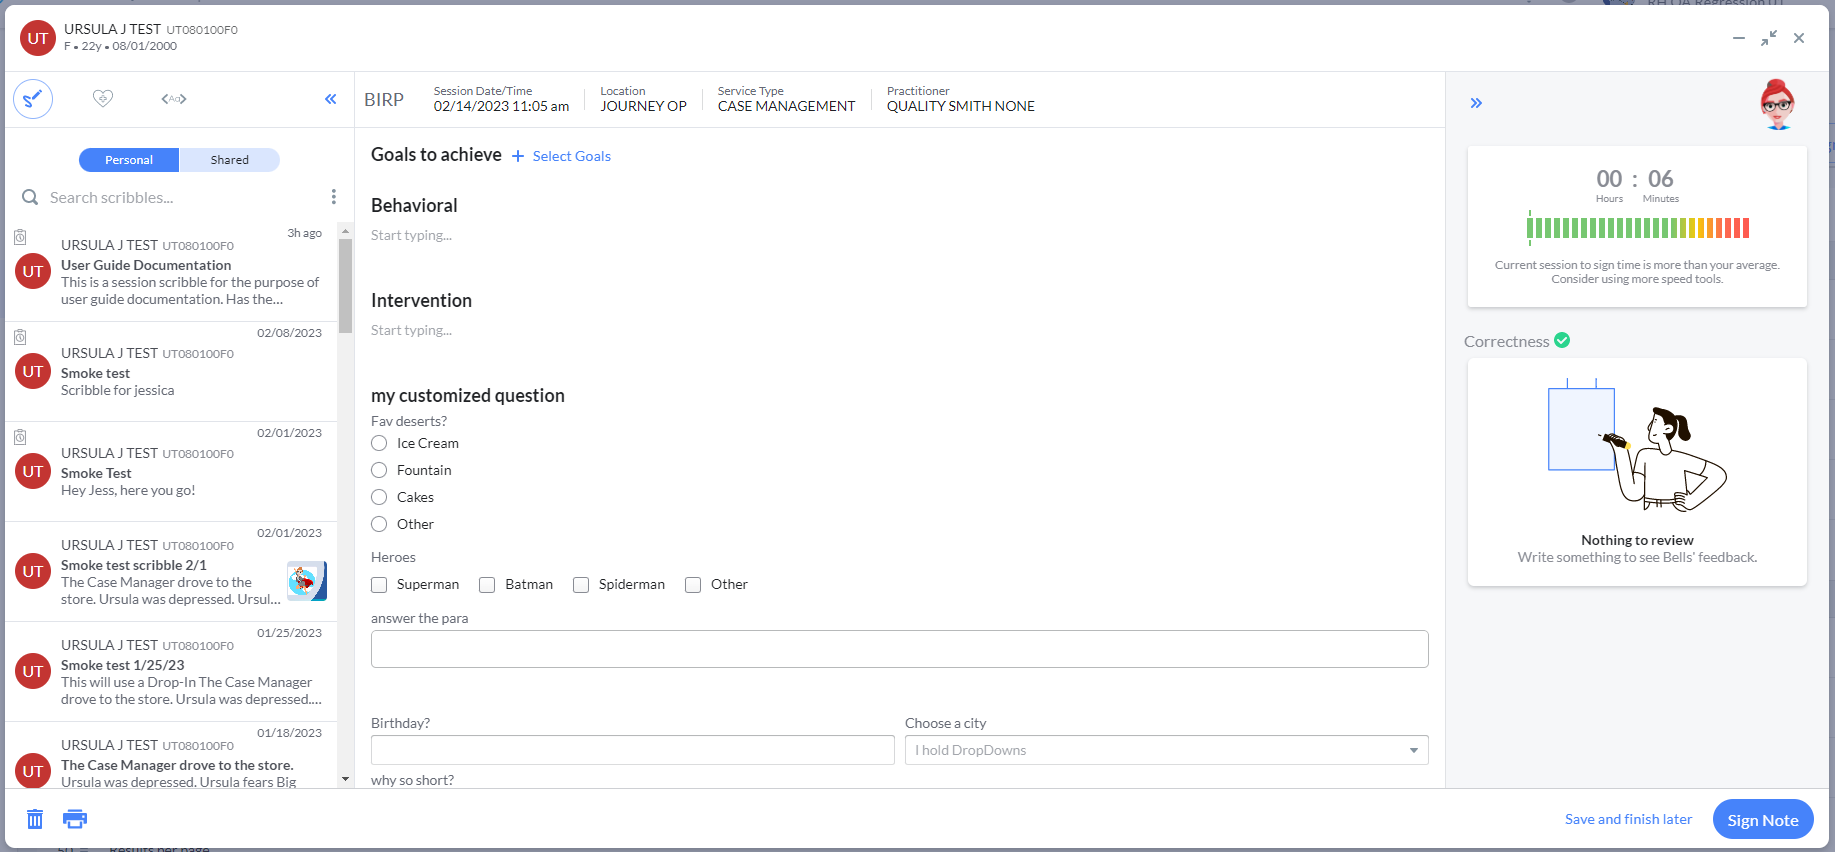
In the Bells application, you can work your progress notes in the full note editor or the mini note editor. The mini note editor displays all the same sections and details as the full note editor. In addition, the Mini Note floats on top and to the lower right, allowing you to navigate to other sections of the application without leaving the note. This is quite handy so you can reference things such as your patient's scribbles, referencing a sibling or another family member for the patient, or additional patient details in their chart.

One difference that should be noted between the full note editor and the mini note editor. In the mini note editor, you cannot edit your patient's diagnosis or goals and objectives sections. Instead, you have an "Edit" hyperlink which will relaunch the window to the full note editor to allow you to make those selections and changes.

In the upper-right corner of the Mini Note editor, you have some controls:
Minimized Note View
A third view of the note available in the Bells application is the minimized note view. Similar to the mini note, the Mini Note floats on top and to the lower right, allowing you to navigate to other sections of the application without leaving the note. This is quite handy so you can reference things such as your patient's scribbles, referencing a sibling or another family member for the patient, or additional patient details in their chart.

The progress note details are not visible when in the Minimized note view.
In the upper-right corner of the Minimized Note View, you have some controls:
Switching the Patient/Note
As you're navigating through the Bells application, you may be editing a progress note and try to access another note for the same patient or another patient. When this happens Bells will alert you so that you only have one progress note actively being worked at a time.
This alert can happen two ways. The first way is when you're editing a note and try to access or start a new note for the same patient. Bells will display a message asking if you want to switch notes. Clicking "No, stay on this note" will leave the note in the view it is in and not start a new note or access the other note record you attempted to access. Clicking "Yes, switch notes" will close the note that is open and open the note you're attempting to access or start the new note. Any changes you had pending are saved.

The second way you will be alerted is when you're editing a note for one patient and try to access or start a new note for a different patient. Bells will display a message asking if you want to switch people and notes. Clicking "No, stay on {Patient name}" will leave the note in the view it is in and not start a new note or access the other note record you attempted to access. Clicking "Yes, switch to {Patient name}" will close the note that is open and open the note you're attempting to access or start the new note on the different patient. Any changes you had pending are saved. 
 Bells Note Sync to CT|One
Once a note is signed in Bells it will sync to CT|One where it can get additional signatures, go through the note audit process (if configured), and then billing. The contents of the note from Bells will be displayed in a general note in CT|One and all Bells note sections will be included in the general tab of the note unless the same data is on the Session Information tab of the note such as the Diagnosis, Session Time (including Units) and Objectives. Any note audit changes to a note in CT|One do not sync back to Bells.
Some notes may not sync to the EHR right away. This can be configured in the Organization Preferences for Hold Notes.
If the progress note has been voided in CT|One, it will no longer be displayed in Bells.
If your organization uses unique show statuses for billable and non-billable notes, Bells will translate those into CT|One. Each note type in Bells is assigned a session status and the billable/non-billable setting. For the no show and cancel notes, Bells will use the billable setting of the Note Type to map the Bells session status to CT|One's corresponding show status.
For instance, if you have configured a No-Show/Charge show status in CT|One, when you write a no-show note in Bells that is mapped to a billable note/service type, this will set the CT|One show status to No-Show/Charge.
 Bells Note Sync to myAvatar and myEvolv
Once a note is signed in Bells it will sync to myAvatar and myEvolv. The Bells Progress Note content will display in the Notes field.
Some notes may not sync to the EHR right away. This can be configured in the Organization Preferences for Hold Notes.
For myAvatar users, if the note is in a Cancelled status and the session date/time is in the future, the note will be held in Bells until after the future date/time.
In myAvatar the note must be finalized, then it can continue through other workflows and to billing.
Goal and objective note selections are no longer syncing to the Notes narrative field in myAvatar, instead it will show in the "Note Addresses Which Treatment Plan" field.
Caution: If you have renamed the Narrative section in myAvatar, that's where the Bells notes will display in myAvatar. For example, renaming to Intervention makes the Bells note show up there.
When a note is linked to an appointment, and the note syncs from Bells to myAvatar, the myAvatar appointment location will be updated to reflect the location on the note if they don't already match.