
 In this article, the no-internet symbol will be used to indicate when a feature on the mobile application can be utilized in offline mode/without access to the internet. Most features in the mobile application work with offline capability using previously loaded data from when you were connected to continue your workflows.
Installation
You can install Bells on your Mobile device. If you are unsure if your device is supported, refer to Bells Recommended Devices.
App Store/Apple Store
Bells can be found by searching for the application name "Bells - Assisted Documentation".
Find the application "Bells - Assisted Documentation" click on it, and install the app.

The Bells mobile application has version handling functionality that will check your version of the application if it is no longer supported. If the version you're on is no longer supported you will be presented with a prompt to update the app via the app store.
Sign In
Clicking the blue Sign In button will launch the sign-in screen where you enter the same credentials as the web application.
This is also the same CT|One sign-in credentials.
 Your username is your CT|One username, which is typically something like
claimtrak\111jsmith
or
111jsmith@ctone
Either option works the same
Note: The Bells mobile app will use the device's biometric by default. This can be your fingerprint or facial detection set up on the phone. If the phone owner/user has not set up biometrics the app will default to the PIN for the phone (not the pin for the application).

Sign In Workflow
-
When you open the Bells Mobile Application for the first time
-
Bells will ask for your username/password credentials and the app will follow these steps if valid credentials are entered
- If you already have a Security Pin configured, continue to the app.
-
If you have not configured your Security Pin yet, the app allows you to define your Security Pin.
- Security Pin setup allows only alphanumeric inputs of 6 characters.
- The setup will ask you to confirm your pin by entering it again.
- If both the Pin matches continue to the app.
- If there is a mismatch, ask the confirmation Pin again.
-
Bells will ask for your username/password credentials and the app will follow these steps if valid credentials are entered
-
When you open the app where you've already signed in on a previous instance or the device is offline.
-
Bells will ask for the Biometrics if it is already enrolled, otherwise fall back to authenticate against Security Pin.
- If the device has biometrics enrolled and you authenticate using Face ID/Touch ID/Biometrics, continue to the app.
- If you cancel the biometric authentication, fall back to Security Pin verifications.
- If the device's biometrics is not enrolled, fall back to Security Pin verifications. On successful validation, continue to the app.
- If biometrics verifications / Security Pin verification is not successful, do not allow the user to access the app.
-
Bells will ask for the Biometrics if it is already enrolled, otherwise fall back to authenticate against Security Pin.
-
You open the app when the device is Offline
- The app should follow the steps defined in Step 2 above.
-
The app allows migration from App Pin to Security Pin.
- On app version update, the app migrates from App Pin to Security Pin.
-
When idle time-out occurred.
-
If the device's biometrics is enrolled, the app asks for biometrics authentication.
- If you cancel Biometrics authentication, the app fallbacks to Security Pin authentication.
- If the device's biometrics is not enrolled, the app validates you against the Security Pin.
-
If the device's biometrics is enrolled, the app asks for biometrics authentication.

Setup your App PIN
You will be prompted to setup a PIN for the Bells app on your mobile device.
This is a 6 digit PIN.
This PIN is for your mobile device. This is the PIN that will be used each time you access your account for Bells - Assisted Documentation.
Note: Your app PIN is different than the PIN you use to sign progress notes.
Note: The Bells mobile app will use the device's biometric by default. This can be your fingerprint or facial detection set up on the phone. If the phone owner/user has not set up biometrics the app will default to the PIN for the phone (not the pin for the application).

 myAvatar users: Service Types are called Service Codes and Enrollments are called Episodes. myEvolv users: Service Types are called Services.
Dashboard
Offline capable
The dashboard is the landing page for the mobile application. The dashboard can also be access via the home icon in the bottom left navigation menu bar.
In the top left corner you'll see your name and avatar. Tapping on your avatar will open the more menu.
More Menu
This section includes user settings, information about your account, terms of service for the user agreement and privacy policies, the version of the application installed to your device and the ability to sign out of the application.
Settings
Call Masking - This setting allows you to turn on and off Call Masking. Call Masking is the display of your device phone number when calling patients. When turned on, your device phone number will not display to the patient when you call them. When turned off, your device phone number will display to the patient when you call them. This setting may not show depending on the organization preference for Always Mask Calls. If you don't see this setting, the organization is set to always mask calls and your phone number will be masked when calling out from the Bells mobile application.
Automatically expand expansions - This setting allows you to control whether expansions automatically expand when you are entering text. You may find it especially helpful to disable automatic expansions if you are using speech-to-text in your mobile Scribbles.
Username - This displays the Username used to sign into the Bells - Assisted Documentation app.
Email - This displays the email address associated to the Username used to sign into the Bells - Assisted Documentation app.
Account ID - This displays the Account ID associated to the Username used to sign into the Bells - Assisted Documentation app.
Profile ID - This displays the Profile ID associated to the Username used to sign into the Bells - Assisted Documentation app.
Network ID - This displays the Network ID for the organization associated to your Username.
Zone - This displays the Zone that you access when signing-in to the Bells - Assisted Documentation app. You will see Prod as your access is linked to the Product environment for your organization.
Terms of Service
The Terms of Service section of the More screen in the Bells - Assisted Documentation app allows you to review the End User License Agreement and the Privacy Policy for the application. Clicking the blue hyperlinks will launch the separate documents for you to review.
Version
The Version section of the More screen in the Bells - Assisted Documentation app allows you to see what version of the application is on your device.
Sign Out
Clicking Sign Out on the More screen in the Bells - Assisted Documentation app prompts you to sign out of the application. The pop-up message will give you the option to Sign Out or Cancel the sign out function.
Dashboard
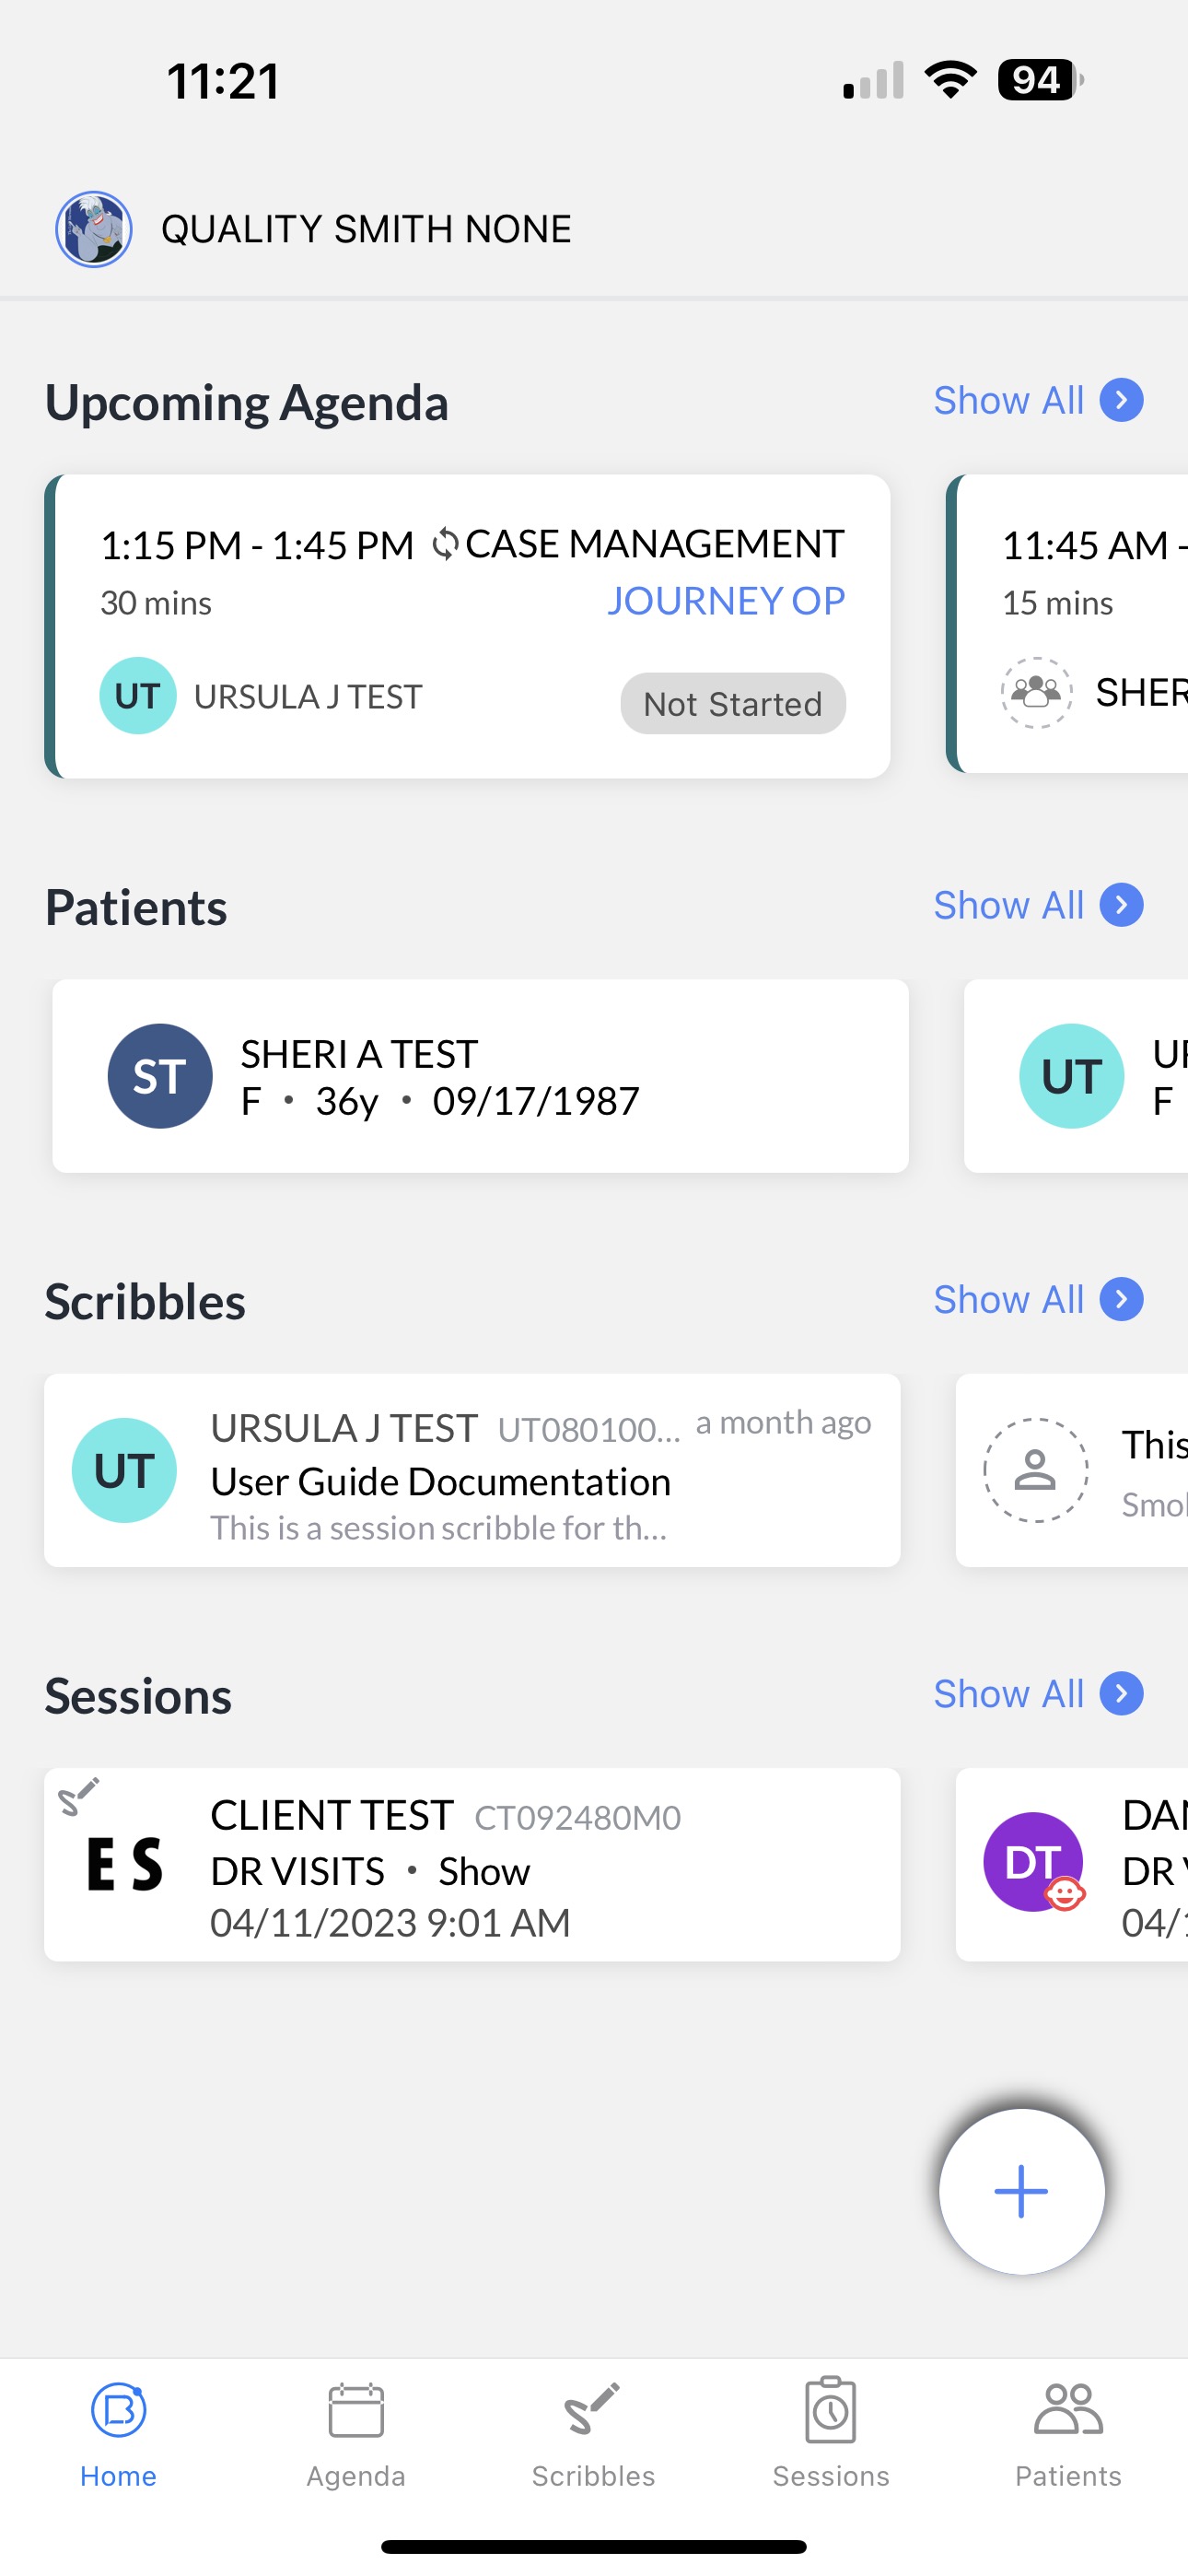
The Dashboard includes Upcoming Agenda appointment, recently viewed Patients, your Scribbles and Sessions.
Upcoming Agenda shows future appointments on your agenda. You can click the appointment card to view the appointment details or start sessions. Clicking Show All will take you to the agenda display in the mobile application.
 myAvatar and myEvolv users, if your organization is configured in the web to Hide No Show and Cancelled appointments then these appointments may be filtered out of the agenda display based on that configuration.
There is an organization setting in the web to allow sessions to be started from an appointment. If your organization has this configured on or has specific services configured you may not be able to start the session from an appointment.
Patients will show the patient card for last six patients you viewed on the mobile application. Clicking a patient under the Patients section will take you to that patients details. Clicking Show All will take you to the patient section of the mobile application.
Scribbles shows the last six scribbles you've written. Clicking a scribble card in the display will take you to that scribble. Clicking Show All will take you to the scribble section of the mobile application.
Sessions shows the last six scribbles you've created. Clicking a session card in the display will take you to view the details for that session. Clicking Show All will take you to the Session section of the mobile application.
If there are no details to show in any of the sections, we'll let you know there are no session, scribbles, patients etc. Additionally, the display at the top will give you the option to create a new session or scribble.
The + button in the bottom right corner will give you the option to create a new session or scribble.
Agenda
Offline capable
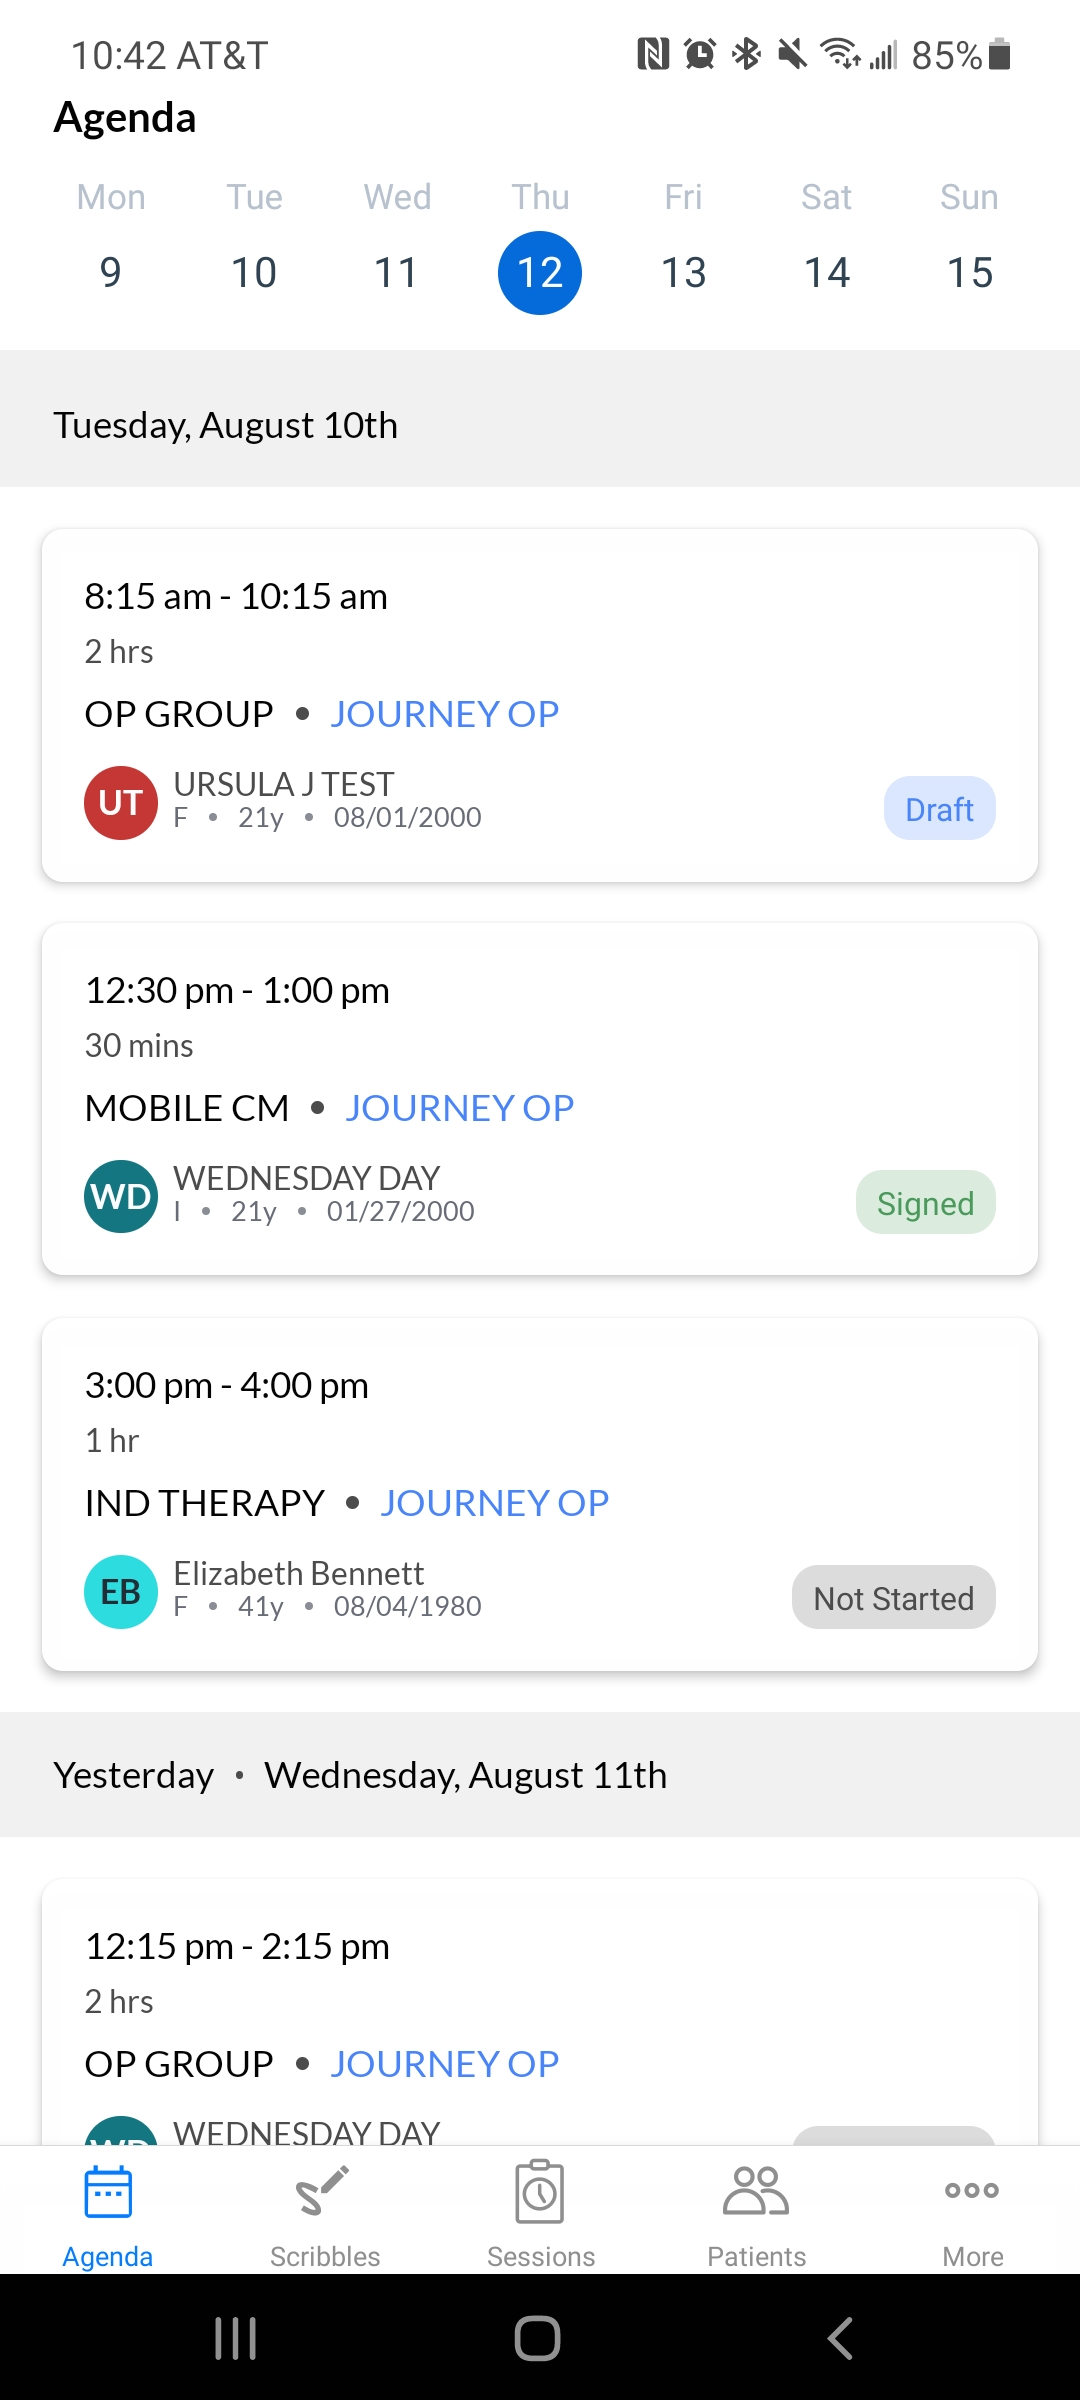
In the Agenda section in Mobile, you will see a scrollable display of your scheduled appointments.
If you have appointments scheduled, they will display in the Agenda section. If you do not have appointments scheduled, no appointments will display in the Agenda section. The appointment sync logic pulls appointment information from the EHR on sign-in to the mobile application for Bells. This means whenever you sign in, Bells pulls the appointment information.
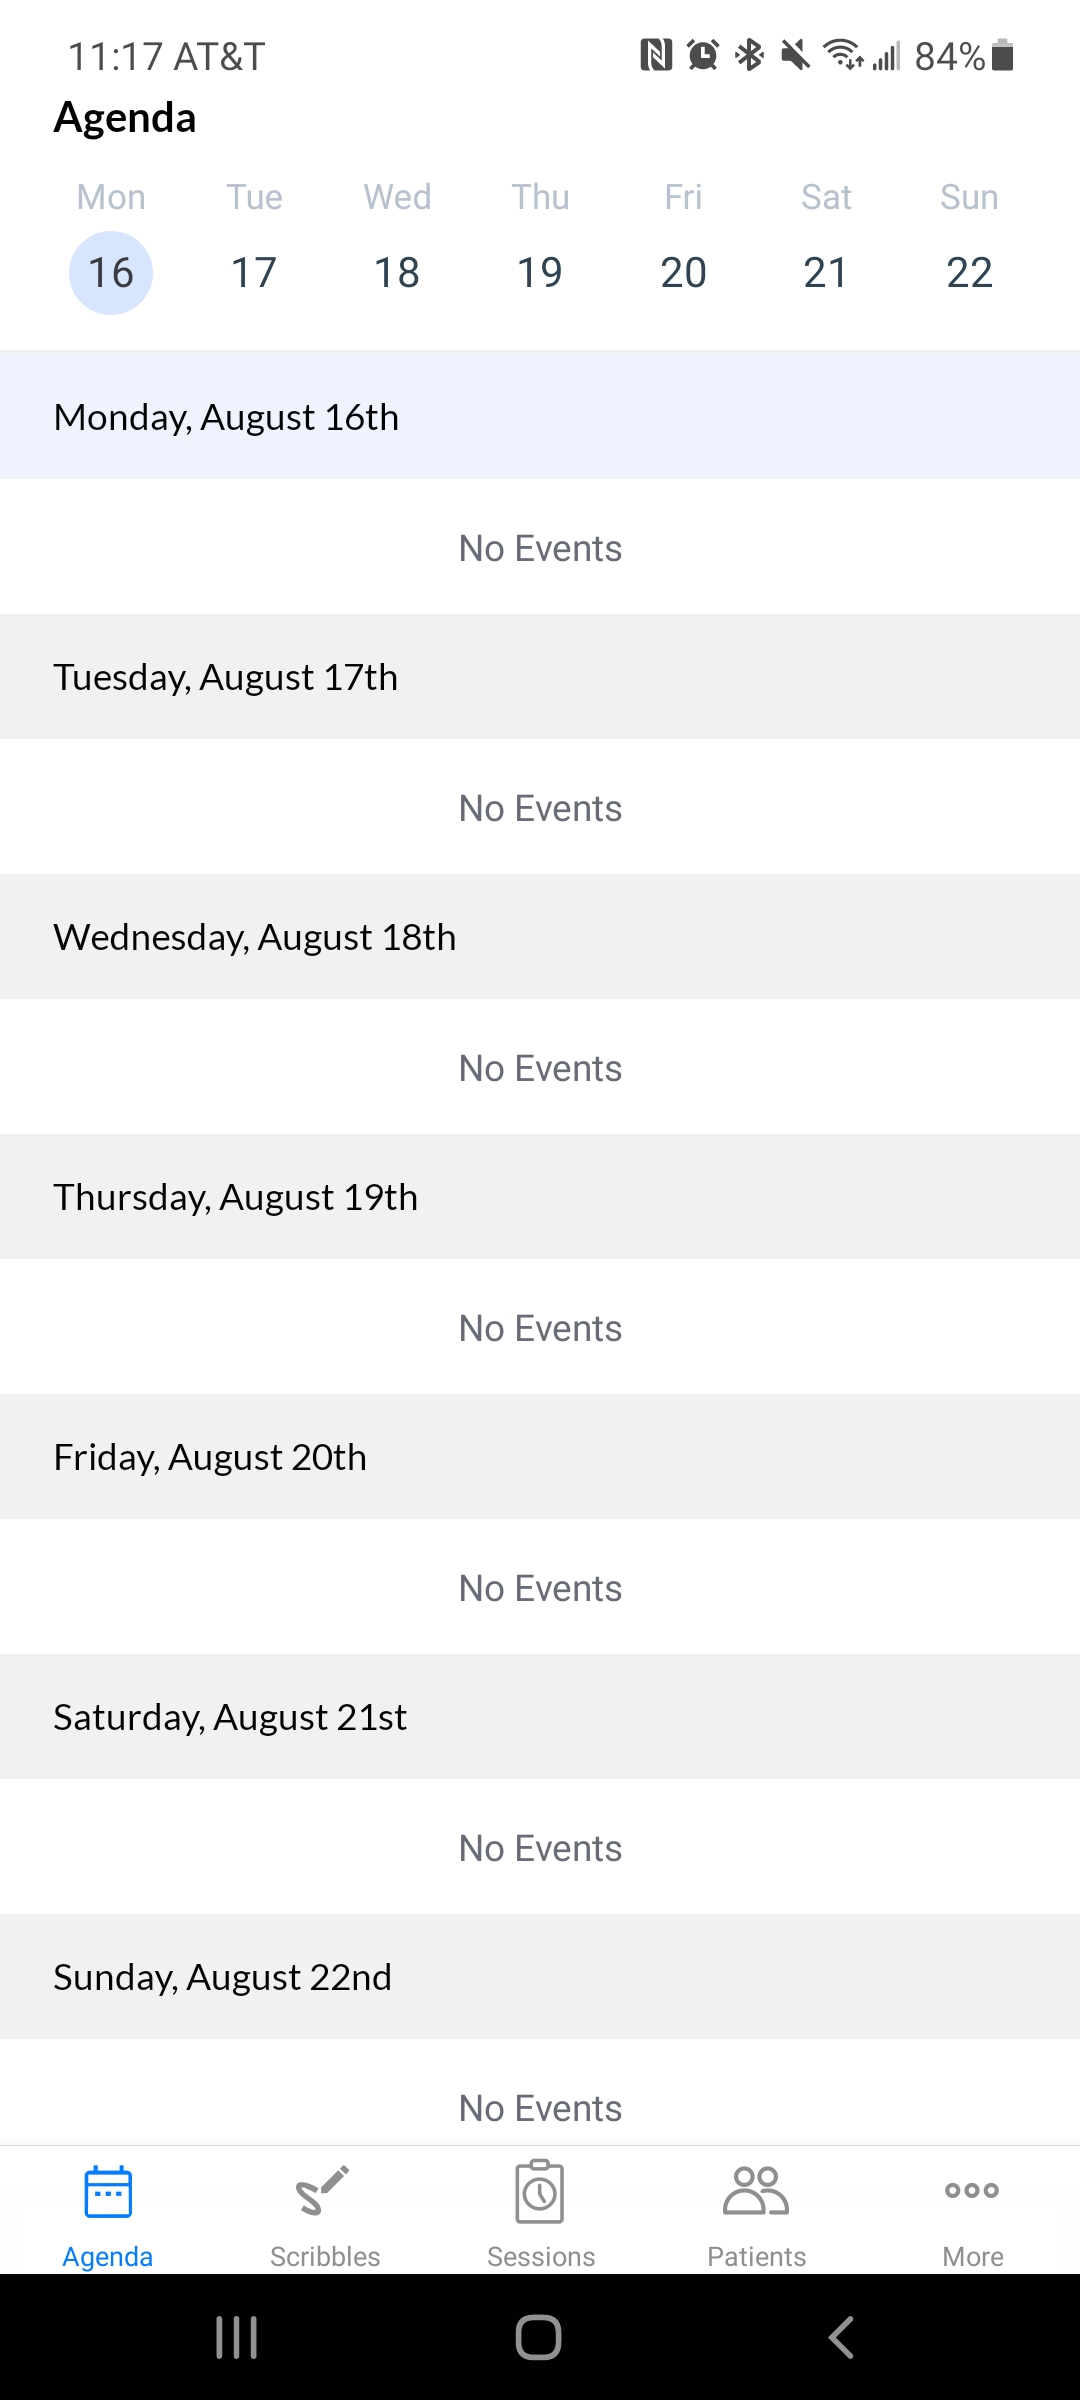
Clicking a date in the date bar will adjust the display to show the date selected. Additionally, the Today button will bring you back to the current date when you've scrolled to the past or future.
You can do a pull down on the display to resync your agenda.
The agenda display is grouped by date and will show the day of the week and Month/Day for the date of the appointment. The banner for the day that is selected in the date bar will be a light blue, other day banners will be gray.
For example, in the screenshot above, Monday August 16th is the selected date on the date bar and Tuesday, August 17th is not selected in the date bar.
The appointment card in the display will show the time of the appointment, the duration of the appointment, the service type for the appointment, the location set for the appointment, the patient(s) for the appointment and any additional staff for the appointment. If the appointment is for a group, the group icon and name will also display.
Each appointment card also shows a tag on the right side which indicates the status of the note/appointment.
Gray appointment tag indicates the note for the Appointment is Not Started.
Blue appointment tag indicates the note for the Appointment is a Draft.
Green appointment tag indicates the note for the Appointment is Signed.
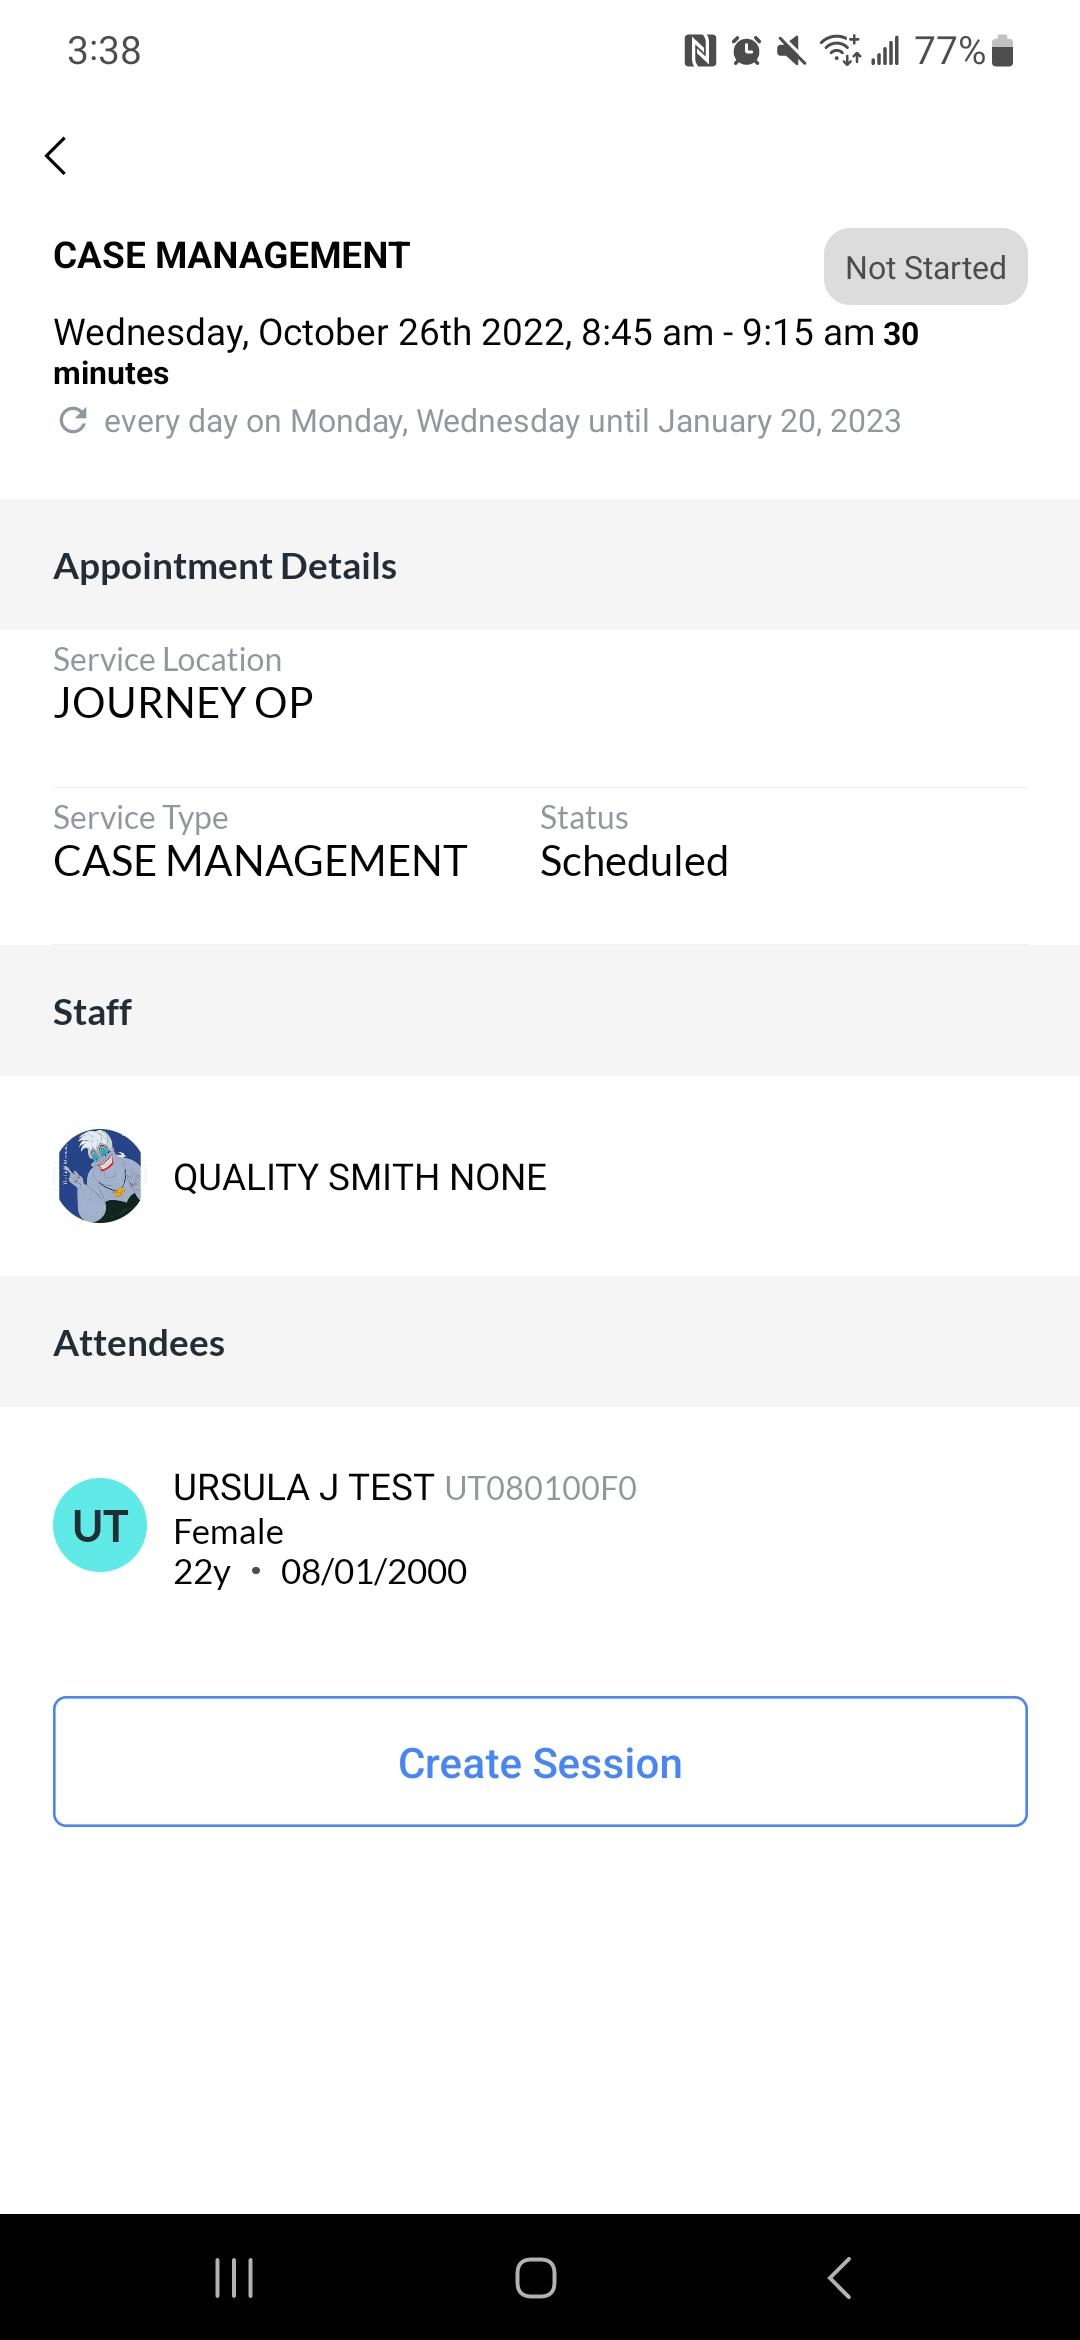
Clicking an appointment in the agenda display will display appointment details.
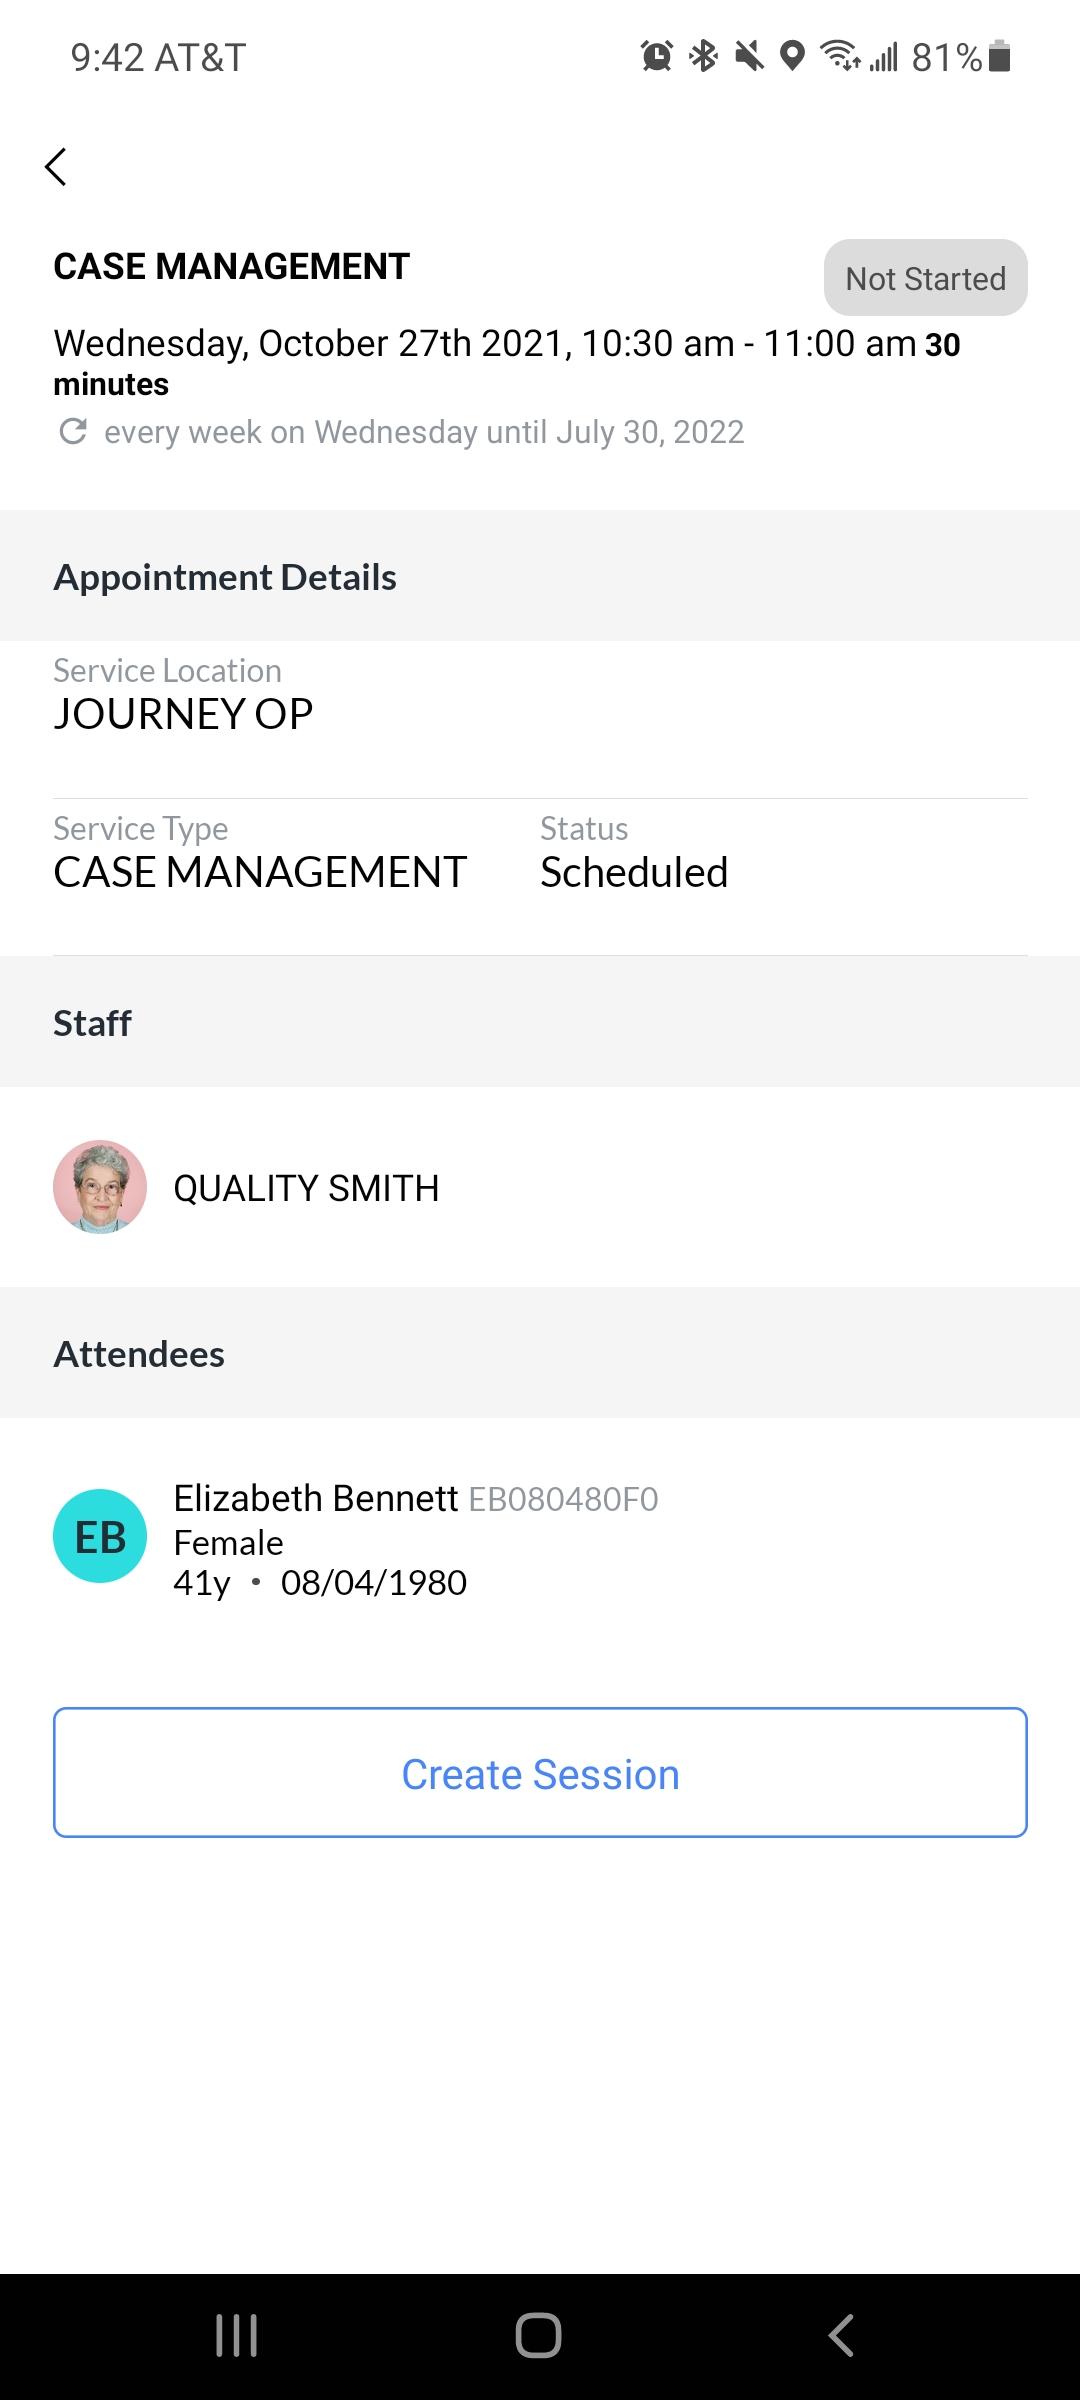
Appointment details include the service type, date, time and reoccurrence (if applicable), location, status, staff and attendees. If the appointment is for a group, the group icon and name will also display.
Additionally, users can create sessions in Mobile directly from an appointment in the agenda.
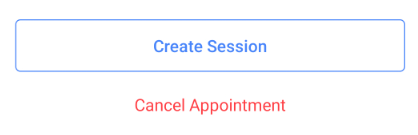
Clicking the Create Session button on the appointment details will launch the same Session workflow that mobile users have used previously in the Bells app.
Appointment details will be defaulted in the Session, saving you time from having to enter the information again for the Session.
If a session for the appointment has already been started or Signed you can View the Session.
All functionality of the sessions from an agenda appointment is existing functionality that we already used as part of Mobile Sessions. (See below in the Sessions section for more details).
myAvatar and myEvolv users will also have the ability to cancel appointments in Bells mobile. An additional option for "Cancel Appointment" will display. This will mark the appointment as cancelled in the mobile, web and EHR applications. The status and reason selected will show in the appointment details.
If the appointment from myAvatar/myEvolv does not include an episode/enrollment, the create session button will be disabled and a message below will show to explain why.
myAvatar and myEvolv users, if your organization is configured in the web to Hide No Show and Cancelled appointments then these appointments may be filtered out of the agenda display based on that configuration.
There is an organization setting in the web to allow sessions to be started from an appointment. If your organization has this configured on or has specific services configured you may not be able to start the session from an appointment.
Scribbles
Offline capable
Scribbles in the Bells - Assisted Documentation app are very similar to Scribbles in the Bells web app. You can access your patient and non-patient scribbles, format text and use Drop-Ins and Expansions, including organization level drop-ins and expansions. Images can also be added to the scribbles in the mobile application. Scribbles are completely functional when connected to the internet or offline.
Scribbles written in the mobile app will automatically sync over to the web application and be available to use and reference when reviewing patients or writing progress notes.

At the top of the Scribble display you will see a pill-style toggle for Personal and Shared.
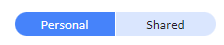
- When toggled to Personal, your personal (non-shared) scribbles will show.
- When toggled to Shared, the Scribbles you've shared or the Scribbles that have been shared with you will show.
Scribbles can be shared and edited via the web. In the mobile application shared scribbles are read-only.
Scribbles that are archived in the web will not show in the mobile application.
Formatting Text
Formatting Text Bells gives you several text formatting options. You can acces...
Text Formatting
Bells gives you several time-saving text features for adding text to scribbles and progress notes.
You can access these features in several ways:
- via a Formatting Bar
- Action commands
Formatting Bar
The Formatting Bar is visible at the bottom of your text editor in
- Drop-Ins
- Scribbles
- Progress Notes
Examples:


Using items on the formatting bar is easy - simply click the tool and start typing! You can also select text and click the tool to apply the feature to the selected text.
| Undo | |
 |
Bold |
 |
Italic |
 |
Heading (larger font, bold) |
 |
Strike-through |
| Highlight | |
 |
Numbered list |
 |
Bulleted list |
 |
To-Do/Task list |
 |
A T@g, which allows you to select a member of the patient's care team if a patient is associated with the text you're editing |
 |
Drop-ins |
 |
Add to dictionary |
 |
Turn on native language mode |
| Speech to Text |
You can quickly access bulleted and numbered lists by:
- Putting your cursor on a new line
- Typing * (bulleted list), - (bulleted list) or 1 (numbered list)
- Hitting the space bar
Your list will start and if you hit enter you can continue the list on each new line.
When you wish the list to stop, hit your backspace key.
MOBILE: The mobile formatting bar also has an option for selecting Drop-Ins. This will include any drop-ins that have been shared. This includes drop-ins with the options placeholders which allows you to make selections from configured values set up in the web.
Actions
Actions save you time by allowing you quick access to functionality in a few keystrokes.
Use Actions to access
- Drop-Ins
- A Date Picker
- T@gs
- A Bulleted List
- A Numbered List
- A Task List
/ Commands
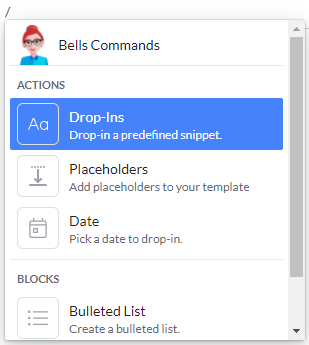
The slash ( / ) command allows you to access Actions.
As soon as you type a /, the menu of actions appears:
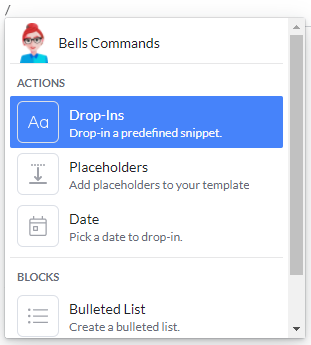
You can use your arrow keys or click on the action you want.
MOBILE: / Commands are not available on Mobile. Drop-ins are available via the  toolbar.
Drop-Ins
Previously named Text Snippets - Drop-Ins are configured in your User Settings, a Drop-In is a pre-defined set of text that is inserted when you select it.
To use a Drop-In
- Select Drop-In from the Actions list
-
Your list of Drop-Ins appears:

- Select the specific Drop-In you want to insert.
- If you change your mind, you can use ctrl-Z (Undo) to remove the Drop-In.
Tip: You can also access Drop-Ins directly by using the ~ key, located in the top left of your keyboard just under the esc key. Once you type ~, you'll be taken directly to your list of Drop-Ins.
Placeholders
Placeholders allow you to set up parts of a sentence that can be altered by the application based on the patient or user for the progress note template or drop-in being used. Placeholders can also be added into the custom note section configuration.
Placeholders can be access by typing $ followed by the placeholder text or via the / command menu.
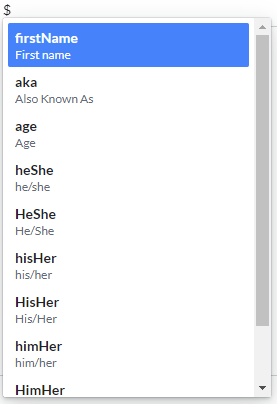
As part of drop-ins, you can set up a singlechoice or multichoice placeholder. This placeholder lets users configure options to select within a drop-in. These drop-ins can then be used in scribbles, templates and progress notes, as well as on the Mobile application.
Available Placeholders in Bells
- First Name - Shows the patient's first name with the first initial capitalized and the rest of the text lower case
- Last Name - Shows the patient's last name with the first initial capitalized and the rest of the text lower case
- Also Known As - Shows the patient's AKA or nickname
- Age - Shows the patient's age
- he/she - sets the appropriate pronoun in lower case based on the patient's gender
- He/She - sets the appropriate pronoun in upper case based on the patient's gender
- his/her - sets the appropriate pronoun in lower case based on the patient's gender
- His/Her - sets the appropriate pronoun in upper case based on the patient's gender
- him/her - sets the appropriate pronoun in lower case based on the patient's gender
- Him/Her - sets the appropriate pronoun in upper case based on the patient's gender
- Guardian - shows the patient's guardian
- Single Choice Placeholder - lets users configure options to select within a drop-in.
- Multiple Choice Placeholder - lets users configure options to select within a drop-in.
- Patient Noun - inputs the patient label substitution configured in organization settings.
- User - shows the logged in user.
- User Role - shows the configured User Role for the logged in user.
- Patient Street - shows the patient's street portion of their address.
- Patient City - shows the patient's city portion of their address.
- Patient State - shows the patient's state portion of their address.
- Patient Postal Code - shows the patient's postal code portion of their address.
- Patient Home Phone - shows the patient's home phone (where applicable).
- Patient Work Phone - shows the patient's work phone (where applicable).
- Patient Mobile Phone - shows the patient's mobile phone (where applicable).
- Patient Gender - shows the patient's gender.
- Patient Email - shows the patient's email (where applicable).
- Location - shows the Location selected for the note.
- Place of Service - shows the Place of Service selected for the note (where applicable).
Date Picker
The Date Picker allows you a quick view to a calendar so you can quickly pick a date that is yesterday, today, next week, or whenever you want.
To use the Date Picker:
- Select Date from the Actions list
-
The Date Picker appears:

- Select the date you want or use the arrows to change the month or year as necessary.
- The date shows in colored text and if you move your mouse over it, the pointer changes to a hand. That is your cue that it's from the date picker.
- You can click on a date from the Date picker and the Date picker will appear.
- If you change your mind, you can use ctrl-Z (Undo) to remove the Date you inserted.
T@gs
Previously named Mentions - T@gs allow you to quickly select a member of the patient's care team. If your text field is not associated with a patient, T@gs will tell you that you have to have a patient to see T@gs.
To use T@gs:
- Select T@gs from the Actions list
-
The T@g list appears:

- Select the person from the list.
- If you change your mind, you can use ctrl-Z (Undo) to remove the T@g you inserted.
Tip: You can also access T@gs directly by using the @ key. Once you type @, you'll be taken directly to your list of T@gs.
Note: T@gs will not display on notes that sync to CT|One as part of the progress note, or in the printout of the note in CT|One.
MOBILE: T@gs are not available in Mobile.
Bulleted List
Select this option to start a Bulleted List.
To use Bulleted Lists:
- Select Bulleted List from the Actions list
- Start typing your list.
- If you change your mind, you can use ctrl-Z (Undo) to remove the Bulleted List you inserted.
- Every time you type return to start a new row, your list continues.
- When you are done with your list, press return followed by the backspace key to end the list.
Tip: You can also access Bulleted Lists directly by typing a * or - on a new line. Once you type * or - and hit your tab key, the list begins.
Numbered List
Select this option to start a Numbered List.
To use Numbered Lists:
- Select Numbered List from the Actions list
- Start typing your list.
- If you change your mind, you can use ctrl-Z (Undo) to remove the Bulleted List you inserted.
- Every time you type return to start a new row, your list continues.
- When you are done with your list, press return followed by the backspace key to end the list.
Tip: You can also access Numbered Lists directly by typing a 1 on a new line. Once you type 1 and press your tab key, the list begins.
To-Do/Task List
Select this option to start a Task List.
To use Task Lists:
- Select Task List from the Actions list
- Start typing your list.
- If you change your mind, you can use ctrl-Z (Undo) to remove the Task List you inserted.
- Every time you type return to start a new row, your list continues.
- When you are done with your list, press return followed by the backspace key to end the list.
Tip: You can also access To-Do/Task Lists directly by typing [ and ] on a new line. Once you type [] and press your tab key, the list begins.
Text Expansions
Configured in your User Settings, Text Expansions are a way to automatically expand a few letters into longer text.
Some examples:
- IPO = In the presence of
- BP = biological parent
- RH = Remarkable Health
- FH = Foster Home
Key features:
- Automatic
- Can be enabled/disabled
- Available in Scribbles and Progress Notes
- Available on the Mobile app
To use a Text Expansion,
- Type the name of the expansion (such as IPO, BP, etc)
- Once you type a space after the last character of the name of the Text Expansion, your text is automatically expanded to the full text of the Text Expansion (such as In the presence of)
-
If you want to undo the Text Expansion,
-
Click the dotted lines under the Text Expansion and click Undo.
 -OR-
-OR-
- Type Ctrl-Z to Undo the Text Expansion.
-
Click the dotted lines under the Text Expansion and click Undo.
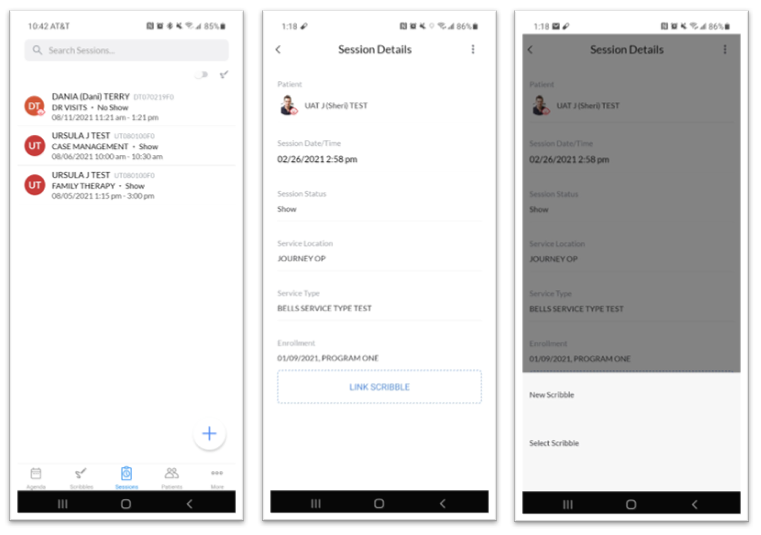
Scribbles can be linked to a session which allows you to set Progress Note details while using the Bells - Assisted Documentation app, these details include Session Date/Time, Session Status, Location, Service Type and Enrollment.
 Clicking the new sessions icon in the top right corner of a patient linked Scribble will start the session workflow, allowing you to select a new or existing session to link to the scribble.
When a Scribble is linked to a session the scribble card will show the session icon.
The color of the icon depends on the note status of the Session linked to the Scribble.
Gray session icon indicates the note for the Session that is linked to the Scribble is Not Started.
Blue session icon indicates the note for the Session that is linked to the Scribble is in Draft.
Green session icon indicates the note for the Session that is linked to the Scribble is Signed.
The Scribbles section of the Bells - Assisted Documentation app also includes a toggle to show scribbles that are linked to a session.
Scribbles can be deleted when swiped left or right from the Scribble list display. When swiped and the delete is selected, you will be prompted if you're sure that you want to delete. This prompt will also note if there are images attached to the scribble being deleted.
Scribbles in the mobile application can utilize option placeholder drop-ins. These drop-ins allow users to make selections as part of the drop-in from a list of configured values from the web application.
You can attach images to your Scribble in the mobile application or you can take images directly from within Bells. Images taken with Bells do not store in your device's photo library so it's completely HIPAA compliant.
Optical Character Recognition (OCR)
Optical Character Recognition (OCR) allows you to take the text that is in an image, like when you snap a photo of your patient's medication bottle or doctor's note and put that text into your Bells Scribbles and Progress Notes.
When you view an image on the scribble, there is a blue button below the image for "Get Image Text".


When clicked, the text that can be detected in the image gets added to your Scribble with the heading "Image Text". From there, the text can be used as reference or inserted into a note from the Scribble just like all other Scribble text does today.
Sessions
Offline capable
Sessions allow you to set Progress Note details while using the Bells - Assisted Documentation mobile app. These details include Session Date/Time, Session Status, Location, Place of Service, Service Type and Enrollment.
The Sessions section of the navigation bar at the bottom of the Bells - Assisted Documentation app will show all Session records that you've created in the application. The name of this section is configurable in the Bells web app by your organization's administrator via organization Preferences in Settings. The label used for Sessions will be the label that is used to name this section and the icon in the Bells - Assisted Documentation app.
Tapping the Sessions icon in the lower navbar will show all Session records that you've created in the mobile application:
If the session is associated to an appointment the display will include a calendar icon.
Session Details
Tapping a Session will allow you to edit your session. Once reviewed, you can see the Session Details.
Adding a new Session
Tapping the + icon allows you to add a new Session
You can link your Session to a patient as well as set the session date/time and the patient show status.. You also have the option to link the session to a new or existing scribble. Once a session is tagged to a patient the patient cannot be untagged while the session is linked to a scribble.

Once created, these sessions will be available in the Bells web app for you to add details to the progress note such as session time, diagnosis, goals/objectives and finish the note.
Sessions can be started on their own, or can be started from within the Scribble on the Bells - Assisted Documentation app.
The Sessions section of the Bells - Assisted Documentation app also includes a toggle to show sessions that are linked to a scribble.
Selecting a session anywhere in the mobile application (Dashboard or Session sections) allows you to edit the session information. When tapped you will see the first display of the session workflow, then can tap to save and continue.
Signatures on Sessions
If your Bells administrator has configured signatures to be allowed in Mobile, when completing a session you'll find a button for “Signature”. Signatures can be configured to be available under Organization Preferences in the Web.
When you've entered all the details in your session and complete the session, there's a button for Signature. When tapped the mobile signature configuration for the session displays. Once configured, the Save and Continue button will enable and then the patient/additional attendees can sign on the mobile device.


After signatures are applied, they'll show as part of the Session. The session card on the dashboard will also show with a signature icon indicating that signatures are applied. If the session needs to be edited, the signatures will be cleared, since the details were signed off on by the patient/attendees. Any changes to the session will require the patient/additional attendees to resign.


Signatures captured in Mobile sync to the web as part of the Session to then apply to the progress notes and continue through the note flow as you have come to expect.
Patients
Offline capable
The Patients section of the Bells - Assisted Documentation app will show all active and inactive patients for your organization.
In the Patient section, you can search for a patient to pull up that patient's chart or details, search through the list of patients to find the patient you're looking for and narrow the list to just your patients to find the record you'd like to see.
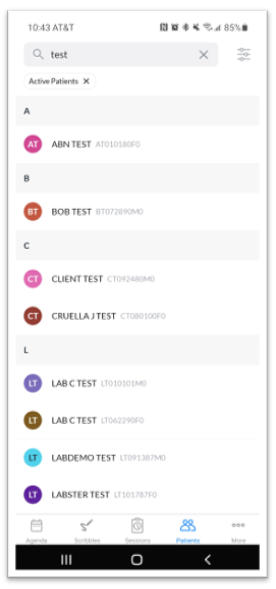

The Patient Search lets you search for patient based on the same criteria allowed in the web application. This includes Patient ID/MRN, Date of Birth, Last Name, Initials, Partial search and Phone number.
The Active Patients toggle - similar to the web application, will toggle the list of patients in the Patients section to just the Active patients.
The My Patients toggle - similar to the web application, will toggle the list of patients in the Patients section to just the patients you're Managing Therapist or a Care Team Member for in CT|One. This toggle is turned on by default but can also be additionally controlled through the User Management section of the Web application to be displayed or not.
myEvolv users, the toggles you see on the Patient section will align with the patient toggles you have available in the web. This includes All Patients, Direct Assigned and Workgroup. These toggles have the same behavior as they do in the web.
 Clicking the filter icon to the right of the search bar will also show you the toggles present for the patients section.
 Important: This list respects any Client Restrictions that are configured in CT|One.
Patient Population Management
The patient list in Mobile respects the added functionality and configurations for Patient Population Management, including the "Break the Glass" functionality. Please refer to the Patient Population Management article for more information.
Patient Details
Offline capable
Clicking on a patient in the list or after searching will take you to the chart or details for the selected patient. The patient details screen in the Bells - Assisted Documentation app shows the patient's full name, including First Name, (AKA/Nickname), Middle Initial and Last Name. You will also find additional details like the PatientID, Gender, Age and Birthdate. If the patient has an image saved it will be displayed on the right side as well as the minor indicator if the patient is under 18 years of age.
Contact information for the patient will display including phone number(s), address(es), email addresses and emergency contact information.

After Patient Contact Info is the Documentation section.
The Documentation section can be reordered or have section filtered out by long pressing on the Documentation header. This will open a Customize Patient Section display.

Users can remove and drag/drop sections in the display to change how they show for them in the mobile application.
Additional sections of the Patient Details are Episode/Enrollment and Program, Diagnoses (Problems), Treatment Plan, Scribbles and Progress Notes.
The Patient's Episode/Enrollment and Program show first in the details. Depending on your EHR the labeling will be different but aligns with the patient side bar in the web application.
- For myAvatar users the label shows as Episode and includes the program and date.
- For myEvolv users the label shows as Program and includes the program name and date.
- For CT|One users the label shows as Enrollment and includes the enrollment date.
If the Patient is assigned to any Clinical Pathways they will show after the Enrollment section under Patient Details, before Diagnoses.

 myAvatar and myEvolv: The problem for each goal in the Treatment plan, as shown in the following example:
The Problem label in the mobile application respects the organization preference in the web.
 For GEHRIMED users, the treatment plan section will not display in the Patient Details section.
Clicking on one of the progress notes in the Progress Note section will open that progress note. You can open and review Draft or Signed notes. If the note is a draft note you will not be able to edit it in the Bells - Assisted Documentation app.
Additionally, there is a section for Appointments. In this section, you can see all the past and upcoming appointments for the selected patient, as well as the note status for that appointment. Clicking on an appointment card in the mobile app will let you start a session for that appointment.
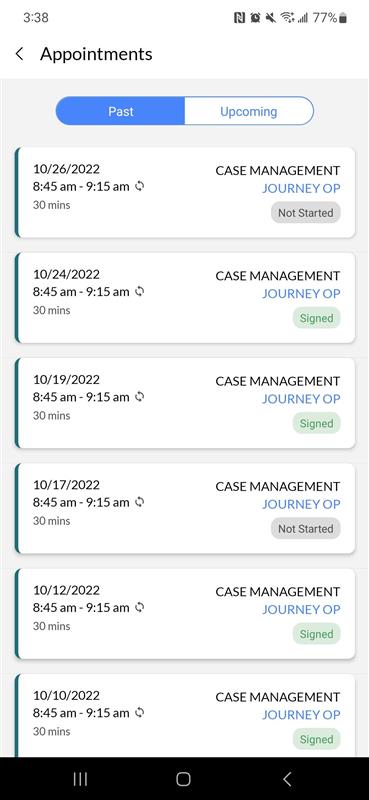
myAvatar and myEvolv users, if your organization is configured in the web to Hide No Show and Cancelled appointments then these appointments may be filtered out of the agenda display based on that configuration.
There is an organization setting in the web to allow sessions to be started from an appointment. If your organization has this configured on or has specific services configured you may not be able to start the session from an appointment.
Application Lockout
The default lockout is 30 minutes. If you put the phone to sleep, when you return to the phone you will have to enter your biometrics or the app pin. The Session Time-Out is controlled by the Organization Preference in the web application.
There are a few settings/details that drive the timeout/lock down functionality for Bells mobile.
- The Web organization preference drives the session timeout timeframe. This is when the application will force the biometrics check or pin to be used to get back into the mobile application.
- There is also a 24 hour timeframe that is forced to revalidate a user by requiring their EHR credentials.