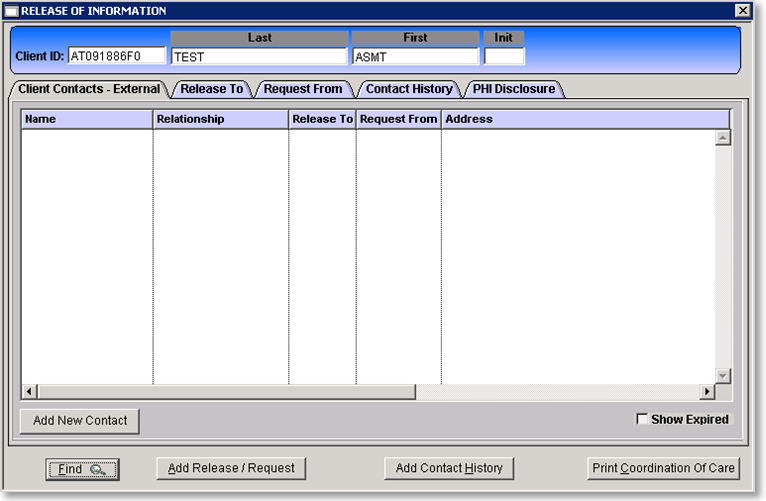
The Release of Information window records and displays the client’s approved contacts and a history of the protected health information (PHI) that has been released to or requested from a contact. The requested documentation on a signed Release of Information can be printed directly from this window.
Add a Contact
Prior to entering a Release To or Request From a client contact is required. The client contact is the individual or entity that will be receiving or providing the client’s information.
- Click the Add New Contact button.
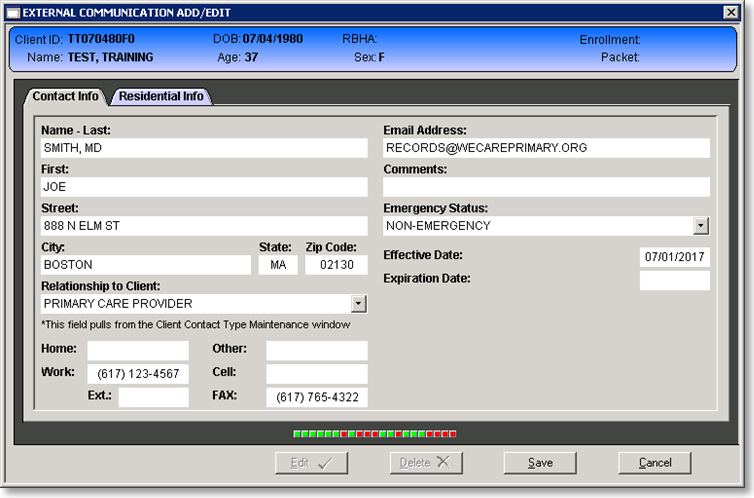
- The External Communications window presents.
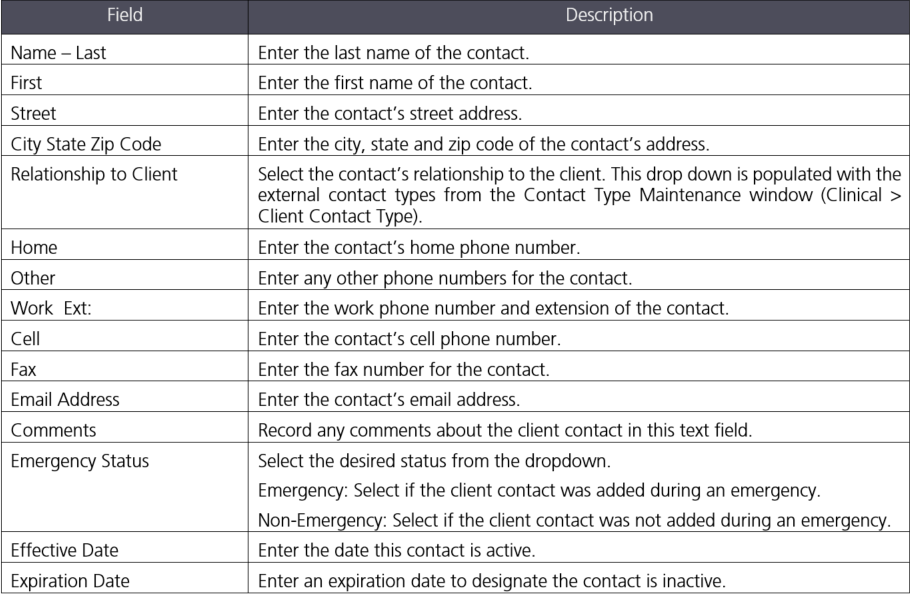
- Complete the Contact Info tab of the External Communications window.
- Complete the Residential Info tab if applicable.
- Click Save.
The Residential Info Tab is used to designate types of communication and any restrictions for that communication for a client in a residential or inpatient setting.
Click the checkbox for a listed communication method to indicate the client is approved for that item. Additionally the communication methods can be limited to a designated number of hours.

Add Release / Request
Once the contact is entered a release and/or request can be created and documented.
- Click the Add Release / Request button.
- Prompt presents to select from the list of contacts, select the appropriate contact.
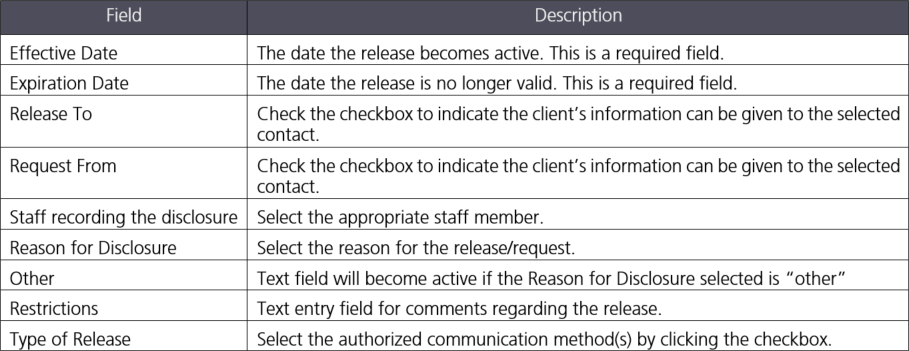
- The Release of Information window presents. The Last and First Name, address, Phone and Fax fields will populate with the information entered on the contact record.
- Complete the Contact Info tab.
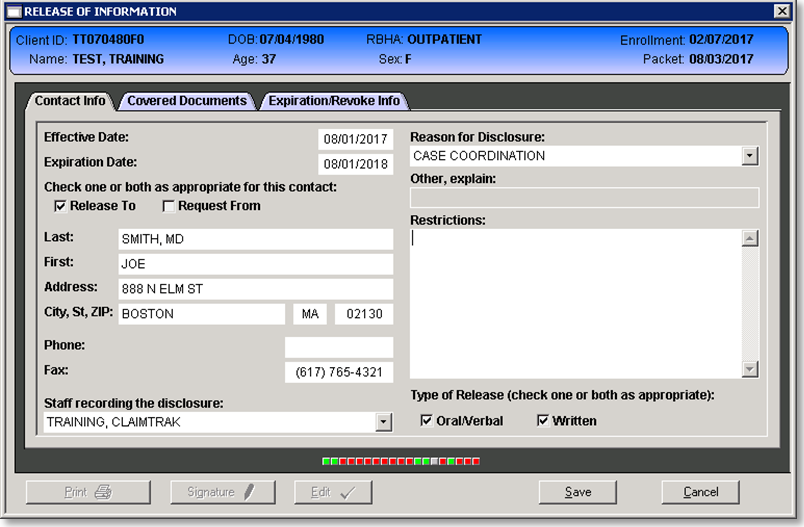
- Complete the Covered Documents Tab by selecting the authorized documents for the Release and/or Request. Hold the CTRL key to select multiple documents.
- Click Save.
- The Finalize Form window presents; enter the Staff ID and PIN to complete the form.
Printing Authorized Documents
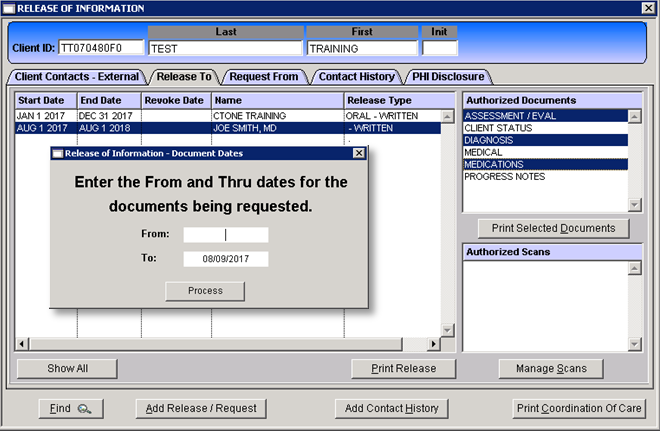
Printing of the authorized documentation can be completed from the Release To tab of the Release of Information window.
- Select the release from the list on the Release To tab.
- Select the document(s) to be printed from the Authorized Documents list.
- CTRL + A = selects all
- CTRL + click = selects multiple
- Click Print Selected Documents.
- Enter the date range to be printed. The To date will populate with the release expiration date.
- The selected documents will present in the pdf viewer window. Print to paper or save to a file as needed.
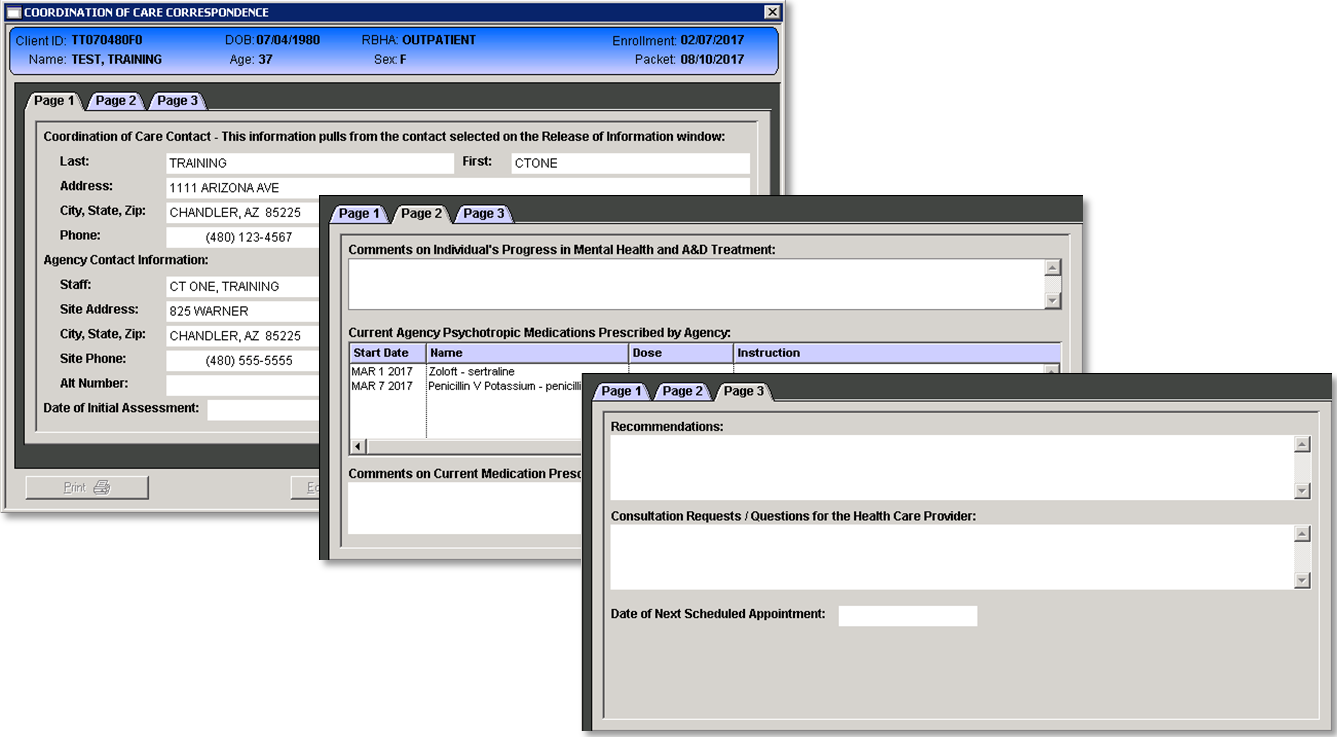
Print Coordination of Care
The coordination of care form is a system generated form that can be used for sharing basic client information. Most fields on this form will auto populate with the client’s information. Enter the appropriate information in the remaining fields as needed.