There are several reasons a claim would need to be voided such as the claim was created for the wrong client or the wrong provider. The correct steps for maintaining accurate financial records depends on whether the claim was submitted and/or it was paid.
Add a Claim Comment
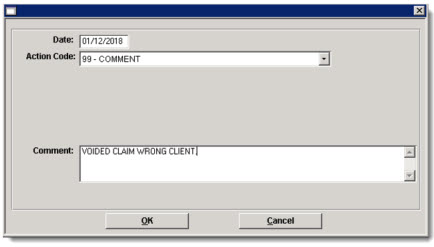
It is best practice to add a comment documenting the reason for the void for historical purposes and auditing.
1. Locate the claim using the Claim Search Advanced (Billing > Claims Search > Advanced) or the Claims tab of the Client Master.
2. Right click on the claim(s) to open the action menu.
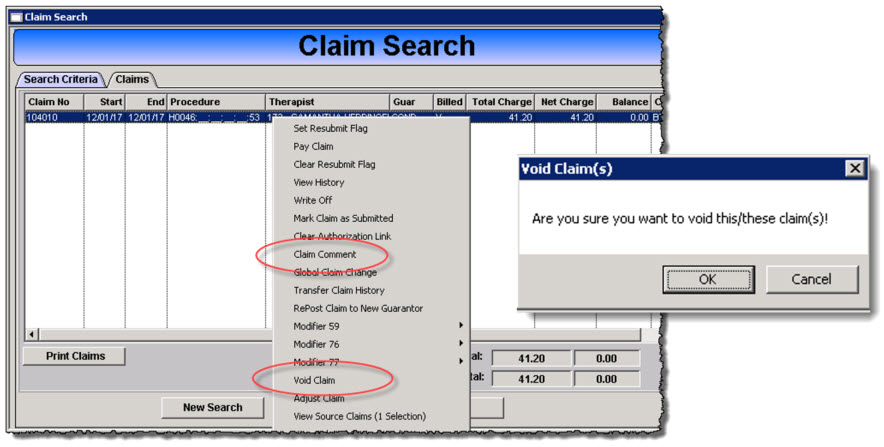
3. Select Claim Comment.
- Enter the date.
- Select the appropriate comment action code.
- Enter the reason for voiding the claim in the Comment section.
4. Click OK.

Zero the Claim Charge
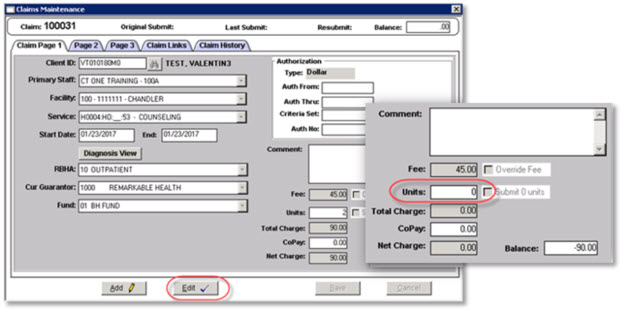
Editing the claim can be completed from the claims Search Advanced or the Claims tab of the Client Master.
1. Locate the claim using the Claim Search Advanced (Billing > Claims Search > Advanced) or the Claims tab of the Client Master.
2. Double click the claim to open it.
3. Zero out the charge. This step is required to keep financial reporting accurate.
- Click Edit.
- Change the Units value to zero, this will change the charge to $0.00.
- Click Save.

Mark Claim as Submitted
The action of marking a claim as Submitted can be completed from the claims Search Advanced.
1. Right click on the claim
2. Choose Set Resubmit Flag from the menu
3. A "Y" will be placed in the Billed column, noting the claim is marked as submitted
Multiple claims can be selected at the same time by holding down the Shift key (for continuous multiple claims) or the Ctrl key ( to select random claims), while clicking on the claims to be marked for resubmission. Then right click on the highlighted area.
Void the Claim
Voiding of the claim is completed using the Claims Search Advanced (Billing > Claims Search > Advanced) window.
Note: Don’t forget to first add a claim comment.
1. Right click on the claim to open the action menu.
2. Choose Void Claim from the menu.
3. A verification prompt presents, click OK to complete the void.
