
Explanation
Group notes can be quickly and efficiently written from the Staff Home window. The group note entry process allows for single entry of the common group documentation which then carries through to each client’s individual progress note.

Step by Step Instructions
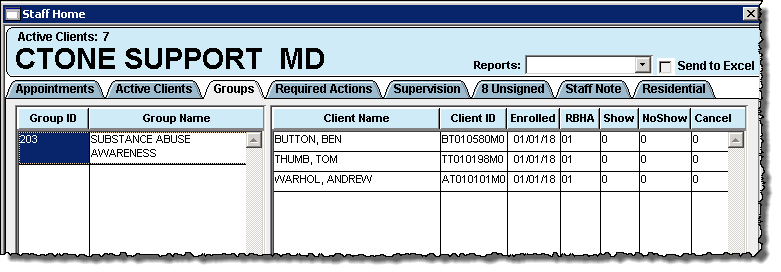
1. Open the Staff Home window. Click the Staff Home icon.
2. Open the Group tab.
Note: If you do not have the Group tab on your Staff Home window contact your supervisor or agency administrator to be added as a group facilitator.
3. Double click the Group name.
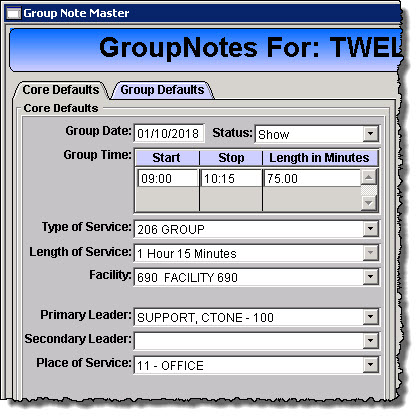
4. Complete the Core Defaults tab. Depending on your agencies configuration some or all of the fields may auto-populate but can be changed.
Group Date: The date the group occurred.
Group Time: The start and stop time of the group session.
Type of Service: Select the type of service for the group.
Length of Service: Populates based on the entered start and stop time.
Facility: The facility where the group session occurred.
Primary Leader: The primary group session facilitator.
Secondary Leader: Additional provider that participated in the group session.
Place of Service: Select the location where the group session occurred.
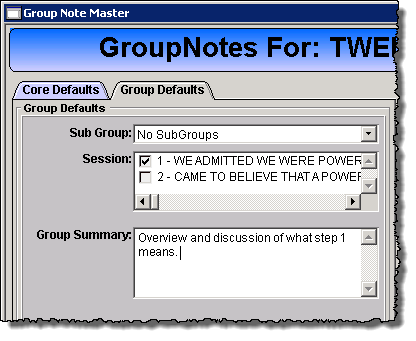
5. Complete the Group Defaults tab. The subgroup and sessions may not be required, follow your agency policy and protocol.
SubGroup: Select the subgroup for the group session.
Session: Check the checkbox to include the session text in the progress note.
Group Summary: Enter the group session clinical documentation. This documentation will pull into each client’s progress note.
6. Double click on each client in the Group Members list to open and enter the individual client content in the progress note. If a client was present and is not on the list use the Add Client to find the client.
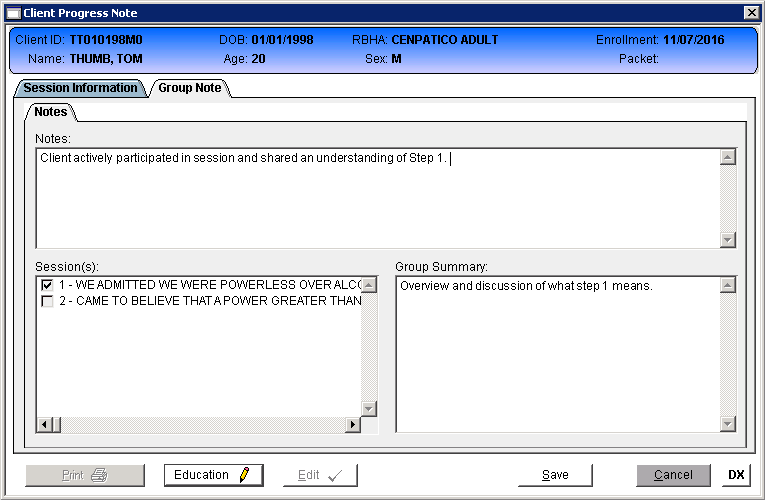
7. When the progress note is signed the client name will move to the Signed Notes section.