To import and attach an image into the CT|One application it must be in the form of a PDF. Images can be imported via the Client Referral, Client Master and Client Chart windows. There are two ways to import a PDF file; Drag and Drop and Import From File.
For hosted agencies to use the drag and drop and import from file options the PDF scan must first be transferred to the Hosted CT|One environment. RDP copy/paste, RDP browse local folders or internet download (requires agency IT setup) are available transfer options.
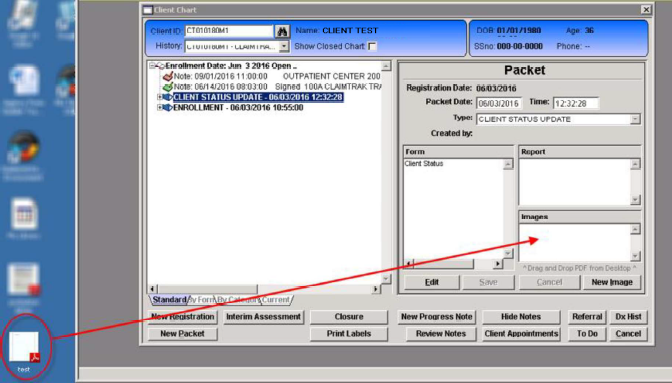
Drag and Drop Method
This method can only be used in the Client Chart and the PDF document must be accessible by the user in the hosted session.
1. Choose the PDF destination by highlighting the appropriate packet.
Note: If the Images pane is not visible ensure a packet is selected and not the enrollment.
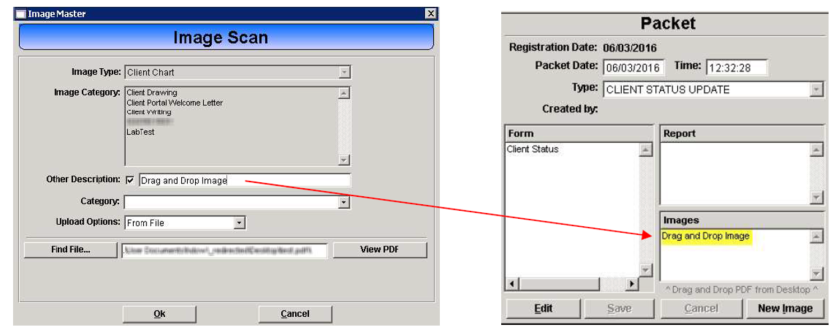
2. Locate the PDF, left-click and drag the PDF to the Images pane of the Packet window.
3. The Image Scan window will present.
a. Select an Image Category or check the Other Description checkbox and enter a description for the image.
b. Select the desired Category from the drop-down.
c. The Find File field will auto-populate.
4. Click OK.
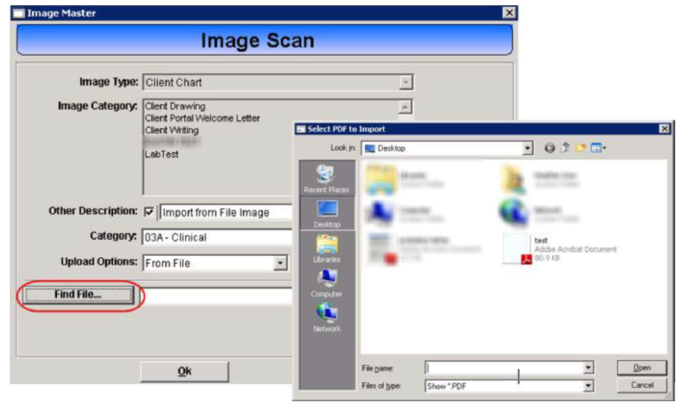
Import From File
The PDF document must be accessible by the user in the hosted environment. This method can be used in the Client Master, Client Chart and Client Referral windows.
1. Choose the PDF destination by highlighting the appropriate packet.
2. Click New Image button.
3. The Image Scan window will present.
a. Select an Image Category or check the Other Description checkbox and enter a description for the image.
b. Select the desired Category from the drop down.
c. Select From File from the Upload Options drop down.
d. Click Find File, the desktop search window will present, locate and select the desired PDF.
e. Click OK.