Adding users to the agency system is a two-step process. The first step is to create a windows logon in the Account Management Utility to allow access to the hosted system. The second step is to enter a Staff Master record in CT|One and link the windows login to this record.
The agency is allowed a maximum of three Account Managers, to add or change account managers contact Customer Support, you will need the person’s full name, email and phone number.
Access: From the Remote Desktop select the Account Management icon.

1. Open the Account Management utility and select the Create Users tab.
2. The Agency Prefix is an arbitrary number assigned by ClaimTrak.
3. Enter a temporary password into the Initial Password field, the user will be prompted to change this password upon the first logon. The password must meet the following requirements:
a. 8 characters in length
b. Must have a numeral
c. Must have a capital letter
d. Must have a special character
4. Enter the staff member’s first name in the FirstName field, tab to the LastName field, enter the staff member’s last name and tab.
5. The UserName will be generated in the following format: agency prefix, first initial of first name, last name.
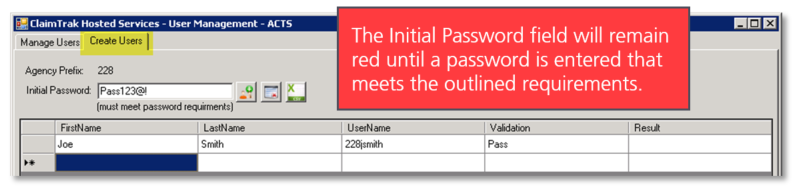
6. The validation column will indicate; Pass if the username is available or Fail if the username is already in use.
a. To resolve a failed username click on the line in the Validation column.
b. A new suggested username will be presented.
c. Click Yes to accept the suggested user name.
Note: Clicking No will not change the username and the validation will continue to fail until an appropriate username is selected.


6. Click the Create Accounts button upon entry of all staff. When entering multiple staff do not click the Create Accounts button until all staff have been entered.
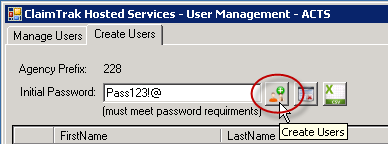
7. Successful creation of the user account will display “Account Created” in the result column.
Managing User Accounts
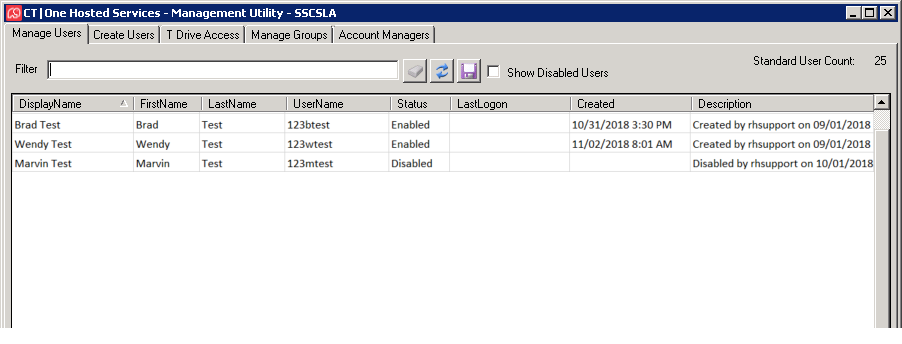
The initial screen shown when accessing the utility displays active accounts listed in alphabetical order by Display Name. The list of user accounts can be sorted by any of the columns by clicking on the column header.
| Filter: Displays users that have names that contain the entered text. | Show Disabled Users: Checking this box displays both active and inactive users. | |
| User Count: The total number of active user accounts. | DisplayName: The first and last name of the user. | |
| FirstName: The first name of the user. | LastName: The last name of the user. | |
| UserName: The windows logon for user account. | Status: Enabled = active, Disabled = inactive | |
| LastLogon: The most recent day/time user logged into the system. | Created: Date and time user account was created. | |
| Description: Most recent administrative activity on the user account and by whom. | ||
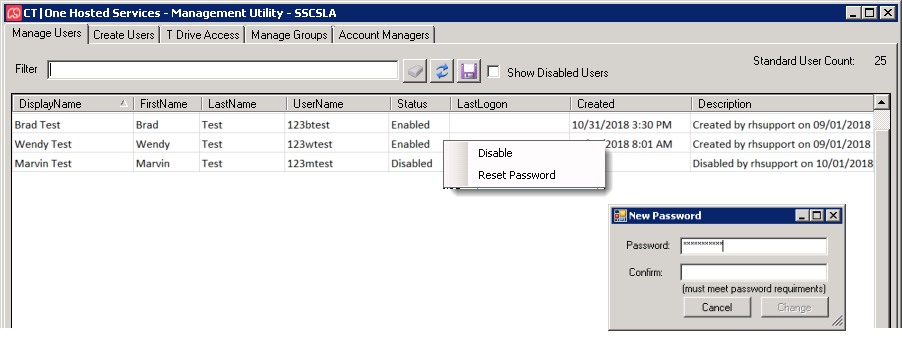
Disable Account and Reset User Password
Administrative tasks of disabling a user account and resetting a user account password are completed on the Manage Users tab.
1. Right click on the line for the user to open the action menu.
2. Select the desired action.
a. Disable: Selecting this option disables the user account and updates the record with the date the task was completed and indicates the account manager that completed the action.
b. Reset Password: Selecting this option enables the account manager to enter a new password for the user account. The new password must be entered twice for verification purposes. Click Change to save the new password.