
Administration
The topics covered here require that you are configured as an Administrator in the Scriptsure application. If you are not, please work with your organization's Super User and/or your Remarkable Health Support Specialist.
Where can I find the BAA and EULA that must be accepted before you can access Scriptsure?
https://www.dawsystems.com/pdf/daweula.pdf
https://www.dawsystems.com/pdf/baa.pdf
How do I add a new user?
Add a User
The agency administrator adds new users.
- Go to https://platform.scriptsure.com/#/login
- Log in
- Click on Users in the horizontal blue bar at the top right

- In the horizontal green bar, click Add User

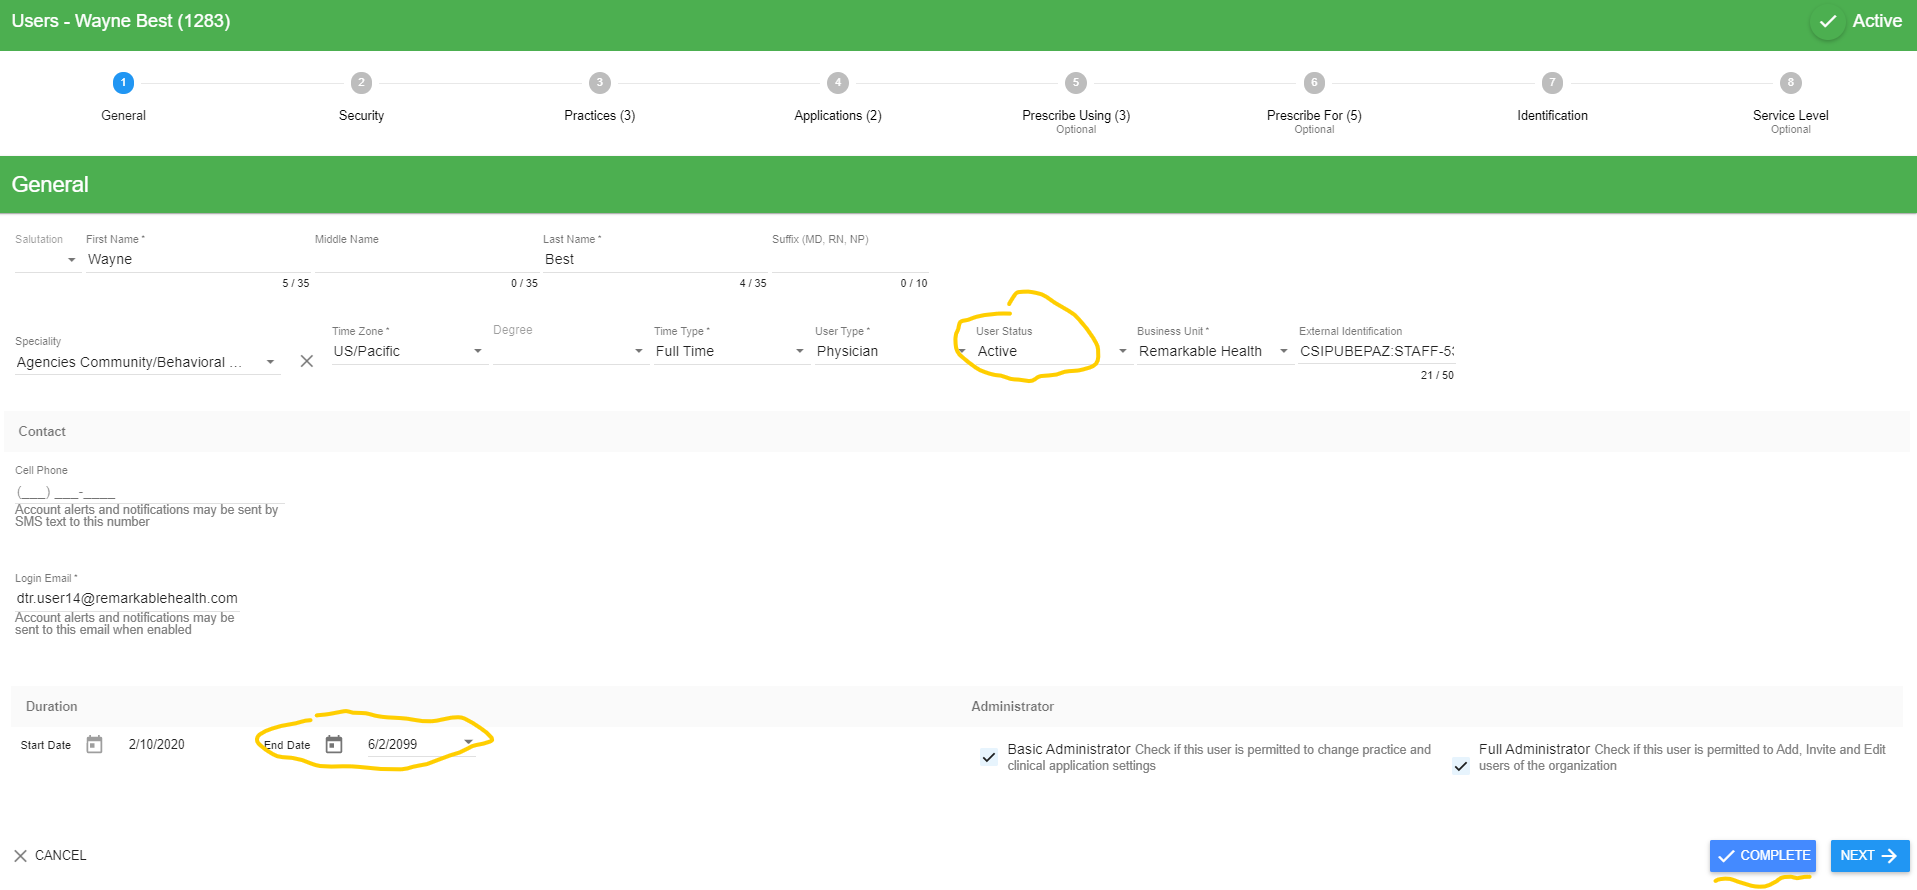
- Section 1 (General) - fill in the following required fields
Note: External id and email address are the 'glue' that connect Scriptsure to the EHR, so pay special attention to the instructions for them.- First Name
- Last Name
- Time Zone – select the time zone where the staff is located
- User Type – select the most appropriate option for the staff
- Business Unit – select your agency
-
IMPORTANT: External Identification –
The user's External id must follow a strict format... It is composed of the CT|One Network id followed by the staff key.For example, CSIPUBEPAZ:STAFF-5349
 The CT|One Network id can be found in the CT|One master record, found by going to the Core Menu and selecting CT|One Master.
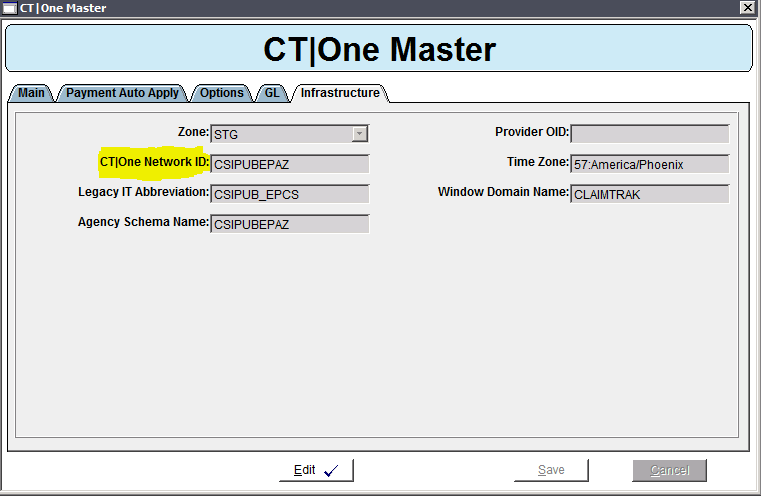
 You can find the Staff Key on the Staff Master window in CT|One:
So in this example, the External Id for Staff 100 would be CSIPUBEPAZ:STAFF-5349.
You can look at other users that are already set up in your agency to see the format your agency uses for external ids. - IMPORTANT: Email – the email address here must match the email address on the Contact tab of the Staff Master.
- Confirm Email – email address
- If the new user will be an administrator, check the administrator checkboxes
- Click Next

- Section 2 (Security)
- Click Prescriber if the staff will be prescribing medications (controlled or non-controlled)
- If the prescriber is also a supervisor, check the box
- Click Supporting Staff for all other staff, including anyone that will prescribe on behalf of a prescriber.
- Click Next

- Click Prescriber if the staff will be prescribing medications (controlled or non-controlled)
- Section 3 (Practices)
- Click Add Practice in the horizontal green bar:

- Click the checkbox(es) for any practices/locations the staff works at.
- NOTE: You must also add the default practice for the agency to each staff/user you add to Scriptsure. The default practice is determined when the agency's information is initially loaded into Scriptsure.
-
To determine which practice the agency has set as the default practice
- In CT|One, go to Maintenance → Flags
- Click on the Search tab and search for ScriptSureDefaultFacility

- Note the flag value. This is the code of the default facility.
- Go to Core → Facility
- Look for the code noted on the flag. This tells you the default facility name.
- Go to https://platform.scriptsure.com/#/login
- Click on Practices

- Click Edit for the Practice that matches the default Facility
- Click Next
- On the Associated Users list, click Add User

- Select the user that you wish to add to the practice, or click Check All

- Click Add Checked

- Click Close
-
- Click Add Checked:

- Click Close
- Click Next

- Click Add Practice in the horizontal green bar:
- Section 4 (Applications)
- Click Add Application in the horizontal green bar:

- Click the + next to Remarkable
- Remarkable should now show in addition to Scriptsure:

- Remarkable should now show in addition to Scriptsure:
- Click Next:

- Click Add Application in the horizontal green bar:
- section 5 (Prescribe Using) - NON-Prescribers
- If the staff will prescribe using another prescriber's credentials, click Add Prescriber:

- Click the checkbox(es) for any prescribers that this staff will Prescribe Using.
- Click Add Checked

- Click Close
- Click Next:

- If the staff will prescribe using another prescriber's credentials, click Add Prescriber:
- Section 6 (Prescribe For) - Prescribers
- If the prescriber will have staff that are able to Prescribe For the prescriber, click Add User:

- Click the checkbox(es) for any users that will Prescribe For this staff.
- Click Add Checked

- Click Close
- Click Next:

- If the prescriber will have staff that are able to Prescribe For the prescriber, click Add User:
- Section 7 (Identification) - Prescribers
- IMPORTANT: This section should only be filled out if the staff is a prescriber. If the staff will not be prescribing, leave the fields here blank, even if the staff has some of the identifiers listed.
- NPI - enter the prescriber's NPI
- DEA - enter the
- Detox (optional) - enter the staff's NADEAN, if applicable
- Click Next:

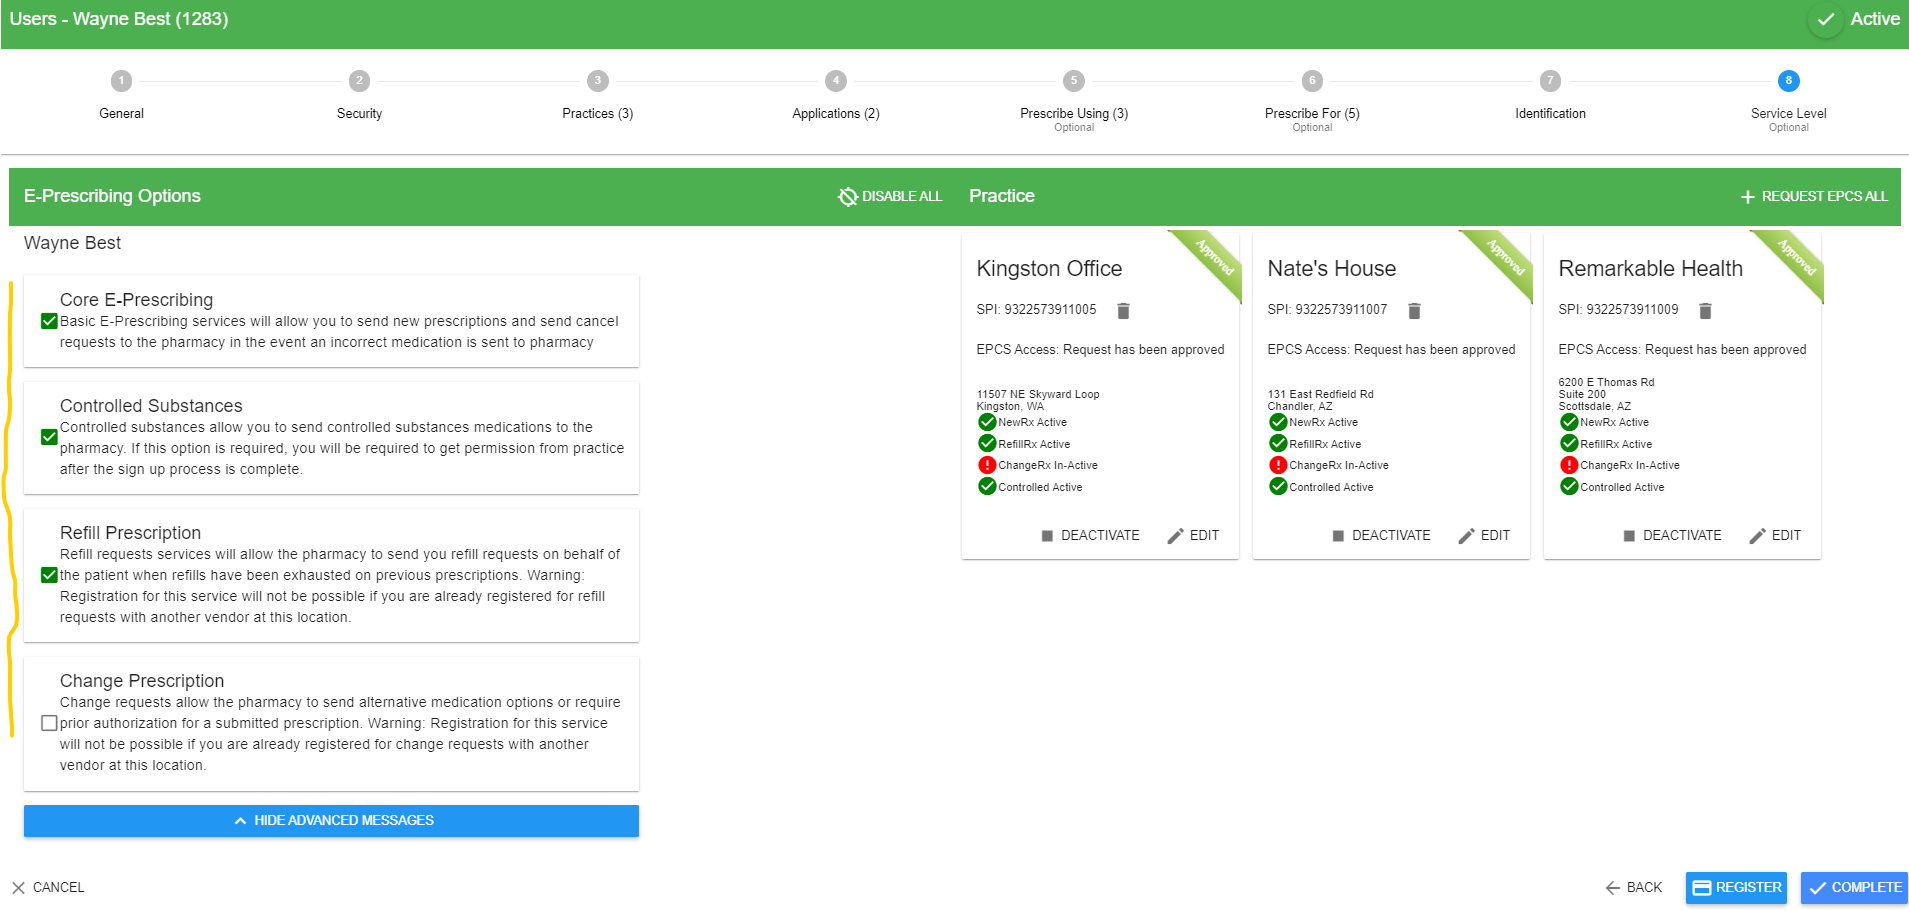
- Section 8 (Service Level) - Prescribers
- Core e-Prescribing - check this if the prescriber will be prescribing controlled or non-controlled medications
- Controlled Substances - check this if the prescriber will be prescribing controlled medications
- Click Show Advanced Messages

- Refill Prescription - check this if you want to receive refill requests from the pharmacy
- Change Prescription - check this to allow the pharmacy to send alternative medication options or require prior authorization for a submitted prescription
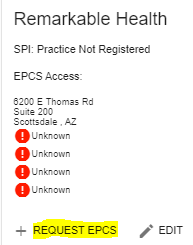
- For each practice, if the prescriber will be issuing controlled medications, click 'Request EPCS':
- Click Register to register the prescriber on the network.

- You should now see green circles with a checkmark at least by Basic and Controlled (if you selected it for this staff):
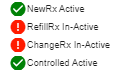
- If your agency is live, you may also see green checkmarks by Refill and Change RX if you have checked the boxes for those options.
- If you see red circles with exclamation marks and you have questions, contact Remarkable Health.
- If your agency is not live, you will see red circles for RefillRX and ChangeRX. On go-live day, Remarkable Health will request your SPI move from the legacy ePrescribe to Scriptsure. This move can take up to a week. Once the SPIs are moved to Scriptsure, Remarkable Health will update this and register the user for RefillRX and Change RX.
- Click Complete:

-
IMPORTANT FINAL STEP: If you have added a prescriber for controlled medications, you must also approve them for EPCS in your Practice Settings for the application. To do that
- Go to https://us.scriptsure.com/#/login
- You will be presented with a pop-up that says EPCS requests to approve. Click Approve next to that provider’s name.
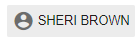
- Alternatively, you can click your name in the upper-right corner:

- Click on Settings:
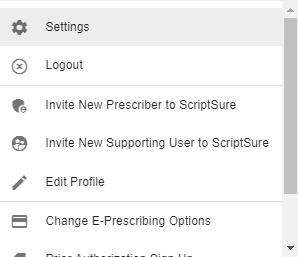
- On the left navbar, click on EPCS Approval:
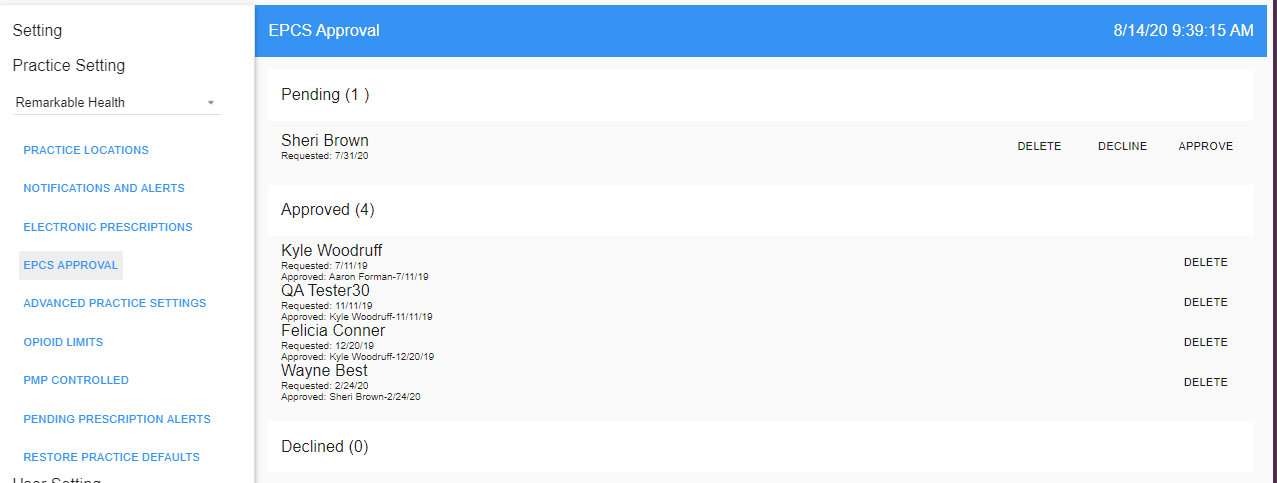
- Click Approve to approve the pending request. Click Deny if access was requested for any staff in error.
How do I set up a Prescriber?
To set a user up as a Prescriber, the User Profile in Scriptsure (platform (https://platform.scriptsure.com/#/login , select User) or via the app (CT|One or https://us.scriptsure.com/#/login , go to user settings) must have the following settings:
- Tab 1 – General
- There are no requirements for a provider on this screen. You can set title to MD or DO, etc if you want, but it's just a text label. You do need to set a user type, but that does not affect settings, it is purely informational regarding the user.
- Tab 2 – Security - Prescriber
- This must be selected in order to have a provider be established as a prescriber.
- Tab 6 – Set users that can prescribe for the provider (if desired). This allows nurses or other staff to create prescriptions on behalf of the provider.
- Tab 7 – Provider credentials must be entered for DEA (if prescribing controlled) and NPI.
- IMPORTANT: You will be charged for each user with an NPI. If a user does not issue prescriptions in their own name (meaning their name is not the prescriber on the pill bottle/vial, etc), do not fill out an NPI.
- Tab 8 – Basic and Controlled checked.
- Both basic and controlled assume the provider is doing controlled prescribing; if not, no need to register for this.
- Click Request EPCS approval if you want, but the system will automatically trigger this when complete is clicked.
IMPORTANT FINAL STEP:
The final step is for an admin to login via CT|One or https://us.scriptsure.com/#/login. They will be presented with a pop-up that says EPCS requests to approve. Click Approve next to that provider’s name.
How does Prescribe Using/Prescribe For work? Can a non-prescriber be authorized to issue scripts on a prescriber's behalf?
You may have a prescriber in an office that does not work every day of the week. But clients are seen every day and have prescription needs to be met when the prescriber is not on-site. How do I configure Scriptsure so that scripts can be sent when the prescriber is not in the office?
Scriptsure users can be configured (via Add/Edit User) for Prescribe Using
Use Prescribe Using to allow a non-prescribing staff to prescribe for a prescriber using that prescriber's credentials.
- Prescribe Using staff should not have NPIs. If the staff has an NPI for some other reason, the NPI field on the Identification tab (7) should still be blank in Scriptsure.
- Configuration:
- For each user that will Prescribe Using, section 2 of their profile, Security, must be set to Supporting Staff.
- For each user that will Prescribe Using, section 5 of their profile, Prescribe Using, must include all prescribers the user will prescribe on behalf of.
- For each user that will Prescribe Using, Section 7 of their profile, Identifiers, should have NPI blank.
- For each user that will Prescribe Using, section 8 of their profile, Service Level, should have no boxes checked.
- When prescribing, non-controlled meds can be sent without requiring prescriber approval when clicking Send to Pharmacy.
- If approval is desired, click Send for Approval.
- Controlled scripts still require a prescriber to approve and will use id.me to verify the prescriber.
- For controlled scripts that are queued for the prescriber, there is a Practice Setting you can configure to send the prescriber an email alert of the waiting script.
- Practice Setting: Pending Prescription Alerts
- Can configure to send text messages or emails.
- Can configure a follow-up reminder every 30/60/90/120 minutes. Will email every X mins until a max number of reminders are sent or the script is approved.
- Do No Disturb quiet times can be configured during which no alerts are sent.
- User Setting: Pending Prescription Alerts:
- The dr. can opt out of alerts and set their own quiet times.
- Practice Setting: Pending Prescription Alerts
- For controlled scripts that are queued for the prescriber, there is a Practice Setting you can configure to send the prescriber an email alert of the waiting script.
NOTE: Only prescribers should have an NPI set on the Identification tab (7).
How do I set up read-only user access in Scriptsure?
Read-Only User Access
You may want to have some users with read-only access to Scriptsure. These might be folks that you want to be able to print medication lists, but not add allergies or medications.
To add a completely read-only user in Scriptsure, you will need to first add the user as a Supporting User via the Platform app.
Once the user is added, you are ready to set up a role with read-only access.
- Open Scriptsure by going to https://us.scriptsure.com
- In the upper-right corner, click on your username
- Select Settings
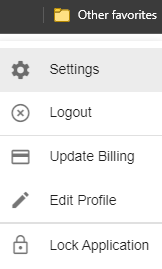
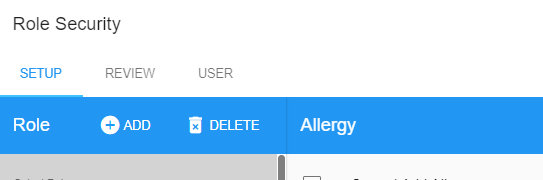
- In the list of settings on the left, scroll down to Security for Users/Roles:
- In the upper-right, click Edit Security Role:

- Click Add to Add a new Role:
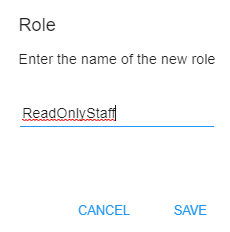
- Give the new role a name, such as ReadOnlyStaff and Click Save:
- Your screen should now look like this:

- Now we’ll turn off abilities to do things. For each permissions, you’re going to select the category on the left and then check the boxes for the item(s) on the right.
- Allergy – Cannot Add Allergy
- Allergy – Cannot Archive Allergy
- Drug – Cannot Add Current Medication
- Drug – Cannot Add Drug Format
- Drug – Cannot Add Favorites
- Drug –Cannot Archive Current Medication
- Drug – Cannot Change Drug Check Setting
- Drug – Cannot Change Drug Tolerance Setting
- Drug – Cannot Delete Drug Format
- Drug – Cannot Download Drug History
- Drug – Cannot Edit Favorite
- Drug – Cannot Prescribe Medication
- Drug – Cannot Request Eligibility
- Drug – Cannot Send Electronically
- Drug – Cannot View Formulary
- EPCS – Cannot Approve EPCS Request
- EPCS – Cannot Request EPCS
- EPCS – Cannot View EPCS Request
- You can review any other categories and select any more ‘Cannot’ options if desired
- Click Save
- Finally, add users to the role.
- Click the User tab:

- Click Add User:

- Select each of the users from our lists that should have read-only access and Click Add

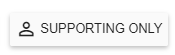
- NOTE: You can click Supporting Only to filter for just supporting users:
- Once all are added, click Close
- Click the User tab:
- Click SAVE to save the new role. (Green button at bottom right):

At this point, any user you've added to this role will get error messages if they try to add an allergy or medication.
If they try to select a drug to prescribe, they’ll get this error:

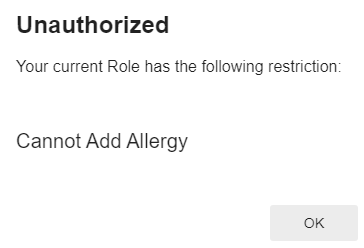
If they try to add an allergy, they’ll get this error:
If a user later needs the ability to add meds or allergies, merely edit the role, click on the Users tab and click Remove to remove the user from the user list.
How do I inactivate a user in Scriptsure?
- Go to Platform, https://platform.scriptsure.com/#/login
- Go to the agency, on the Users page.
- Click Edit for the user.
- On the General tab of the user profile,
- Set the end date. Scriptsure should automatically set status to inactive when the end date arrives. You cannot have an end date prior to today when you are inactivating a user.
- To make the user immediately inactive rather than wait for the end date to arrive, set the status to Inactive.
- On the Service Level tab, uncheck permissions to prescribe/refill
- Click Complete

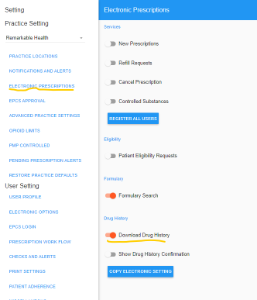
How do I Enable/Disable Downloaded Medications?
To enable the display of external/downloaded medications in Scriptsure, open Scriptsure, click on your name/profile in the upper-right corner, and select settings to go to your agency's practice settings, From there, select Electronic Presciptions, and then enable/disable the Download Drug History toggle.
Is a Prescription Monitoring Program (PMP/PDMP) available?
Yes! Scriptsure is integrated with Bamboo Health, formerly known as Appriss.
Bamboo Health aggregates prescription from many different states into one report
Is there a cost?
Some states cover the cost of the program, others require the organization to pay. When there is a cost, you may pay at the facility level or at the prescriber level.
How does it work?
- Contact Bamboo Health/Appriss to see if your state is covered in their PMP. Refer to the following document for more information on contacting Bamboo Health/Appriss:
Appriss Onboarding Doc.docx - Once you have been provided credentials for Bamboo Health/Appriss, Scriptsure inputs them.
- You can contact Scriptsure Support directly at support@dawsystems.com or you can contact your Remarkable Health Support Specialist and they can contact Scriptsure on your behalf.
- Scriptsure will require
- Your login Credentials
- The facility/practice address for the credentials
- The facility/practice NPI
- You will also need to confirm the NPI you set is also set on the corresponding Practice in Scriptsure.
- Go to https://platform.scriptsure.com/#/login to confirm the practice NPI
- If a facility does not have a facility NPI, the NPI of any prescriber can be used instead.
- Once ScriptSure has added the credentials, Users simply need to logout and back in to capture this update.
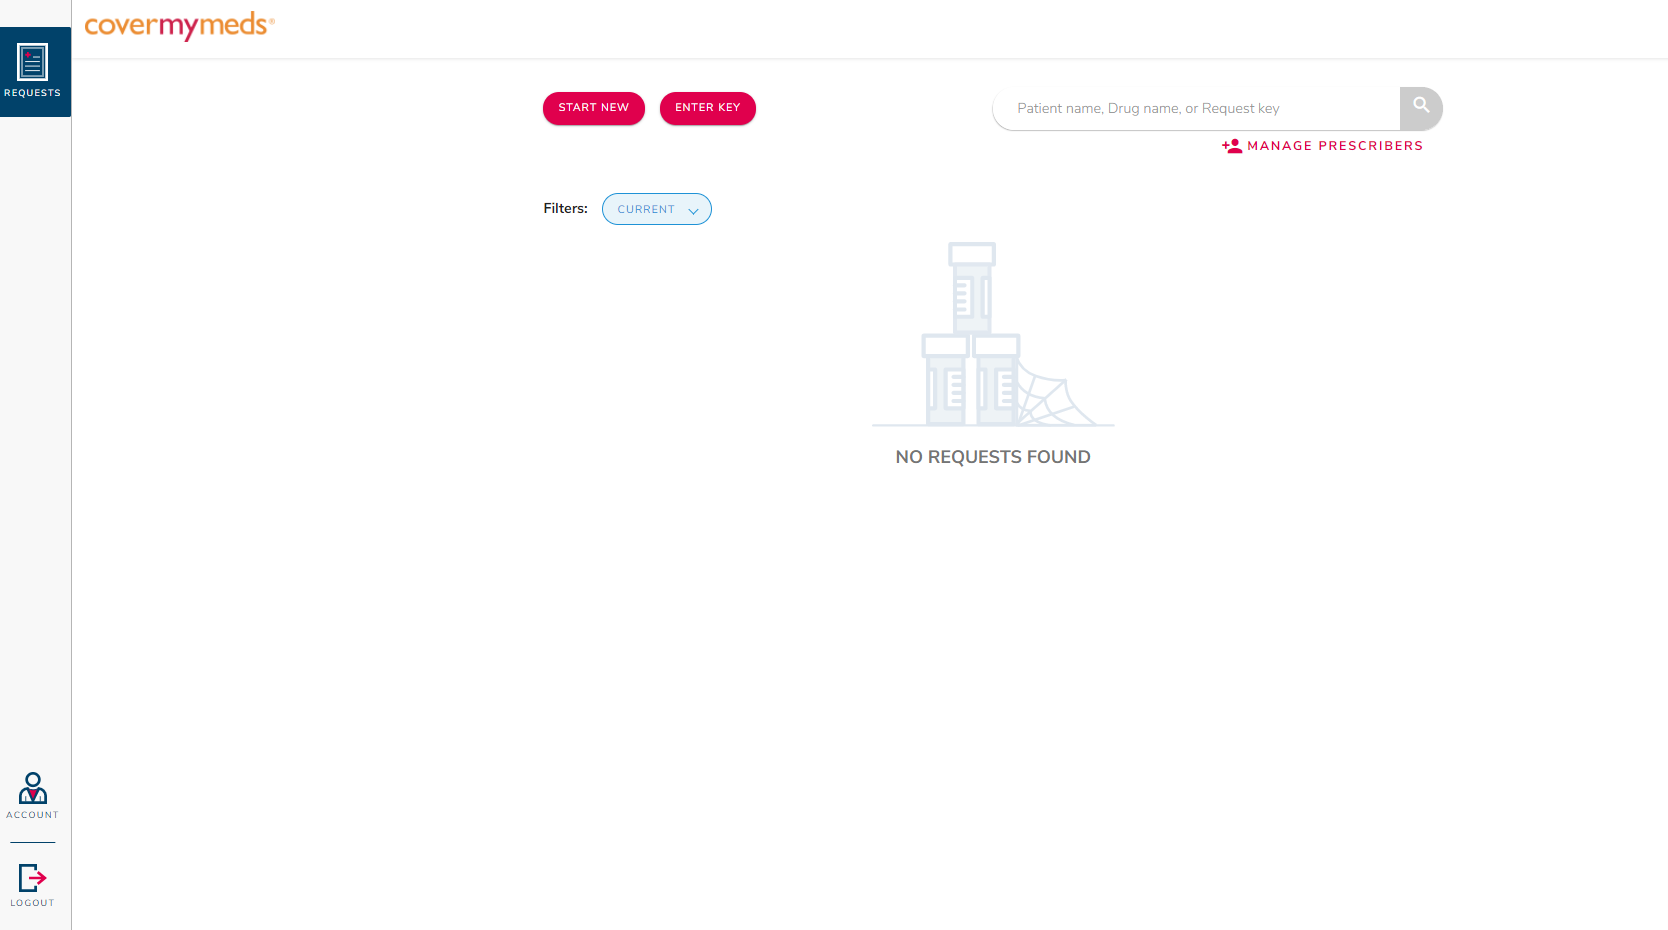
- On the provider's next login, the providers, and any supporting users with permissions under a provider, will see the VIEW PMP REPORT button on each patient (see circled button below). The users can click this button and see the APPRISS (PMP REPORT) for the patient.

How do I add a new Practice?
When you need to add a new physical location/practice to Scriptsure, you must notify Remarkable Health. This is because there are some additional pieces that Remarkable Health must set up in addition to what you can set up via the Scriptsure platform.
When you have a new physical location to add to Scriptsure, you will need to perform the following steps to add a Practice.
- Add the Facility to CT|One.
- To do this, go to Core → Facility and add the facility.
- NOTE: In Scriptsure, Facilities must have a physical address, not a PO Box.
- Scriptsure does require a phone and fax number for each facility.
- It is helpful if the agency notes the facility code displayed so Remarkable can look up corresponding information to complete the Practice setup.
- Notify Remarkable Health to add the Practice in Scriptsure.
- Once RH has added the practice, then the agency Administrator must add Scriptsure users to the new Practice.
- Go to https://platform.scriptsure.com/#/login
- Login with the adminstrator email/password
- Click on Practices
- Click Edit on the Practice
- Click Next
- Click Add User to add user(s) to the Practice.
What is Cover My Meds and how does it work? Do you have prior authorizations?
Scriptsure integrates with Cover My Meds to provide information about Prior Authorizations.
Scriptsure has provided the following documentation for Cover My Meds.
A complete user guide is also available from CoverMyMeds: CoverMyMeds App User Guide.pdf
How do Prior Authorizations work?
Scriptsure has the ability to link to CoverMyMeds for prior authorizations.
When appropriate, an agency may get a prompt to enable prior authorizations. The prompt looks like this: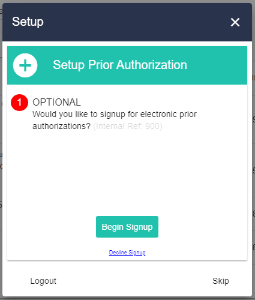
If the integration is desired, click Begin Signup and you will be walked through prompts for setting it up.
If the integration is not desired, click Decline Signup.
If you are not sure, click the Close X or Skip. You will receive the prompt again the next time you login to Scriptsure.
You can also Sign Up for Prior Authorizations by going to the Settings menu: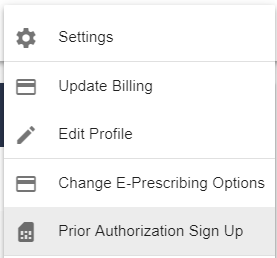
Prompts you may see in the Sign Up (RH NOTE: Update this when we have documentation from Scriptsure!)
|
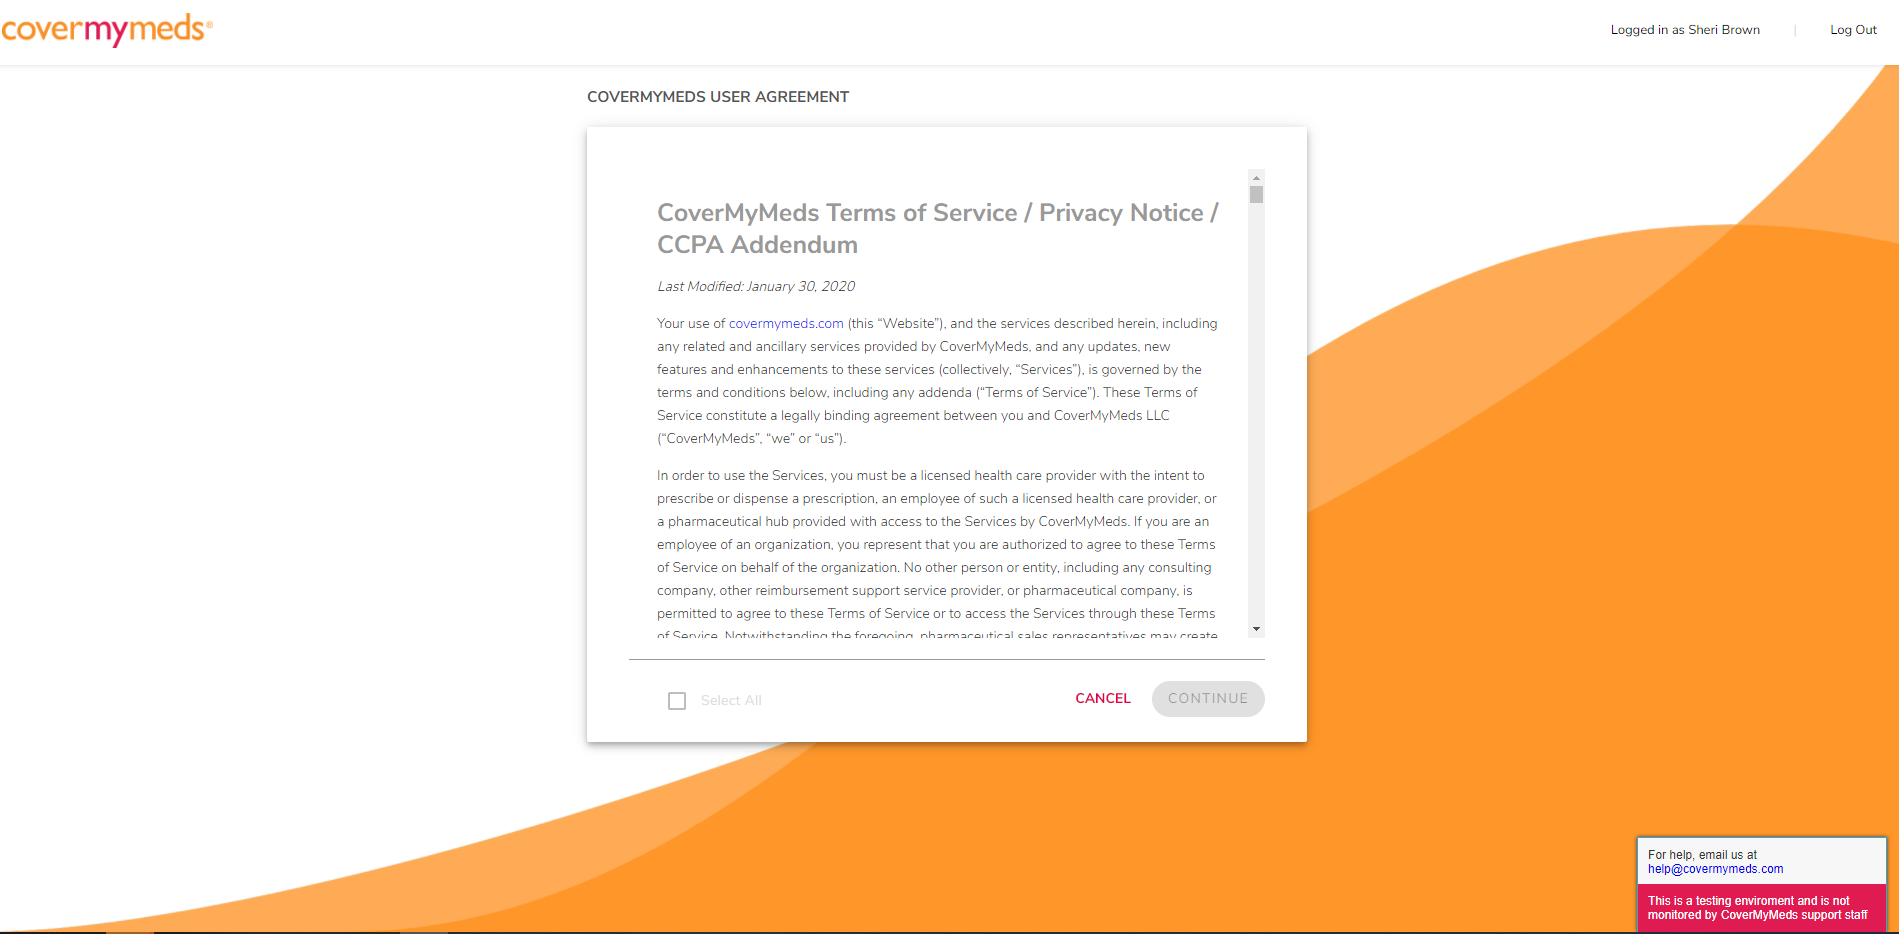
Read Terms |
|
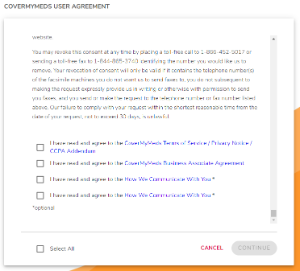
Scroll to bottom, check boxes and click Continue |
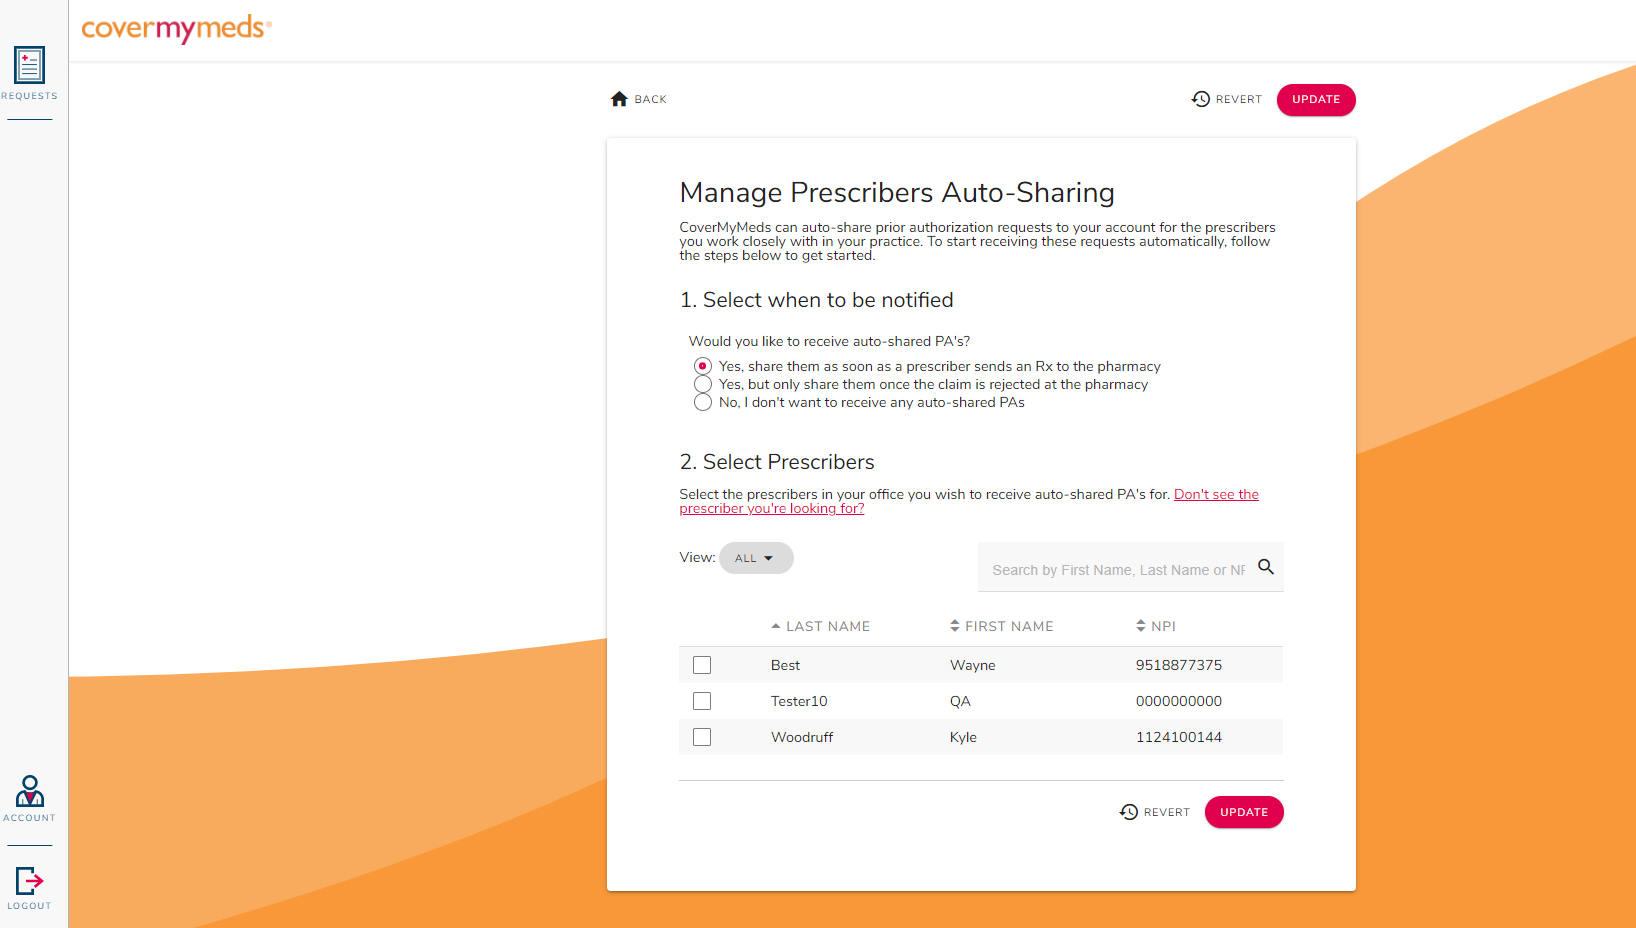 |
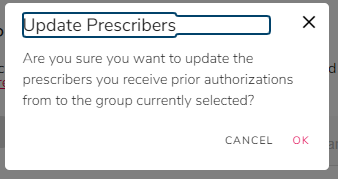
Select when to be notified and which Prescribers you which to receive notifications about. Click Update |
|
Click OK to confirm the update |
|
You are then shown the CoverMyMeds dashboard. |
From this point, it is the same interface you are used to in CoverMyMeds.
See Cover My Meds documentation (above) for additional information on using Cover My Meds.
Our CoverMyMeds Prior Authorization account is under the administrator. Will it work for my Prescribers?
The CoverMyMeds interface in Scriptsure is the same interface CoverMyMeds provides outside of Scriptsure.
The administrator may go into CoverMyMeds as a supporting user and select the prescribers that they want to manage. They will need to have Prescribe Using access within Scriptsure to facilitate that.
See Cover My Meds documentation (above) for additional information on using Cover My Meds.
How do I use a custom Status?
Why use a Custom Status
A custom status gives you the ability to control how a medication displays when the medication is assigned the status. You might use a custom status to color-code medication statuses, such as a PCP/External Medication or a Discharge Medication. You might also use a custom status to prompt the user to supply a prescriber name, such as for a PCP/External Medication.
Accessing Status Configuration
- Open ScriptSure by either
- Clicking the pill bottle on the toolbar (
 ) or
) or - Going to the Client Menu, selecting Client Medications to open the Client Medication History window and clicking the Add Med button.
- Clicking the pill bottle on the toolbar (
- Click Settings

- Scroll down the list and select Modify Prescription Statuses from the dropdown list
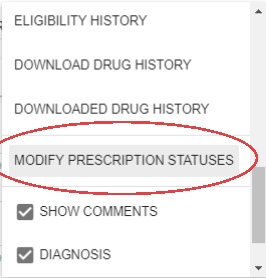
The Prescription Status window opens.
Prescription Status Window
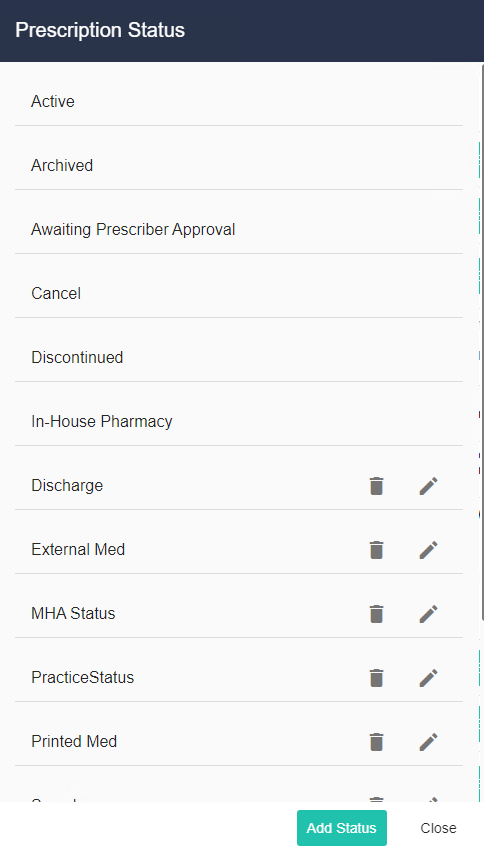
NOTE: Status entries that do not have an edit (pencil) or delete (trash can) icon are not customizable
Select an Action:
-
 (Trash Can icon): Delete a status
 Pencil icon: Edit a status
 Add Status button: Add a new status
Add a Status - General Tab
|
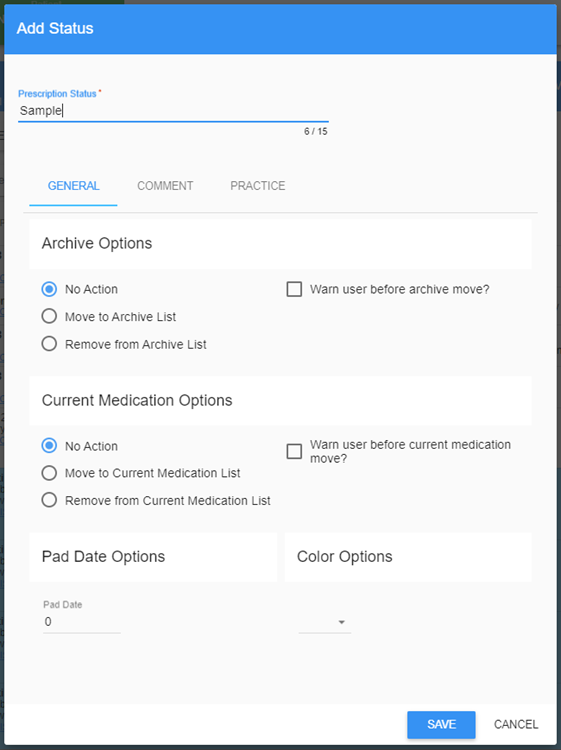 |
Add a Status – Comment Tab
|
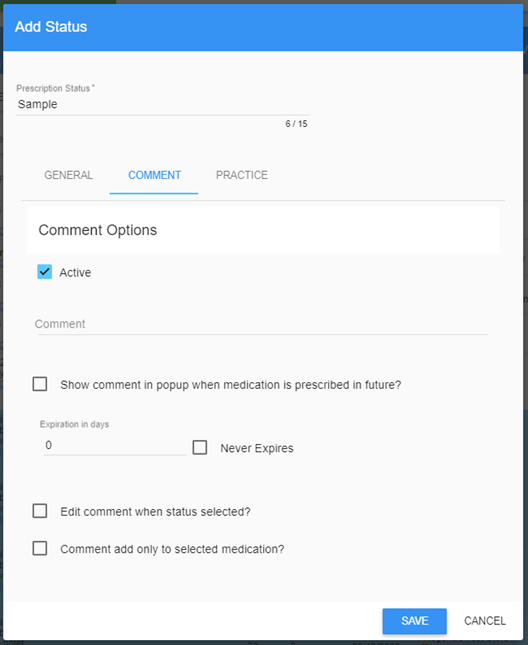 |
Add a Status – Practice Tab
| Select which practice(s) can use this status. | 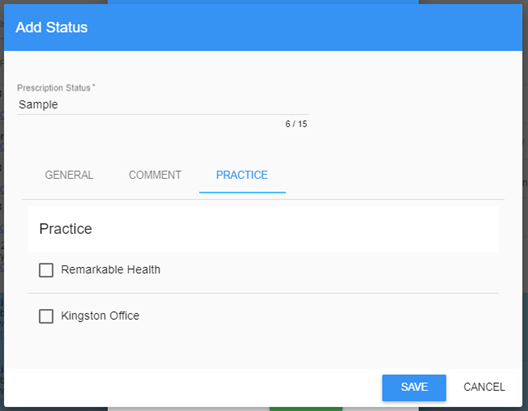 |
Is there a way to turn off the discount feature? Our pharmacies say it's covering up the order on the script.
Yes, you can turn the discount feature off. To do so,
- Go to Scriptsure via CT|One.
- Click on your username in the upper-right corner of the window
- Select Settings
- Under User Settings in the left navigation bar, click on Patient Adherence
- Click Do Not Print Discount Card so that the switch is red/orange in color.
- Click Save on the left navigation bar
- Click Close on the left navigation bar
Note: This is a user setting, so each Prescriber will need to do this.
Once this is set, you will no longer see the $ indicator that there’s a discount when viewing medications by category on the Prescribe New Drug page, nor will the extra page print.
Why am I getting a 'Patient security error patient cannot be found as part of this practice list' error?
If a user gets this error,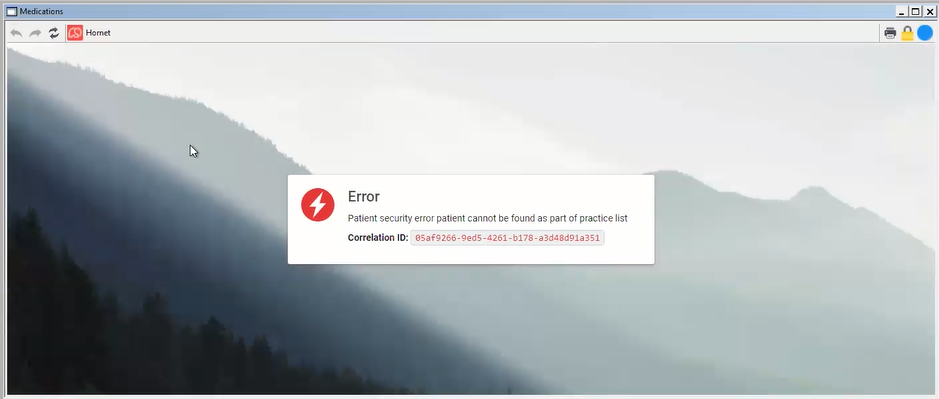
it means that the staff/user has not been added to the default practice for the agency.
All clients are added to the default practice for the agency. In order for a staff/user to see the clients, the staff/user must also be associated with the practice that all the clients are associated with.
To determine which practice the agency has set as the default practice
- In CT|One, go to Maintenance → Flags
- Click on the Search tab and search for ScriptSureDefaultFacility
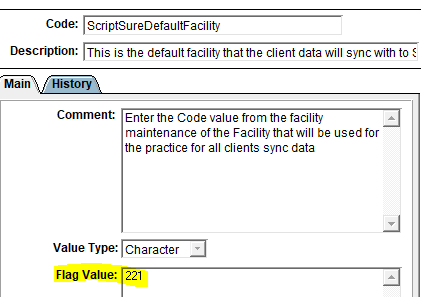
- Note the flag value. This is the code of the default facility.
- Go to Core → Facility
- Look for the code noted on the flag. This tells you the default facility name.
- Go to https://platform.scriptsure.com/#/login
- Click on Practices

- Click Edit for the Practice that matches the default Facility
- Click Next
- On the Associated Users list, click Add User

- Select the user that you wish to add to the practice, or click Check All

- Click Add Checked

- Click Close
How do I restrict who has access to the Client Medications window in CT|One?
 You can restrict visibility to windows in CT|One in two ways
- Restrict access to the window completely so that they cannot open the window without a password.
- Allow the staff access to the window in read-only mode so they can see the window, but not alter anything.
To set window access permissions:
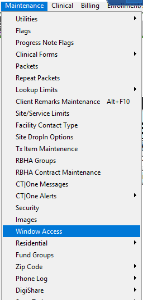
- Go to Maintenance and select Window Access.
- In the list of windows on the left, select wClientMedHistory
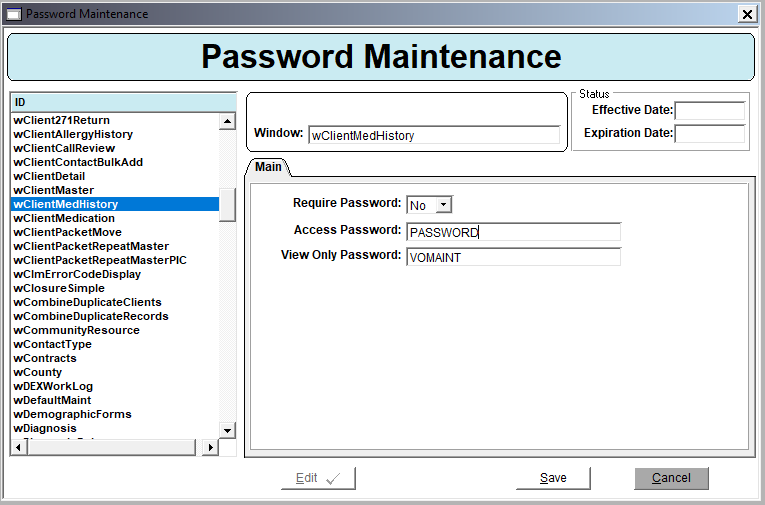
- Click Edit
- Require Password
- Yes = A password is required
- No = No password required
- Access Password: This password grants full access to the window - view and edit. Enter text you wish for the password.
- View Only Password: This password allows the staff to view the window, but not alter things on it.
- Click Save to save changes.