
To enter transactions listed on a paper EOB when an electronic 835 file is not available a manual Payment and Adjustment batch is created.
Access: Billing > Payments & Adjustments > Create Payment & Adjustment Batch
1. Open the Payment & Adjustments window.
2. Click Add.
3. Complete the following fields:
a. Date: Enter the date of the deposit; this ensures the batch date matches the bank deposit date for record-keeping.
b. Description: Enter a description; The check number, name of the Guarantor, etc.
c. Site: No selection is needed.
d. Status: Select the desired status.
i. Hold: Allows entry and editing of payments and denials but the batch cannot be posted.
ii. Open: Allows entry and editing of payments and denials and can be posted.
4. Click Save.
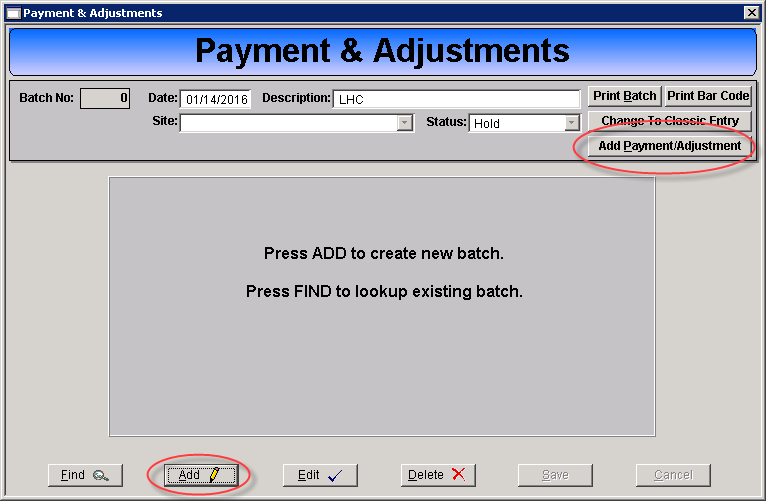
5. Click Add Payment/Adjustment.
6. The Payment Entry Detail window will present.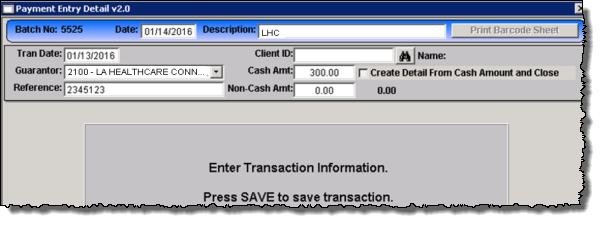
7. Complete the following fields:
a. Tran Date: Enter the EOB payment date.
b. Guarantor: Select the guarantor for the EOB.
c. Reference: Enter the check number from the EOB.
d. Client ID: Leave blank.
e. Cash Amt: Enter the total payment amount for the EOB.
f. Non Cash Amt: Leave blank.
8. Click Save.
9. The individual transaction fields will present.
10. Click New Trans to enter a transaction line from the EOB.
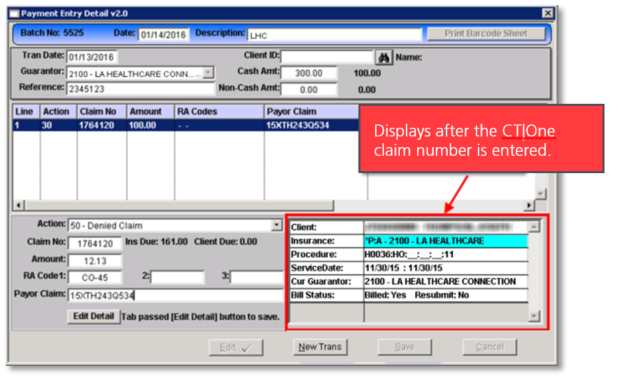
11. Complete the following fields:
a. Action: Select the appropriate action code.*
i. 30 – Cash Payment
ii. 50 – Denial
iii. 99 – Comment
b. Claim No: Enter the CT|One claim number.
c. Amount: Enter the dollar amount of the action.
d. RA Code 1, 2, 3: Enter the RA code(s) on the EOB.
e. Payor Claim: Enter the payor’s claim number listed on the EOB.
12. TAB past the Edit Detail button to save the transaction and clear the entry fields for the next transaction.
13. Repeat steps 7 – 12 for all lines on the EOB.
14. Click Finish.
15. Post the Payment Adjustment Batch.
* For additional information on action codes and creating custom codes refer to the Action Codes and RA codes user guide.