
When a progress note is handwritten due to an electric failure, providing services away from the office, or another reason the progress note can be scanned into the client chart and the service manually entered into a charge batch for billing.
To add the progress note to the client chart scan the paper note, save it in a pdf format and then follow the image import steps to add it to the client’s chart.
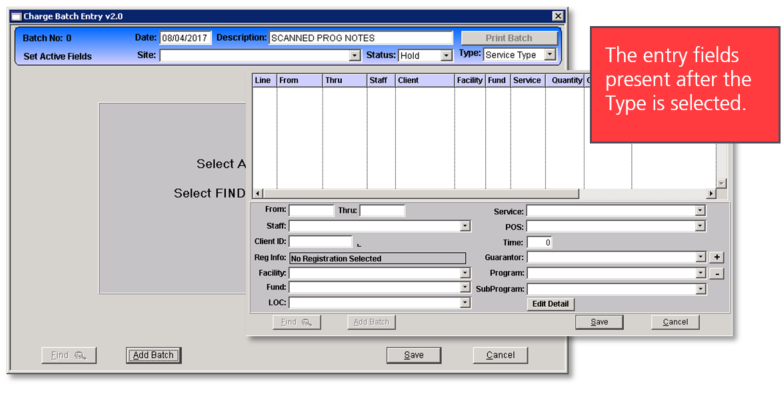
Creating A Charge Batch
Prior to entering the individual services, a charge batch must be created.
Access: Billing > Claims Generate > Charge Batch > Charge Batch Entry (New Version)
1. Click Add Batch.
2. Complete the Batch header fields.
3. Click Save.
| Field | Entry |
| Date | Enter the date for the day being processed. |
| Description | Enter text per your agency policy to identify the batch. |
| Site | Not required. Select the site from the drop-down if the agency has multiple sites and each site is processing their claims separately. |
| Status | Select the appropriate status, selecting the hold status prevents the batch from accidentally being posted prior to completing the batch. · OPEN (able to post the batch) · HOLD (the batch cannot be posted) |
| Type | Select “Service Type” from the drop-down. |
Entering Services
After the charge batch has been created the individual services lines can be entered. The entry window is designed for data entry using the tab key to navigate to each field.
1. Click the New Trans button.
2. The cursor presents in the From field, enter the date of service.
3. Use the TAB key to complete the service information fields. Not using the TAB key will prevent the autofill fields from populating and possibly loss of completed fields.
4. Tab past the Edit Detail button to save the current service and open the entry fields for the next service.
5. Upon entry of all service lines click the Finish button to save the batch and services.
For each field upon tabbing into the field typing the item ID will populate the field with that item without having to open the dropdown list.
Field |
Entry |
From |
Enter the date of service. |
Thru |
Tab through this field to populate the From date. |
Staff |
Select the provider of service from the drop down. |
Client ID |
Tab into the Client ID field and enter the client’s name, last name or CT|One ID and press Tab to open the Client Look Up. Select the client. |
Reg Info |
Displays the registration/enrollment that is attached to the claim. If the client has multiple registrations, the field will require the selection of the correct registration. |
Facility |
Select the Facility where the service was rendered. |
Fund |
Select the appropriate fund for the service. |
LOC |
Select the client’s Level of Care if required. |
Service |
Select the service type for the service provided from the drop-down. |
POS |
Select the place of service where the service was rendered. |
Time |
Enter the appropriate value for the service. To determine the appropriate value view the Service Type Maintenance > Prog Note > Options 1 tab, ‘Use Units Instead of Time on Note’ field. · Yes = Whole units will be entered, typically “1” · No = Time based service is entered where each 15 minutes is .25. |
Guarantor |
This field will auto populate based on the guarantor information entered in the Client Master record. If the client has multiple guarantors the field will be blank, select the correct guarantor. |