EXPLANATION
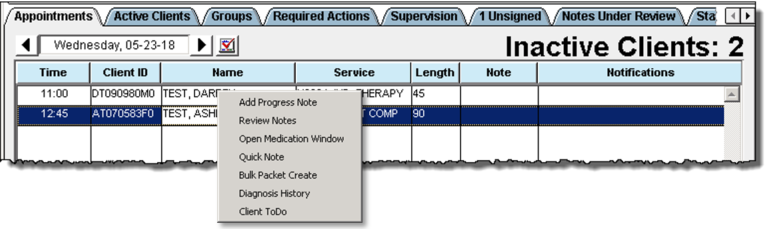
The appointments tab displays the clinician’s scheduled appointments and assigned tasks, allows for viewing their clinical supervisions and setting their CT|One PIN for electronically signing progress notes and forms. This tab also has an action menu that is displayed by right clicking on a client.
The available actions are:
- Add Progress Note .
- Review Notes
- Open Medication Window
- Bulk Packet Create
- Diagnosis History
- Client ToDo List
- Write a Quick Note
Action Menu
Add Progress Note
Opens the Progress Note entry window. The session information fields auto-populate with the information from the scheduled appointment when the action is initiated from the Appointments tab.
Review Notes
Opens a note review window for quick access to view a client’s progress notes. The last five progress notes are populated as the default. The window provides additional filters to present additional notes.
Open Medication Window
Opens the Medication Window for the client.
Write A Quick Note
Opens the Quick Note entry window.
Bulk Packet Create
Opens the Bulk Packet Create maintenance window.
Diagnosis History
Opens the client’s current diagnosis update form in view only mode.
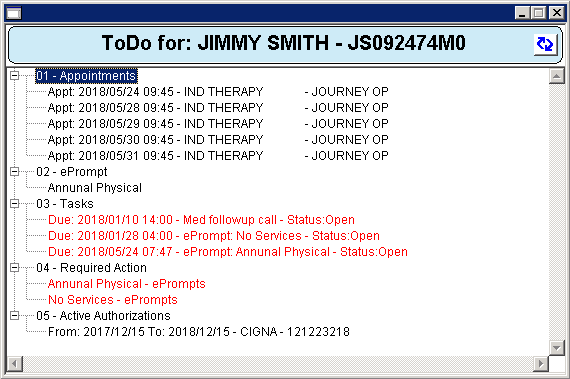
Client ToDo List
Opens a list of items of the client attention. Double clicking a task opens the task.
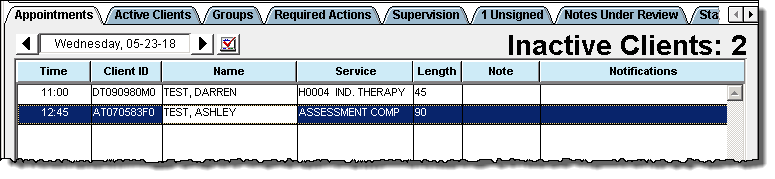
Scheduled Appointments
As a default the display is the current date. Use the arrows to change the date. The checkmark icon will return the display to the current date.
Best practice for a scheduled appointment is to write the progress note from the Appointments tab.
Note: Double clicking a client will open their client chart.
Field |
Explanation |
Time |
The start time of the scheduled appointment. |
Client ID |
The CT|One ID of the scheduled client. |
Name |
The name of the client for the scheduled appointment. |
Service |
The service type in the scheduled appointment. |
Length |
The length of time for the scheduled appointment. |
Note |
The column will turn green and display “Note Complete” when the progress note for the scheduled appointment was written from the Staff Home window and is signed. |
Notifications |
|
Appointment Comments |
Displays the comments entered on the scheduled appointment. |
Tasks
The bottom half of the Staff Home window presents the assigned tasks. Refer to the Task Guide for instructions on managing tasks.
Clicking on a column header will sort the tasks by that column.
Double click a task to open the task.
Field |
Explanation |
Due |
The assigned due date of the task. |
Task Name |
The description of the task. |
Client |
The client name and CT|One ID for the client associated with the task. |
Status/Priority |
The current status and assigned priority of the task. |
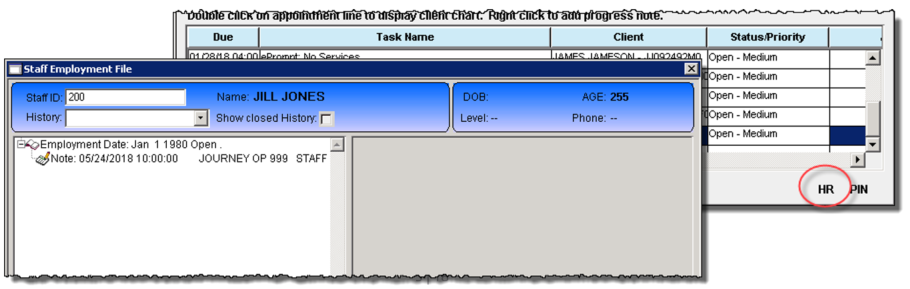
HR
Clicking on HR will open the users Staff Employment File that contains documented clinical supervisions. Double click the note to view the clinical supervision.
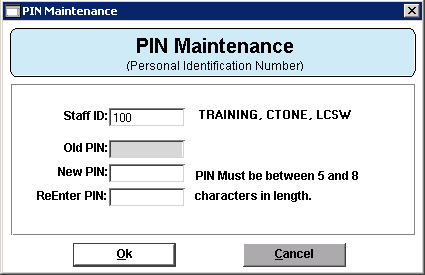
 PIN
PIN
To electronically sign progress notes and forms a PIN is required. Clicking PIN opens the PIN entry window.
A user can change their PIN at any time if the current PIN is known. If a PIN is forgotten contact the agency designated CT|One administrator to request a PIN reset. The Old PIN field will be greyed out at initial PIN creation and when a PIN reset has been requested.
- Staff ID: Enter your Staff ID.
- New PIN: Enter a series of alphanumeric characters that is at least 5 characters but does not exceed 8 characters.
- ReEnter PIN: Enter the alphanumeric series that was entered in the New PIN field.
- Click OK.