
Creating a Lab Order
When creating a note, depending on the type of service you select the "transcribed Note" tab will appear and you can click Open Smart Template to open the med note.
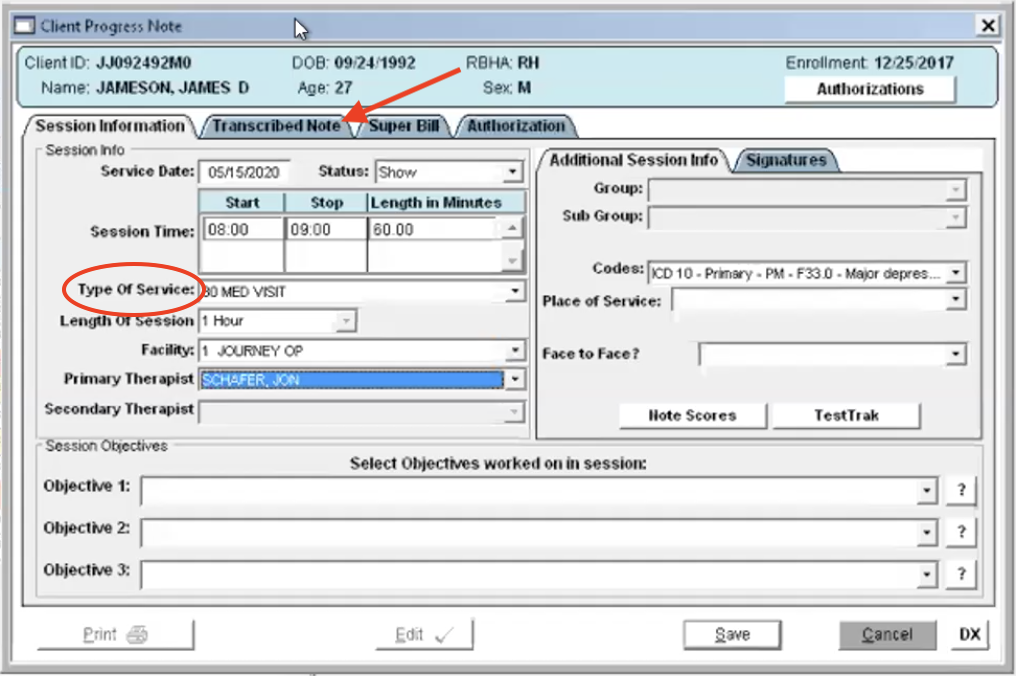
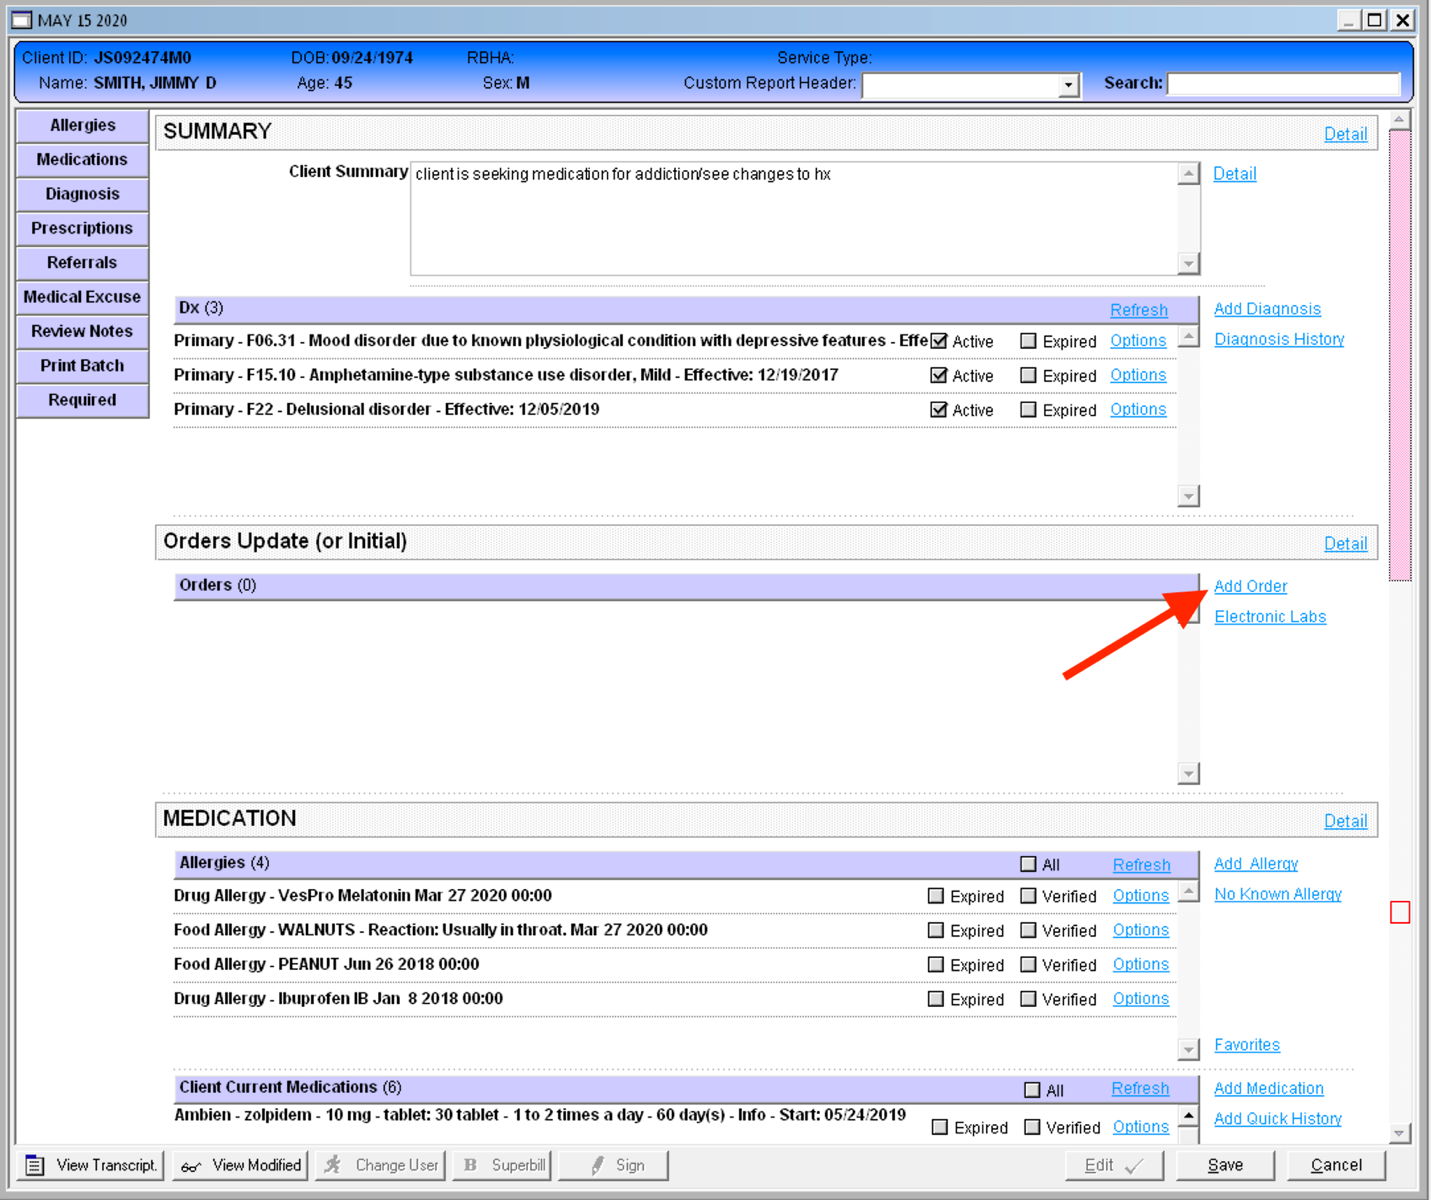
Once in the med note, click on Add Order to the client chart.
Order Initial Setup
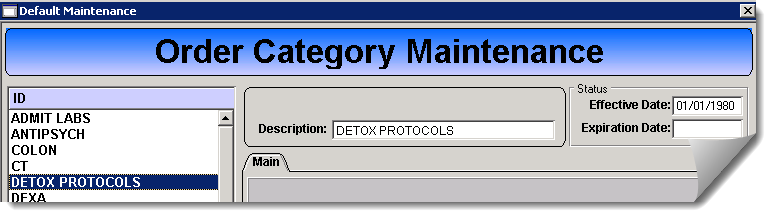
Order Category Setup
Navigation: Maintenance menu option > Orders (Lab-Test Groups) > Test Category
-
Enter categories (Labs, Protocols, X-rays, etc)
Click the Add button
Enter Name and Effective Date
Save
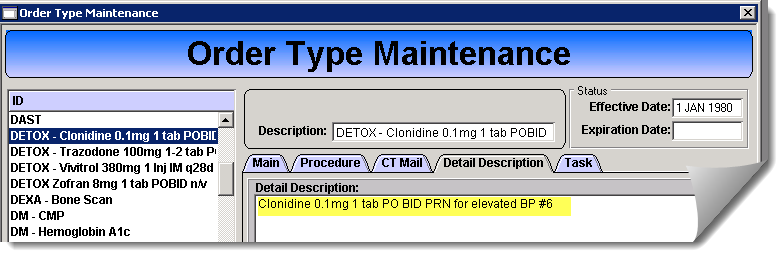
Order
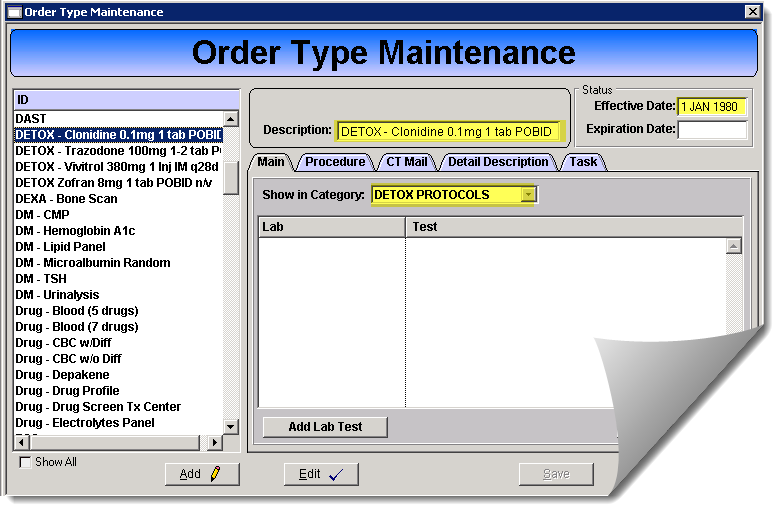
Type Setup
Navigation: Maintenance menu option > Orders (Lab-Test Groups) > Test Group
-
Main Tab
Click the Add button
Enter Nam and Effective Date
Select the applicable Show in Category from the drop-down menu
-
Detail Description Tab
Type in the Detail Description
-
Task Tab
-
Set up the following options:
Create Task: Yes
Facility Contact: Choose Contact type from the dropdown
Priority: Select Priority from dropdown
Category: Select Category from dropdown
Comment: Type comment text that you want to show in the Task
-
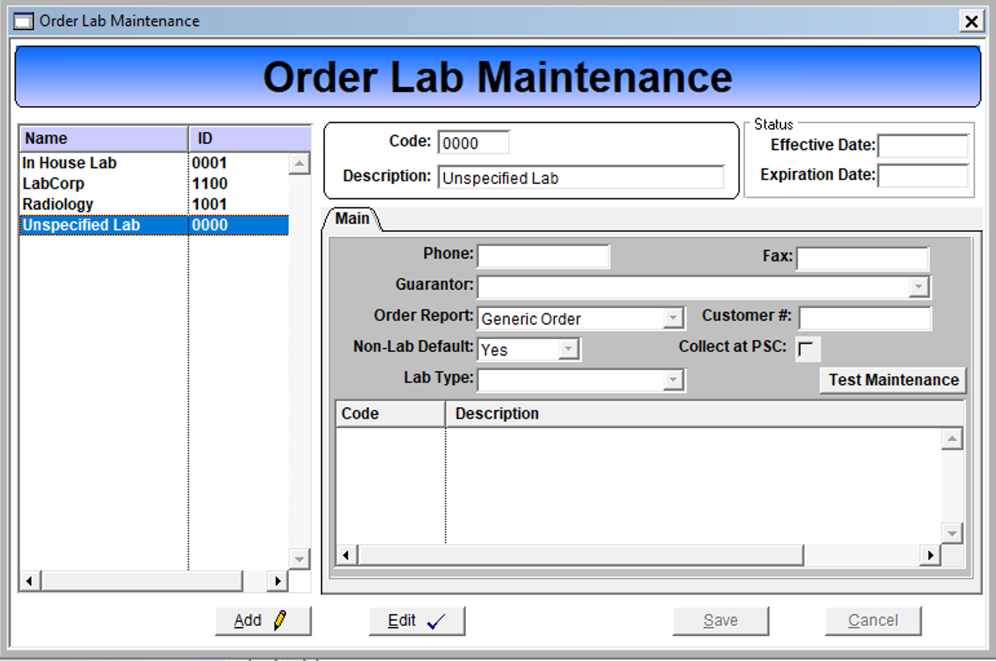
Lab Test Setup
Navigation: Maintenance menu option > Orders (Lab-Test Groups) > Lab-Test Service
-
Enter Order Labs
Click the Add button
Enter desired Code
Enter Name and Effective Date
Enter the Lab information on the Main Tab
One Lab option must be set as “Non-Lab Default” (usually “Unspecified Lab” is set as non-lab default)
Orders Auto-Task Setup
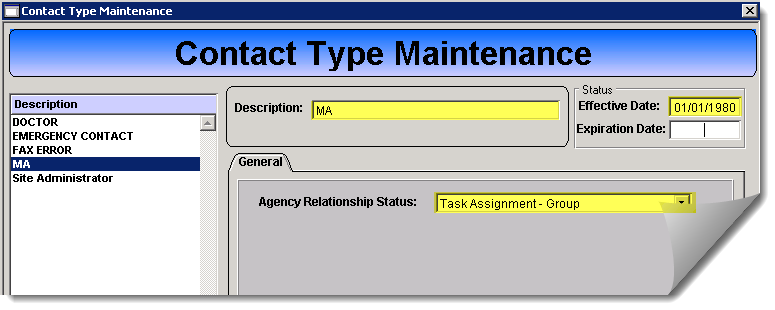
Facility Contact Type Setup
Navigation: Click F1 > search and select Facility Contact Type
-
Add Contact Types to be notified of Order Tasks
Click the Add button
Enter Name and Effective Date
Agency Relationship Status: Task Assignment – Group
Save
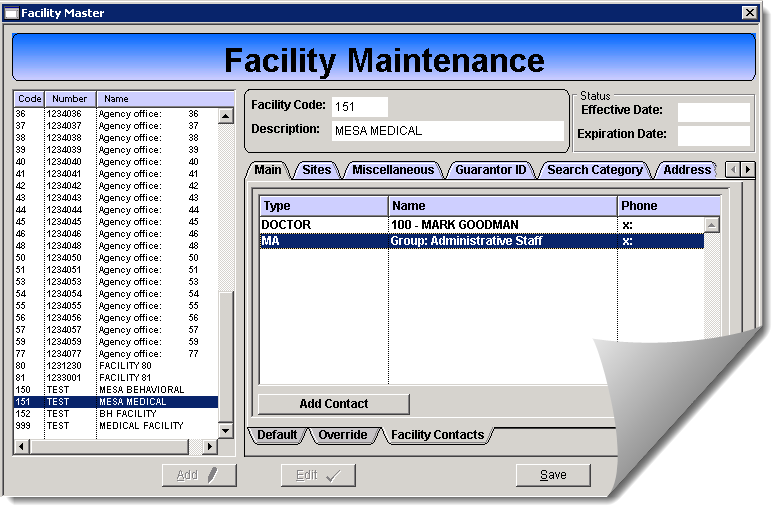
Facility Maintenance
Navigation: Core menu option > Facility > Main Tab > Facility Contacts sub-tab.
Click Add Contact and add the newly created type to the facility
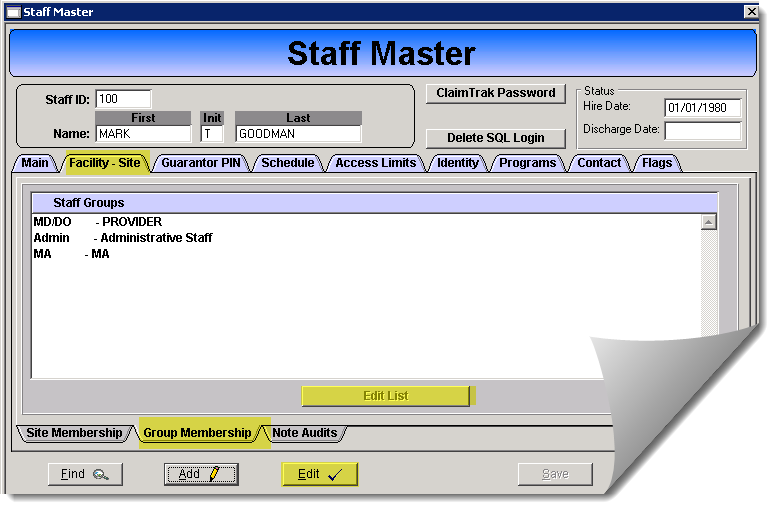
Staff Master Group Membership
Navigation: Core menu option > Staff > Staff Master > Facility – Site tab > Group Membership sub tab
Click Edit
Click Edit List button
Select the applicable Staff Group from the left and drag/drop it to the right
Click OK
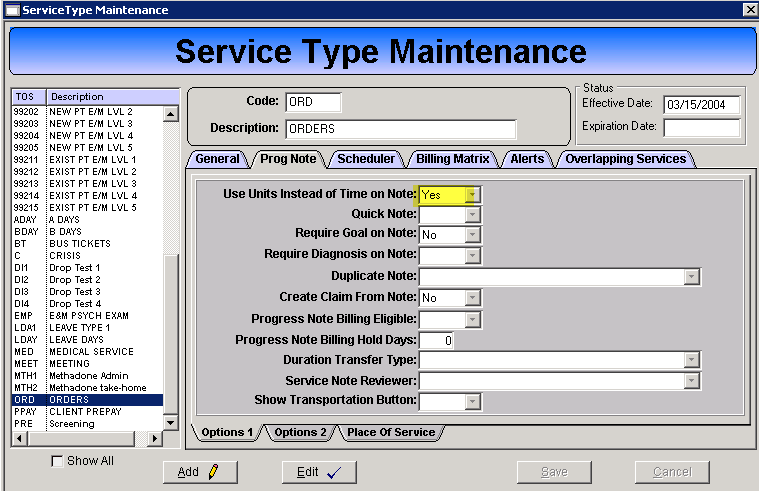
Adding an Order Note to the Chart via the Service Type Maintenance Window
Navigation: Maintenance menu option > Service Types
Click Add
-
Service Type Maintenance Window header:
Code: ORD
Description: ORDERS
General Tab: No special settings
-
Prog Note Tab > Option 1 sub-tab
Use Units instead of Time on Note: YES
Set all others to NO
-
Prog Note Tab > Option 2 sub-tab
Show status Note Page: General Note
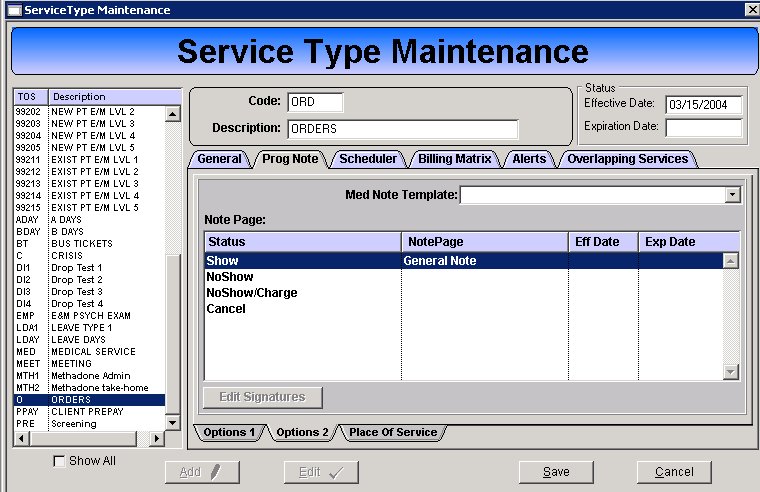
Check to make sure you have the Flag: UnboundOrder
Contact Support to point the flag [unboundOrder] to the Service type ORD: ORDERS. Currently this flag has to be configured by Remarkable Health.
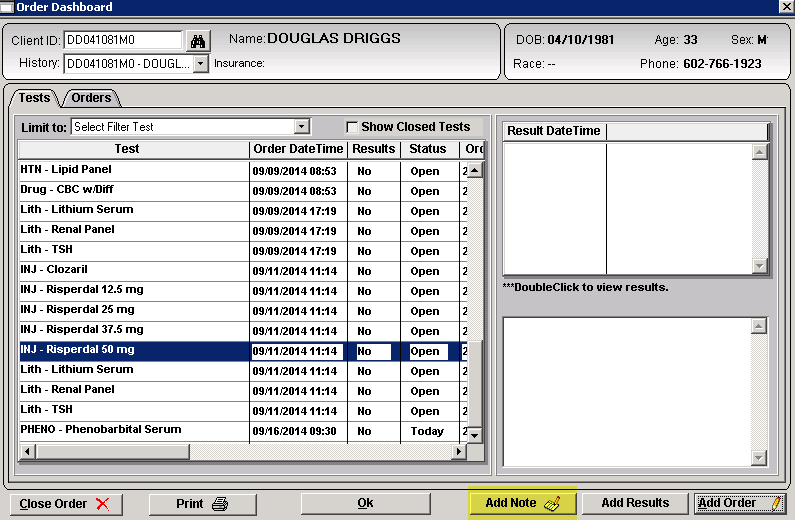
Adding the Note to the Client Chart
Click on the order and then click the Add Note button to add note to chart.
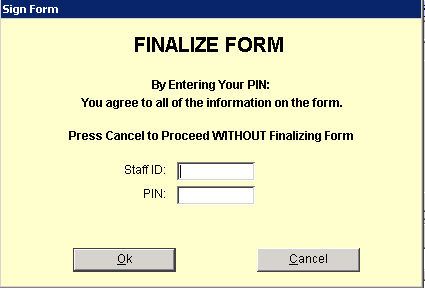
Sign Order using ID and PIN.
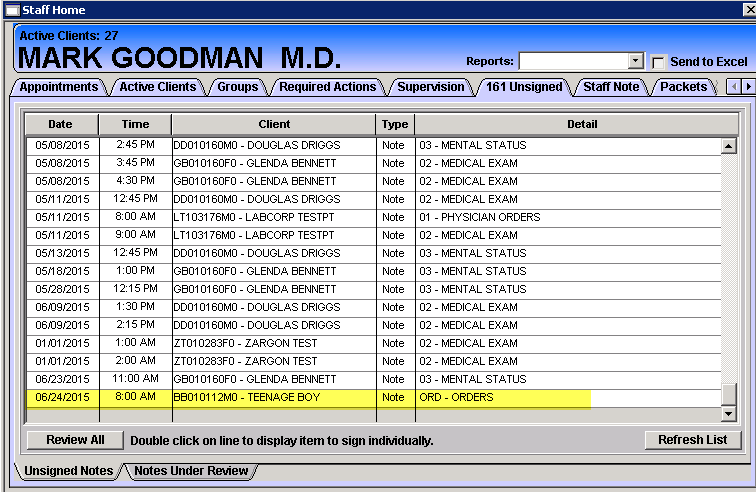
Unsigned Tab on the Staff Home
Any orders that are not signed will be listed on the Unsigned Tab in Staff Home
It can be signed as part of the bulk signature function from the Review All button

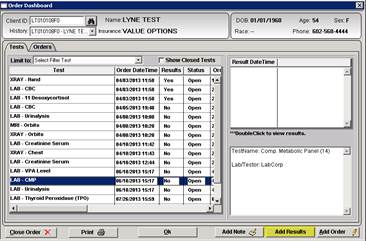
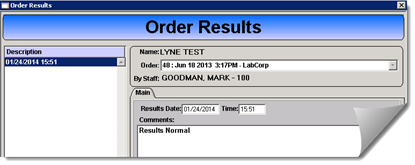
Manual Entry of Lab Results
Navigation: Client menu option > Client Orders
Open Client Orders from Client Menu
Then search for the client you want to add results for
Left click to select the specific lab you want to enter results for
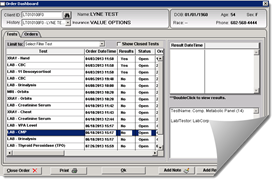
Click the Add Results button
Tab through the Results Date and Time fields and then type Results into the Comment field.
Then click the Save button
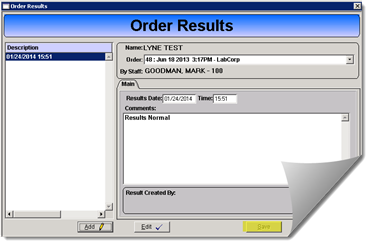
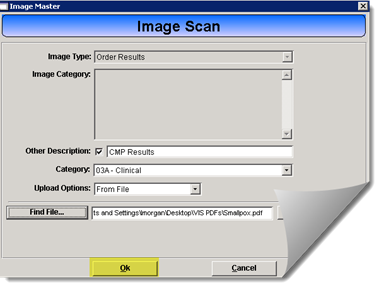
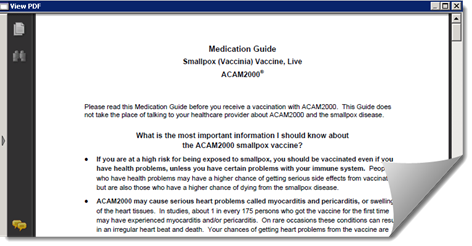
To upload an Image of the results, click the Add Image button. This will open the Image Scan screen
-
Fill out the fields accordingly:
Image Type: Order Results
Other Description: Add description
Choose the applicable Category
Upload Options: From File
Click the OK button
Click the Close button
Then “X” out of the Order Results screen
Now you should be able to see the comments and PDF from the Result Date/Time field.
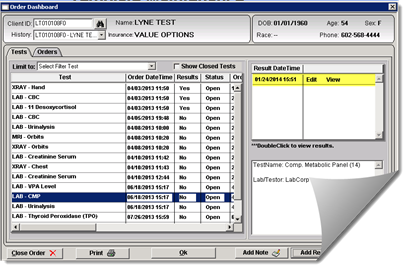
If you click on ”Edit it will show you the Order Results
If you click “View” or “Result DateTime” - you should be able to see the PDF in the PDF view screen
3
Confidential and proprietary property of Remarkable Health, LLC. Not for distribution, except to authorized persons.