
The Copy Paste Utility allows for pasting frequently used text (macro) into any text field of a progress note, smart template or form. A keystroke can also be assigned for quick entry without opening the utility window. With proper permission levels a user can also create new entries. There are multiple available permission levels associated with this functionality and are explained below.
The Copy Paste Utility is accessed from the Menu Toolbar: select CT Copy and then select Copy/Paste Utility from the menu list
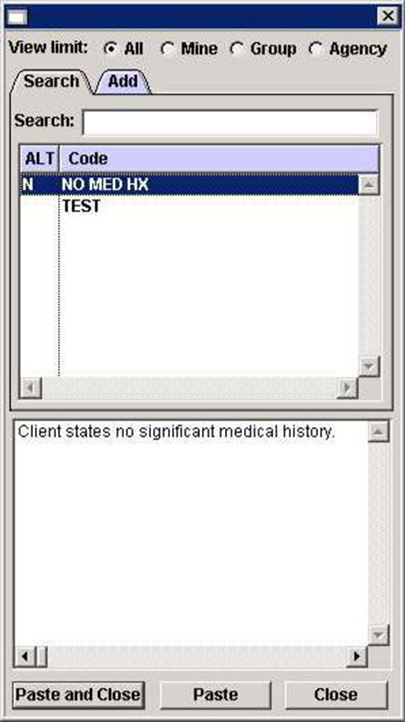
Highlighting a macro will display the full macro text in the bottom section of the utility window (see picture below).
View Limit: Filters the list of macros displayed.
Search: Enter a word or words to filter the list of macros.
ALT: The assigned custom keystroke for the macro.
Paste and Close: Places the macro in the text field of the progress note and closes the utility. Double clicking the macro produces the same result.
Paste: Places the macro in the text field without closing the utility window.
Close: Closes the utility window.
Configuration
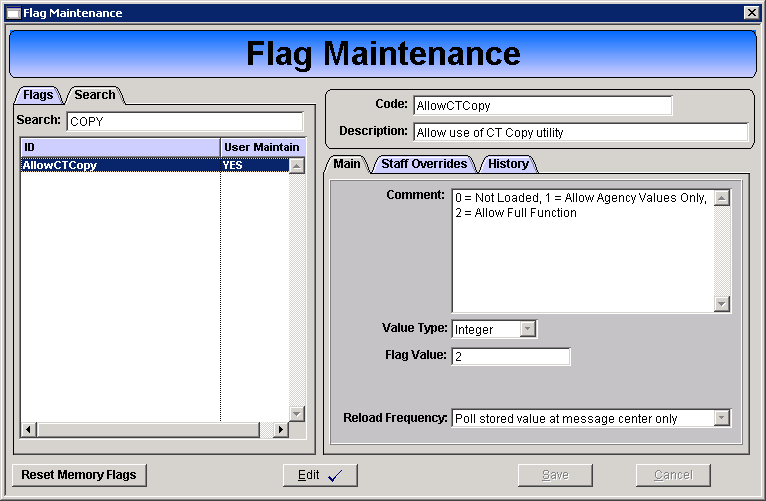
The Copy Paste Maintenance window is for the administrative management of copy paste text (macros). To limit staff use of macros based on the settings entered on the maintenance window the staff member must have the appropriate flag value for the AllowCTCopy flag.
Flag Values
Access: Maintenance > Flags
Flag Name: AllowCTCopy
0: The utility is not present on the toolbar.
1: The utility is present on the toolbar, the utility will only display macros entered via the Copy Paste
Maintenance, staff will not be able to create a macro.
2: The utility is present on the toolbar, the utility has full functionality allowing the user to create and manage macros.
Copy Paste Maintenance
The Copy Paste Maintenance window is for administrative configuration and management of macros.
Access: Maintenance > Utilities > Copy/Paste Data
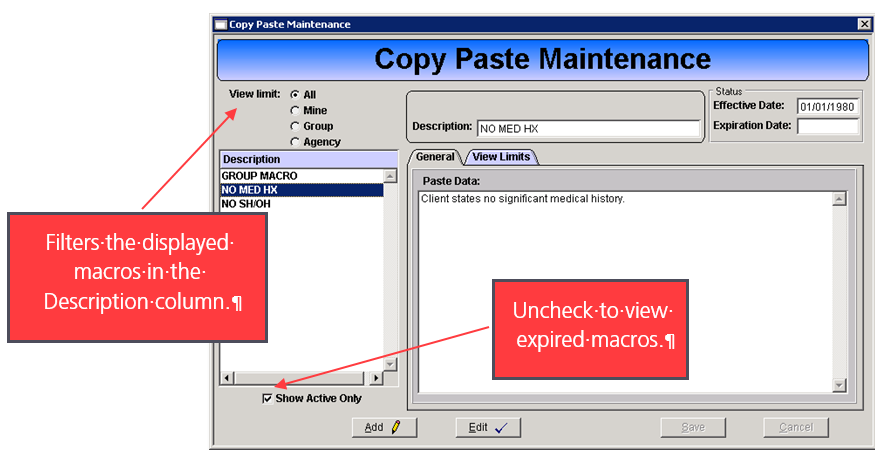
Create a Macro
1. Click the Add button.
2. Enter an effective date for the macro.
3. Enter a description, this text will show in the utility window.
4. Enter the full macro text in the Paste Data field.
5. Enter the View Limits.
-
Limit to Staff: Only the selected staff member, select the staff from the Limit to Staff drop down.
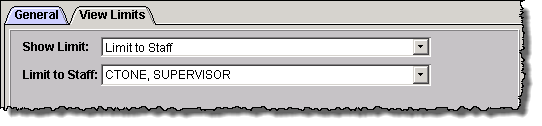
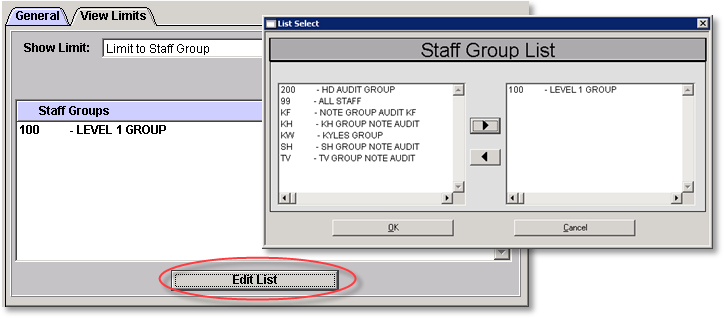
Limit to Group: Only the selected staff group(s).
- Click the Edit List button.
- Move the desired staff group(s) to the right hand side by clicking and dragging or using the directional arrows.
- Click OK.
Agency Wide: All staff

6. Click Save.