Remarkable Health Client Survey module was designed to give customers the ability to send surveys to the populations they serve, in order to gain an understanding of their population from a client satisfaction and marketing perspective to clinical insight.
With the Client Survey module, you can:
Send a survey to a client via email and receive a completed survey from a client
Build your own surveys to send to clients on a specific date or timeframe
Survey Home Page
To access surveys, log into CT|One and navigate to the Outcomes menu at the top of your screen. Select Surveys from the drop-down menu.
You will be presented with the Survey screen which will display a list of all the sureveys you have created. Let’s explore this screen a little more!
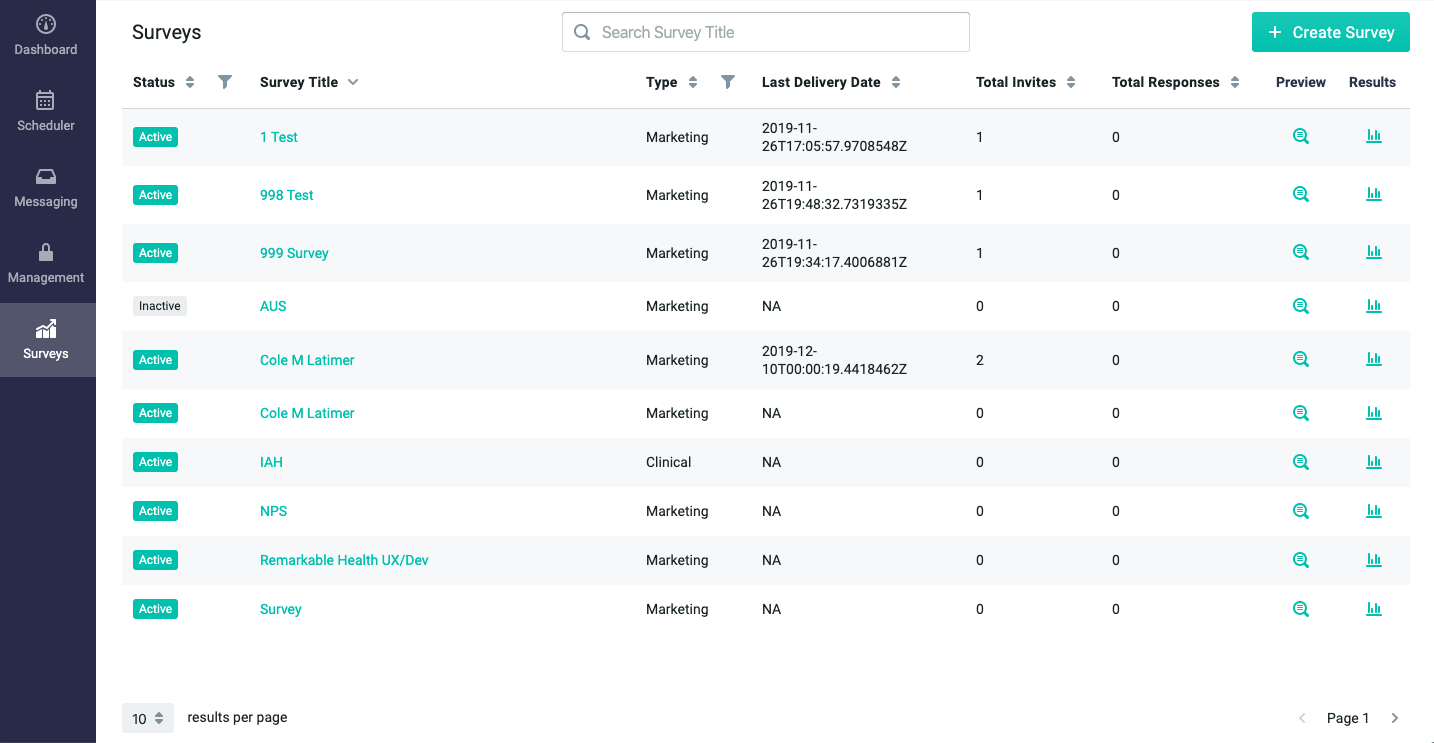
Column Descriptions
Status: This column will show you if the survey is currently active or inactive.
Survey Title: The title of your survey.
Type: The type the survey is categorized as. Currently, we have Marketing and Clinical as the available options.
Last Delivery Date: This is the most recent date the survey was sent out.
Total Invites: This is the number of people the survey was sent out to.
Total Responses: This is the number of responses to the survey you have received.
Preview: This allows you to preview the survey.
Results: This will show you the results from the responses to your survey.
You can view up to 50 surveys results per page by changing the Results Per Page in the lower left-hand corner of your screen.

You can scroll through the pages of survey results by clicking the left and right arrows by the page number in the lower right-hand corner of your screen.

Previewing Surveys
To see a preview of a survey, click the magnifying glass icon in the Preview column for the applicable survey.

This will bring you to the preview page for the survey you selected.
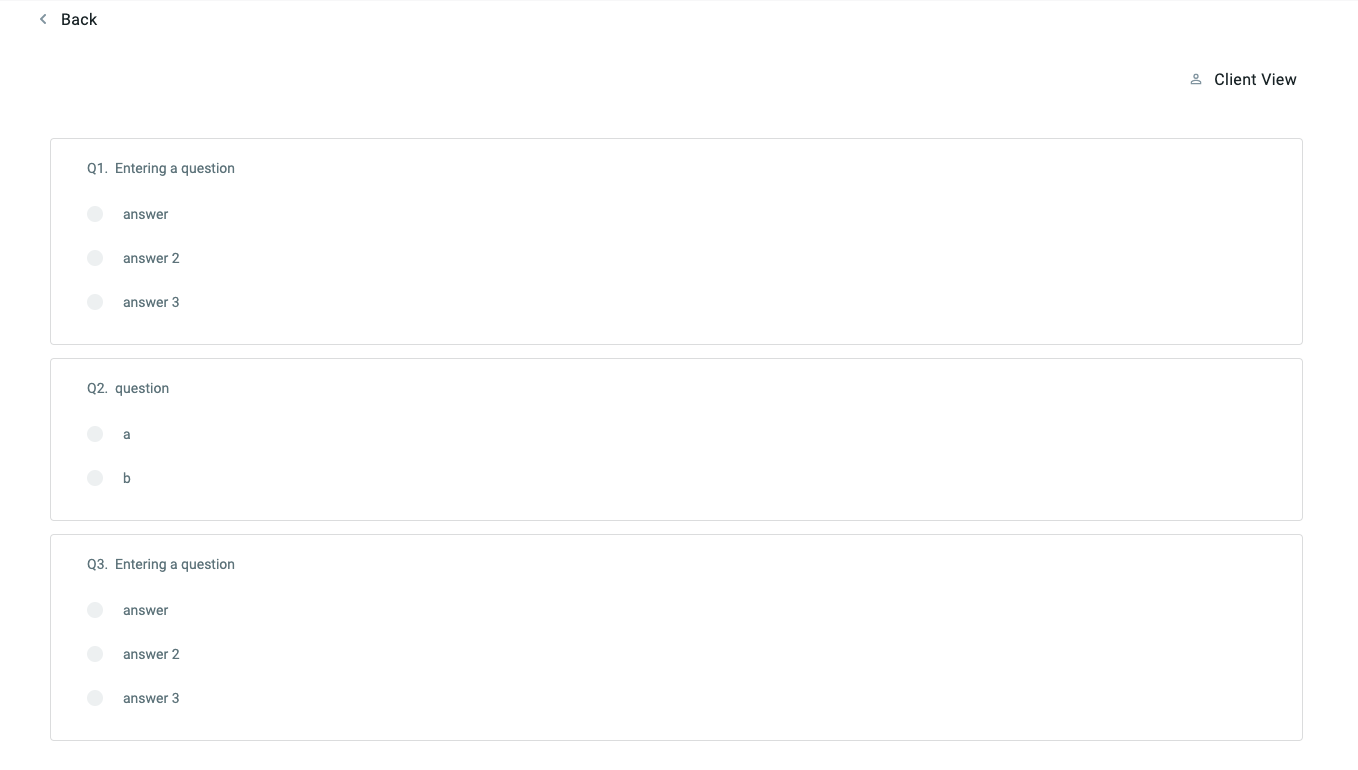
To see what the client will see, click the Client View button in the upper right-hand corner of your screen.

To go back to the main screen, click the Back button in the upper left-hand corner of your screen.

Reviewing Survey Results
To view the results of a survey, click on the graph icon in the Results column for the applicable survey.

This will bring you to the survey results for the survey you selected.
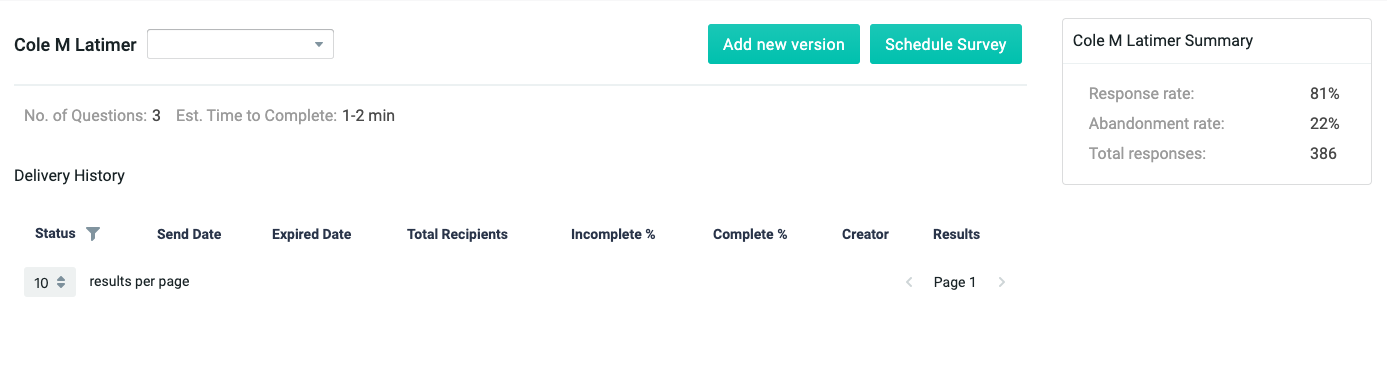
On this screen you will be able to see information about the survey like:
Number of question on the survey.
Estimated time it takes to complete the survey.
Status of the survey (active or inactive).
The date the survey was sent and the date it expired.
The total number of recipients that were sent the survey.
What percentage of the surveys sent are incomplete.
What percentage of the surveys sent were completed.
Who created the survey.
The results of the survey.
In the upper right-hand corner, you will also see a Survey Summary Box that will provide a quick snapshot of the:
Response Rate
Abandonment Rate
Total Responses
Adding a New Version of the Survey
At the very top of your screen, you are able to Add a New Version of the survey and Schedule Survey.

Clicking the Add new version button will allow you to edit the existing survey that you selected and create a new version to send to clients.

You can:
Edit the questions and answers
Delete questions
Copy questions and answers
Rearrange the order of the questions
Once done, you can click the Save button and you will have a new version of the survey to send.
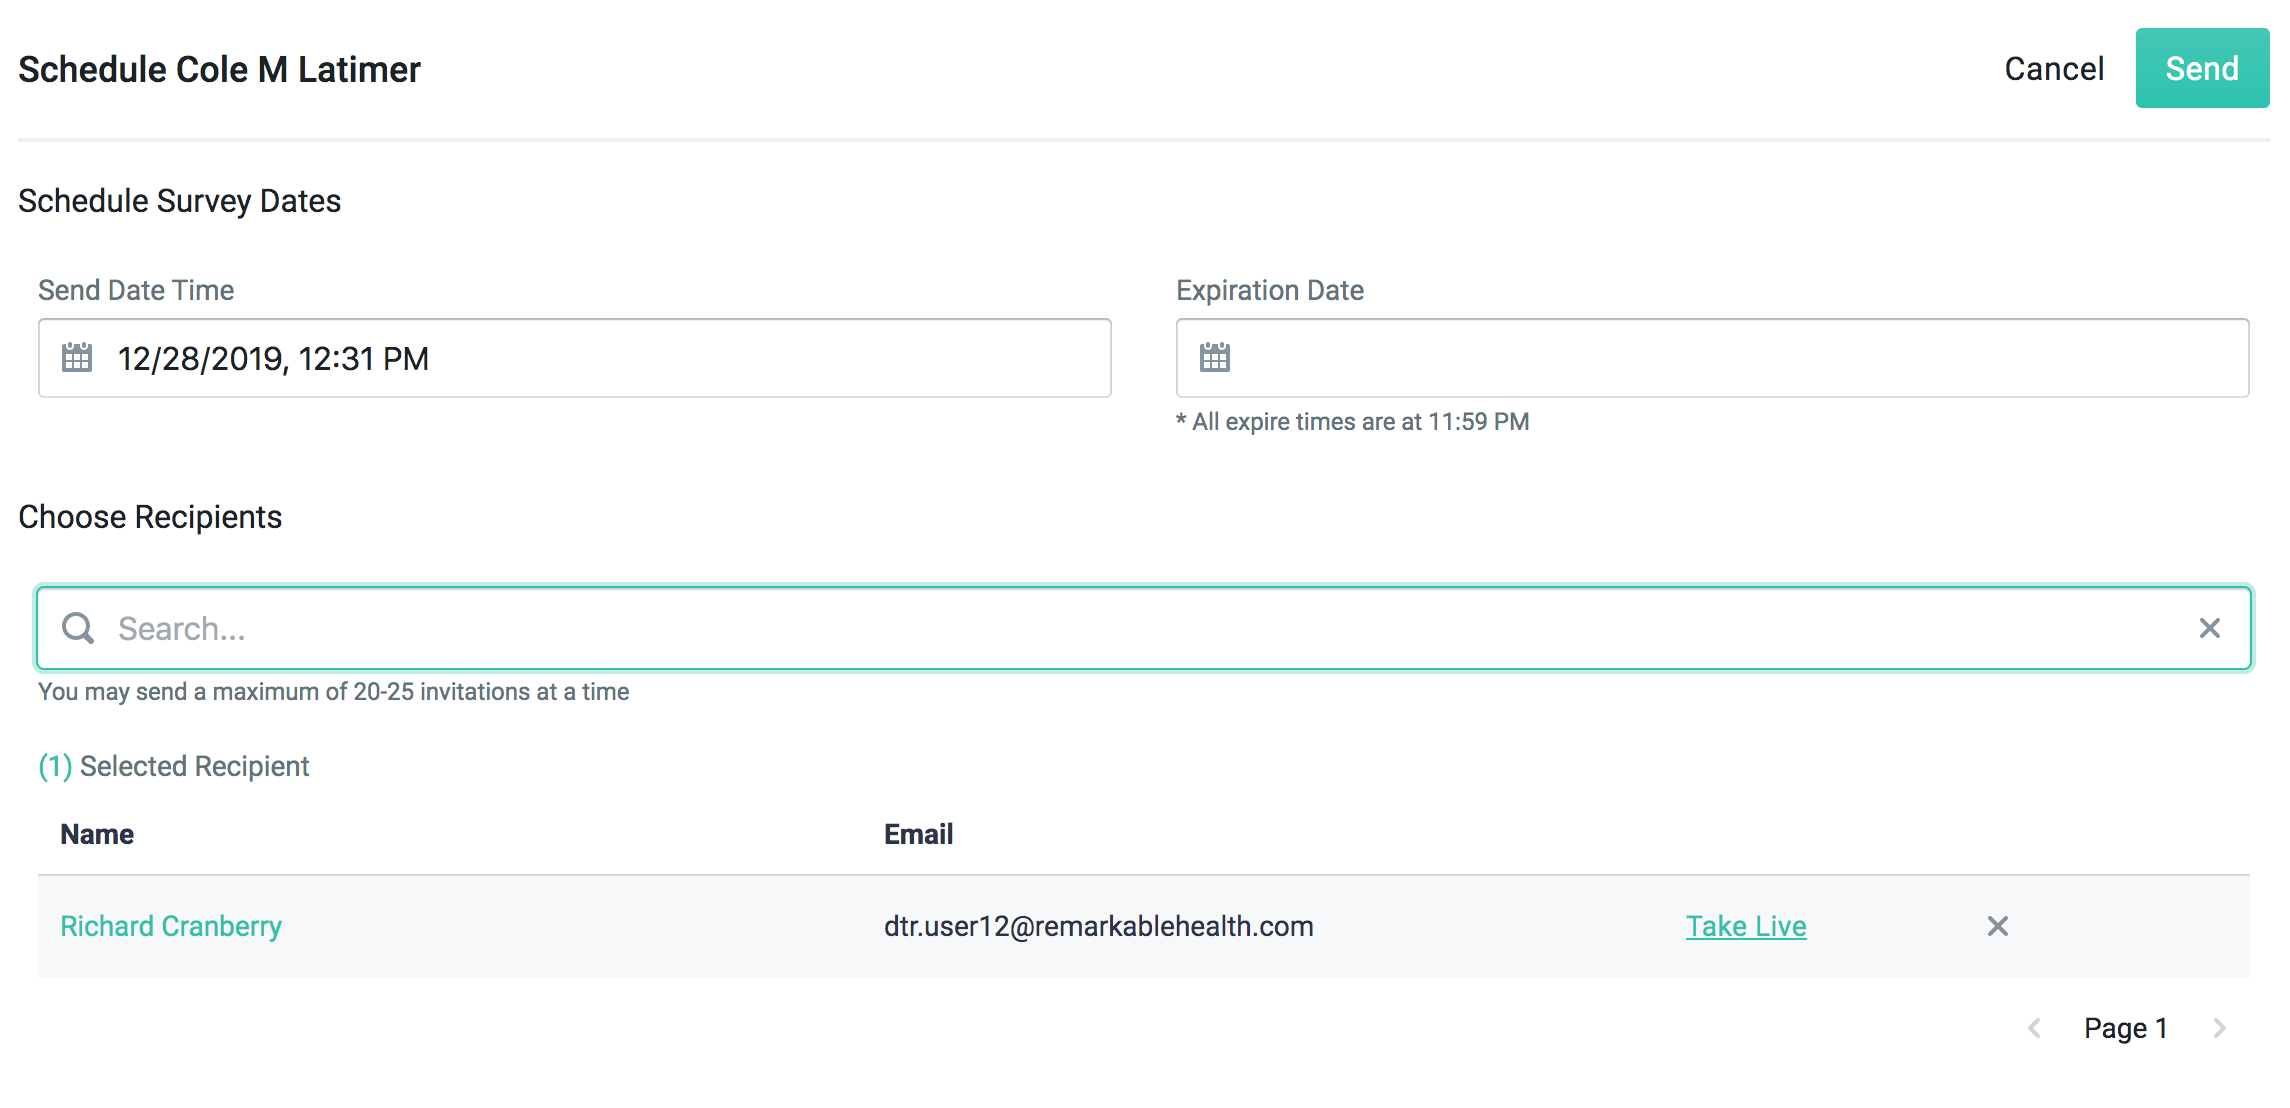
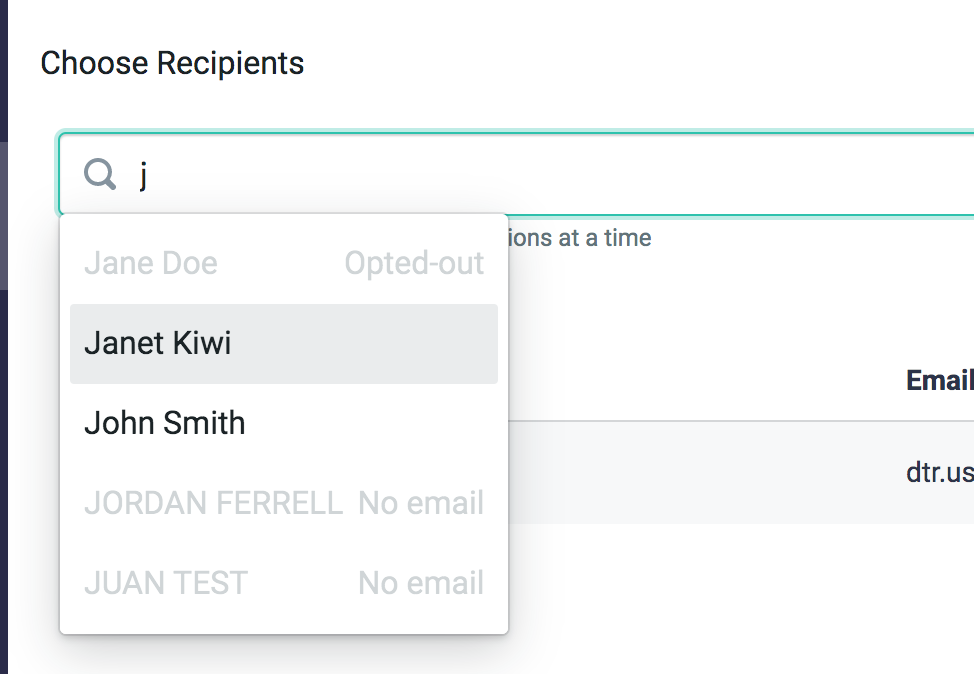
Scheduling a Survey to be Sent
Clicking the Schedule Survey button will bring you to the Schedule Survey page where you can set a date and time for the survey to be sent to selected recipients. You can also set an expiration date so that clients will not be able to access the survey after the expiration date.