
Client Performance Tracking
The Remarkable Health Client Performance feature within the Mobile application will allow clinicians to document client performance seamlessly from client to client with quick turnaround time on time on sensitive progress notes, all from the ease of a mobile device.
Client Performance Workflow
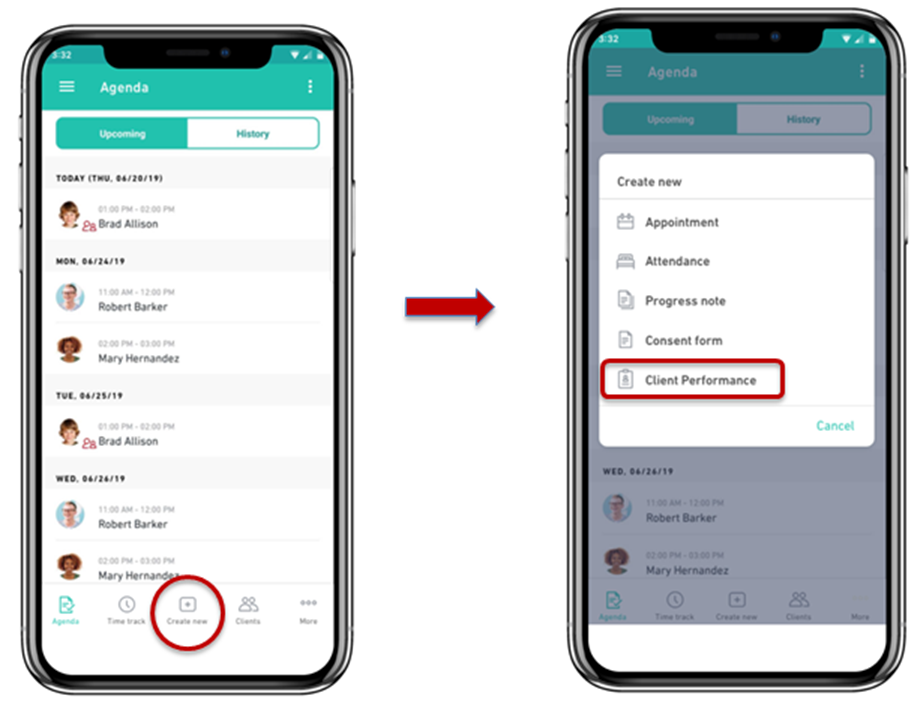
Log into your mobile app and click Create New at the bottom of the screen.
From the options listed, click Client Performance.
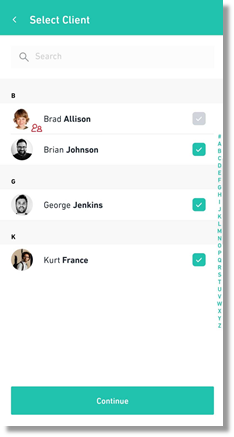
You will then be presented with a list of clients who meet the following criteria:
- Client is associate to you as their clinician
- There is at least one “active” objective associated to a goal from their treatment plan
Next, select the client(s) whose performance you would like to track and click the Continue.
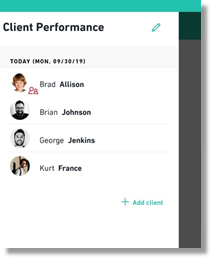
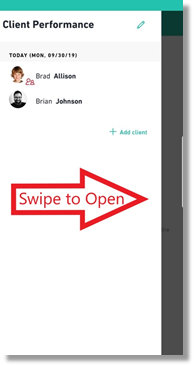
The selected clients are now available in your CP Drawer and are ready for performance tracking.
You can add additional clients to your CP Drawer by clicking "+ Add Client" button and remove clients by clicking the pencil icon and then the trash icon by the client you wish to remove.
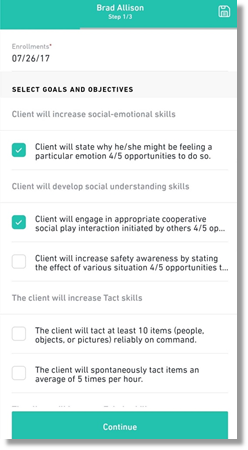
Simply click on the client and select which objectives you plan on addressing during the session from the Select Goals and Objectives screen.
Once the objectives are selected, click Continue. Every time you click Continue your selections are auto-saving!
This will navigate you to the first Goal with associated "selected" Objectives.
Note, each goal will have its own page of objectives to help keep the goals separate.
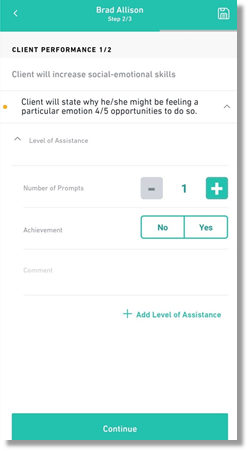
You are able to update the following options based on the performance being tracked during the session time with the client:
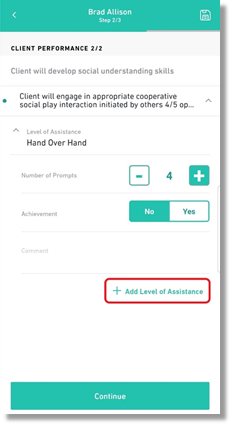
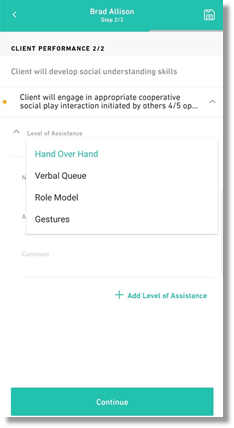
- Level of Assistance (LOA)
- Additional LOA's can be added as desired
- Number of Prompts
- Achievement
- Comments (field can be used for short open text dialog)
Level of Assistance (LOA)
Number of Prompts: You can increase/decrease the number of prompts being tracked.
Achievement: This is where you would select if the client achieved the goal or not.
Comment: Here you can add any additional comments.
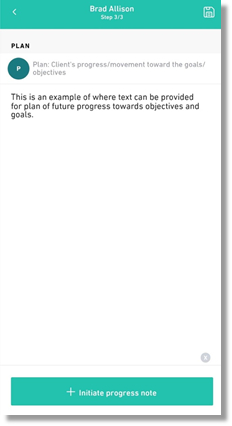
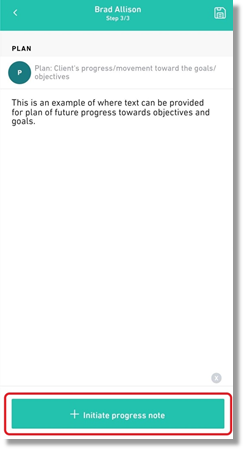
During the session, you can also view the Plan page.
The Plan page gives you a free form text box to note down any planning steps for future performance tracking as deemed necessary.
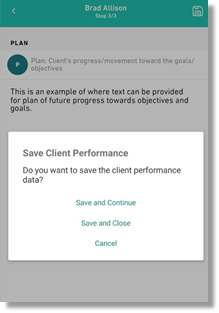
Once the tracking has been completed (or complete up to what is needed at the time), you can save the information tracked by clicking the save icon in the upper right-hand corner.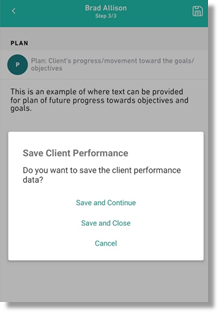
Save and Continue: This option will save the information currently tracked and keep the user present on the previously selected Client
Note: The user will need to swipe the drawer open to navigate to other Clients present in the CP Drawer
Save and Close: This option will save the information currently tracked, however it will then navigate you out of the Client Performance flow and back to the other many Mobile Application features
Cancel: This option will cancel the action of save and keep you present on the previously selected Client
Note: The information will still be auto-saved as previously stated
Once saved, you can either:
Navigate back to the CP Drawer by swiping right to open the drawer. Then you can select a different client whose performance you would like to track. Swipe left to close the drawer and go back to the previous Client.
Or navigate to the other features within the Mobile Application by selecting Save and Close:
Initiating a Progress Note from Gathered Data
As a clinician, the main reason to track client performance is to then create a progress note from said information. To do this, follow the instructions below.
Once the tracking has been completed (or complete up to what is needed at the time), select the "Initiate progress note" button at the bottom of the "Plan" page.
Once selected, you will be prompted with the Session Information screen for progress notes.

Note: The Performance Tracking Template is auto-selected as this note template is mandatory for this Client Performance flow.
Also, the Enrollment will be auto-populated as it associates to the enrollment selected during the Client Performance flow to coordinate with the associated Goals/Objectives from the Treatment plan
Once all the required fields in the "Session Information" screen are populated as desired, the "Start taking notes" button will be enabled.

Note: If you decide you do not want to proceed prior to selecting "Start taking notes" then the progress note will NOT be saved and the Client information will still live in the CP Drawer until the progress note has officially started.
Once this button is selected, the progress note is now officially created in a draft state until all required information is populated and signed.
Note: All information from the Client Performance flow will auto-populate into the progress note as intended
Since the tracked client performance is now living in a progress note, the Client is removed from the flow and will no longer be present in the CP Drawer.