

Maine Program Based
Treatment Plan
Contents
Treatment Plan Configuration and Setup4
Staff Master – Program Access14
Configuration fields as they appear in the Maine Program Based Treatment Plan:16
Completing Your Treatment Plan19
Crisis Safety and Unmet Needs19
Risks and Benefits Reviewed with the Client27
Purpose of this Guide:
To set up your Maine Program Based Treatment Plan (Treatment Plan – ME) or make changes to an existing setup.
To Understand how to use the Maine Treatment Plan.
Treatment Plan Configuration and Setup
Form Maintenance Setup
Log into CT One using your username and password.
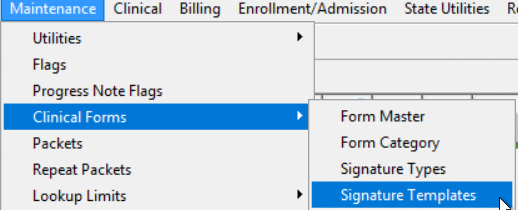
Navigate to the Maintenance menu and select Clinical Forms from the drop-down.
Next, select Form Master.

Form Maintenance Window
Your available forms will be listed in the left-hand Form Description column of the Forms Maintenance window.
Scroll down until you find the Treatment Plan – ME form and select it.
Enter an Effective Date for the Treatment Plan and click Save.
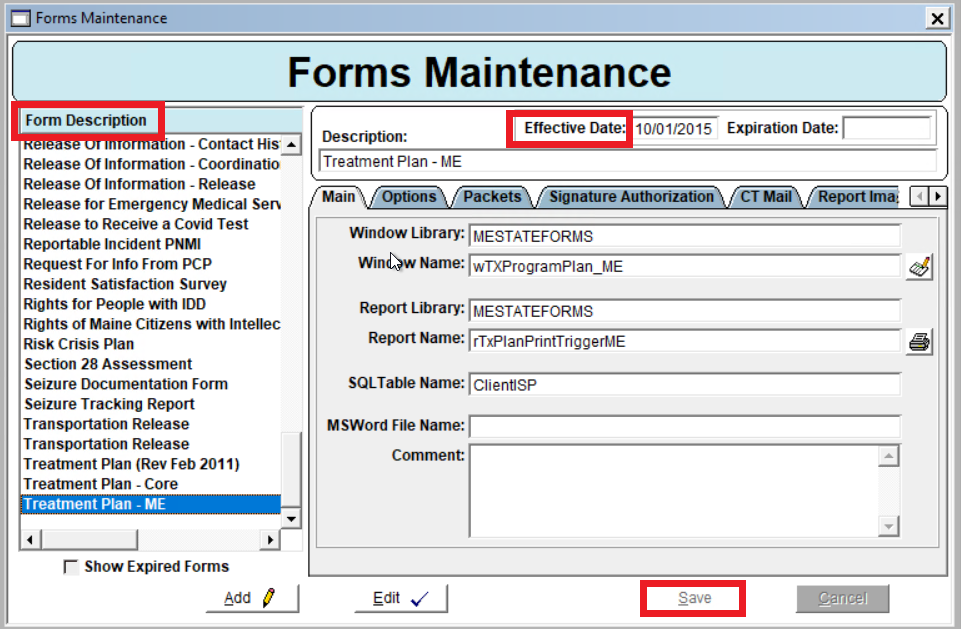
Note: For the Maine Program Based Treatment Plan, Do Not set up the Signature Authorization tab. The Signature set up for this plan is done via setting up a Signature Template. Directions for this come later in this guide.
Form Maintenance Optional Set Up – CT Mail:
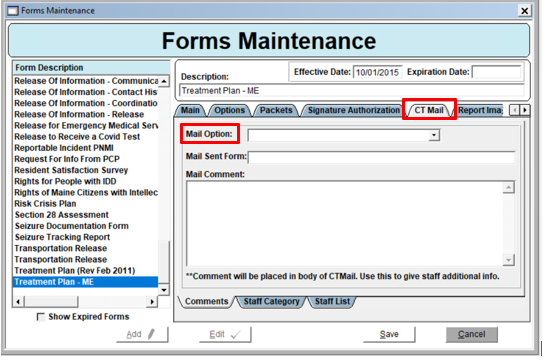
CT Mail Tab: Complete configuration on this Tab if you would like a CT Mail sent to staff when a Treatment Plan is created or added to a Packet. See below:
Mail Options: You can have a CT Mail message send to designated people when this treatment plan is created for a client.
- Do Not Send Mail on Form Create: No message will be sent when the treatment plan is created
- Send Mail on Form Create: CT Mail message will be sent when a new treatment plan is created for a client
- Send Mail on Form Create and Note in Packet: CT Mail message will be sent when a treatment plan is created and when added to a packet.
Mail Sent Form: This will be the description on the form entry in the chart and part of the body of the email.
Mail Comment: Add a comment to your mail message to provide additional information. This comment will be added to the body of the CT Mail message.
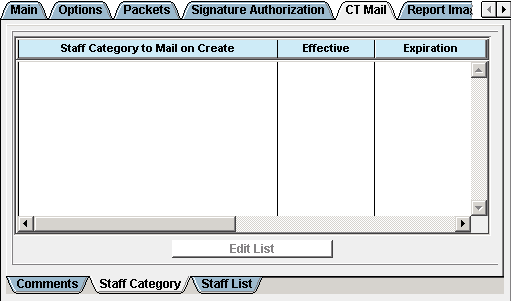
Staff Category Tab
Staff Category to Mail on Create: This is what staff categories you would like the message to be sent to.
- Click the Edit List, highlight which staff categories you would like and click the right facing arrow to add them to the list. When done click OK.
- Staff categories are set up in the Contact Type Maintenance. To edit, go to Core > Staff > Staff Maser > Schedule Tab. The entries on the schedule tab come from Appointment Search Category which is maintained Core>Scheduler Maintenance > Appointment Search Category.
Effective: This is when the CT Mail will start being sent.
Expiration: This is when the CT Mail will stop being sent.
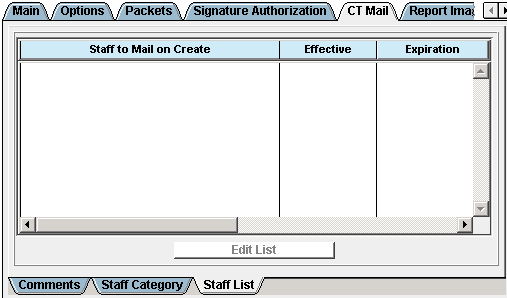
Staff List Tab
Staff to Mail on Create: You can select specific staff members to send the message to.
- Click the Edit List, highlight which staff members you would like and click the right facing arrow to add them to the list. When done click OK.
Effective: This is when the staff to mail will start being sent
Expiration: This is when the staff to mail will stop being sent
Signature Template Setup
The Signature Templates window is where configuration of the signatures to be captured on the Maine Program Based Treatment Plan is completed. To support signatures, this plan requires that a Signature Template be created and assigned to each Program of the Maine Program Based Treatment Plan.
Note: Only signature templates that are configured with “Client Tx Program” in the Template Type dropdown will be available to select when configuring Programs – as part of the Maine Program Based Treatment Plan set up.
On the Signature Template Maintenance Window click Add.
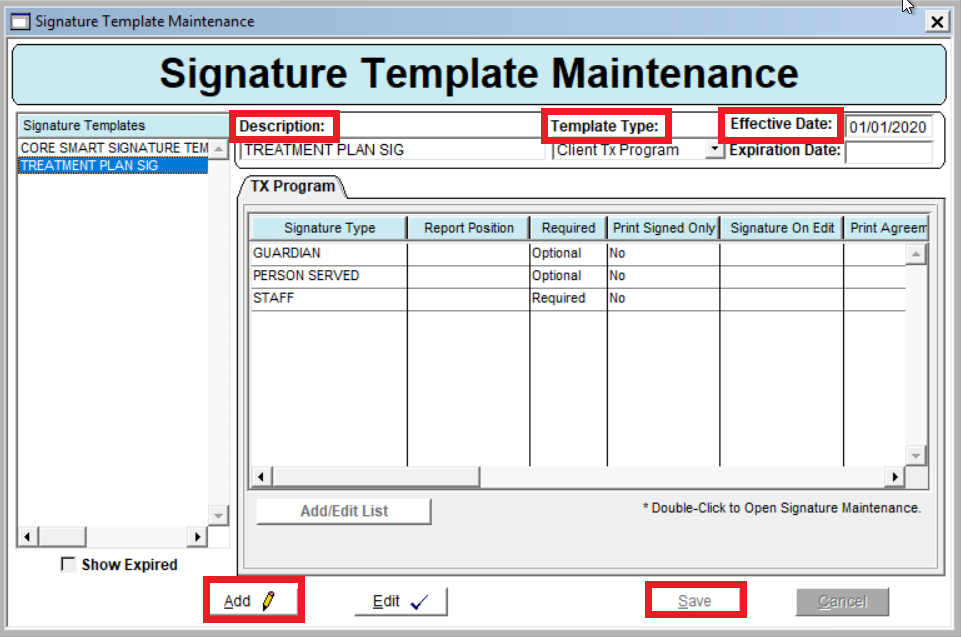
Name the Signature Template in the Description Field.
Select Client Tx Program in the Template Type dropdown.
Enter an Effective Date.
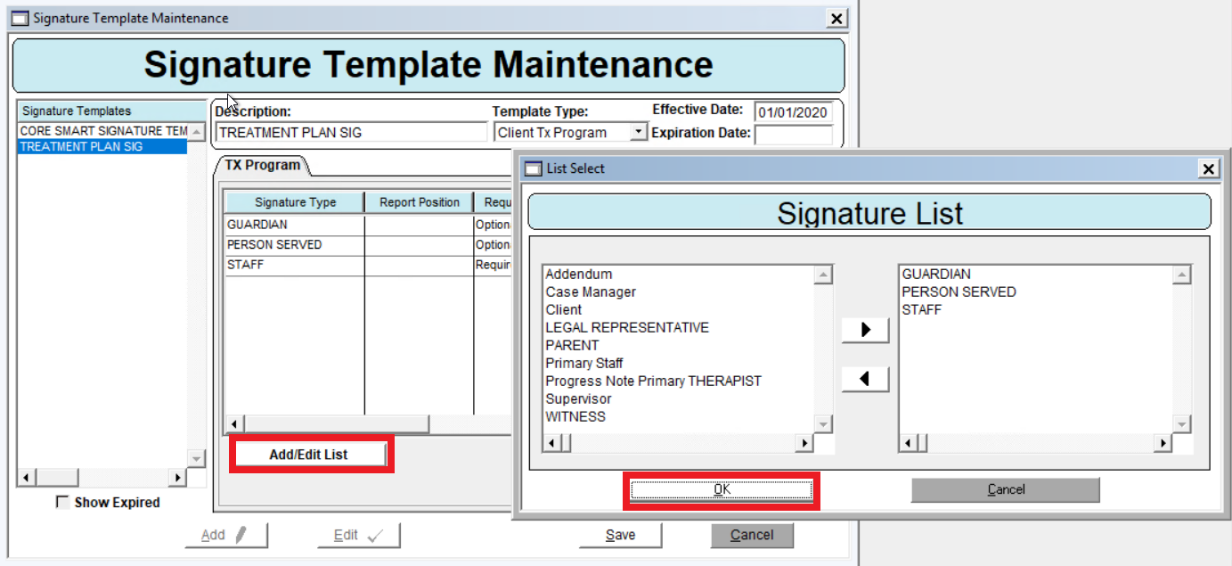
Click Add/Edit List button to select the applicable Signature Types for the template, click Ok to close the Signature List window and then click Save.
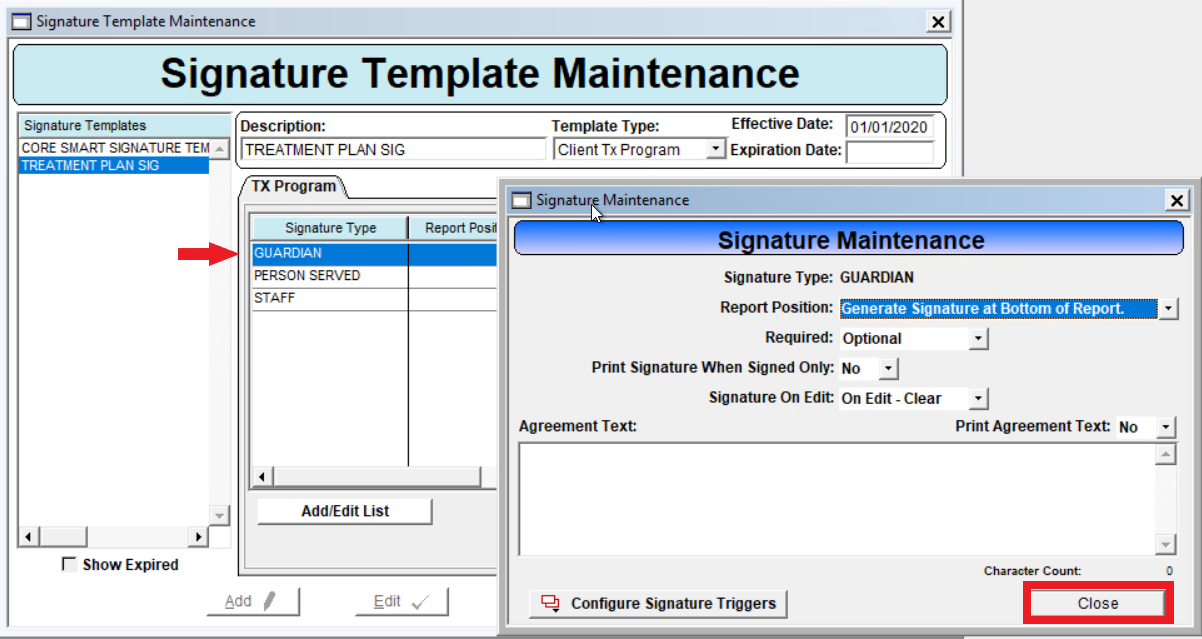
Once Signature Types are added to the template, double click on each Signature Type (e.g. Guardian, etc.) to open the Signature Maintenance window. Make the applicable selections for the signature type and click Close.
Program Setup
The Program Maintenance window is where the configuration for Programs included in the Maine Program Based Treatment Plan is completed. This includes entering the Names of each Program as they should appear on the Program tabs of the Treatment Plan and selecting a Signature Template for each Program of the Treatment Plan.
Note: Each Program must be configured, as directed below to appear in the Maine Program Based Treatment Plan.
Navigate to the Clinical menu and select Program from the drop-down. This will open the Program Maintenance window.
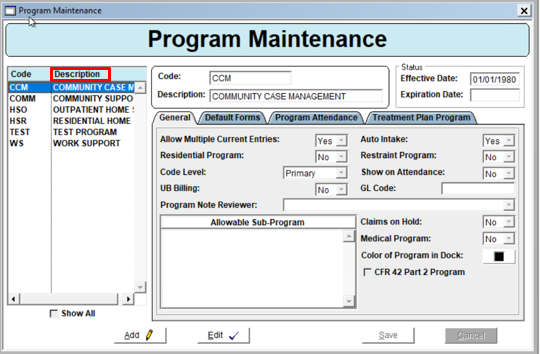
Locate the Program in the Description list on the left-hand side of your screen. Highlight the Program, and the information will populate in the fields to the right-hand side.
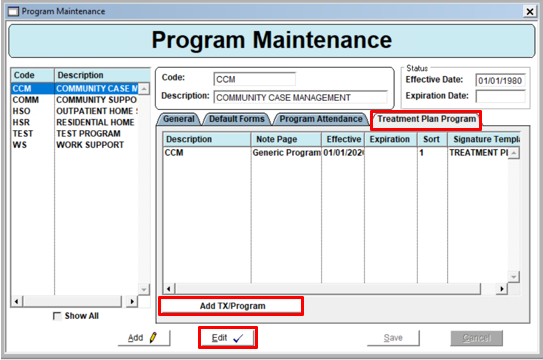
Click on the Treatment Plan Program tab.
Click Edit and the Add Tx/Program button will become active.
Click the Add Tx/Program button to add the information for the TX Plan Program tab.
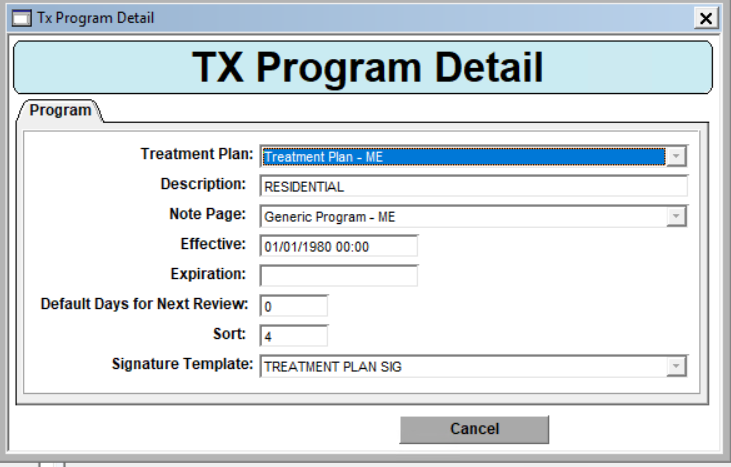
TX Program Detail window Fields:
Treatment Plan - Select Treatment Plan – ME (the Maine Program Based Treatment Plan).
Description - Enter the description (Program Name) you want to appear on the Program Tab of the Treatment Plan.
Note Page - Select Generic Program - ME
Effective Date - Enter the date you want this tab Effective.
Expiration Date - Enter an Expiration Date when you want to expire the configuration record.
Default Days for Next Review – Enter in the number of days in which the Plan will be reviewed. Based on the number of days entered, the Maine Program Based Treatment Plan will populate a default date for the Due Date for Next Treatment Plan Review field of the Plan Program tab.
Sort - If the client is in multiple eligible Programs, this sets the order in which the program tab will appear in the Treatment Plan.
Signature Template - Select the Signature Template that will be used to capture signatures for the Program tab on the Treatment Plan. Note: this is required to add signatures to the Maine Program Based Treatment Plan.
Click Ok when finished.
Client Program Assignment
For the Program tabs to appear on the Client Treatment Plan, the client will need to be enrolled in Programs. This is done by completing the Client Program Update form on the Client Chart.

On the Client Chart click New Packet, enter the Packet Date and Time, then click Save.
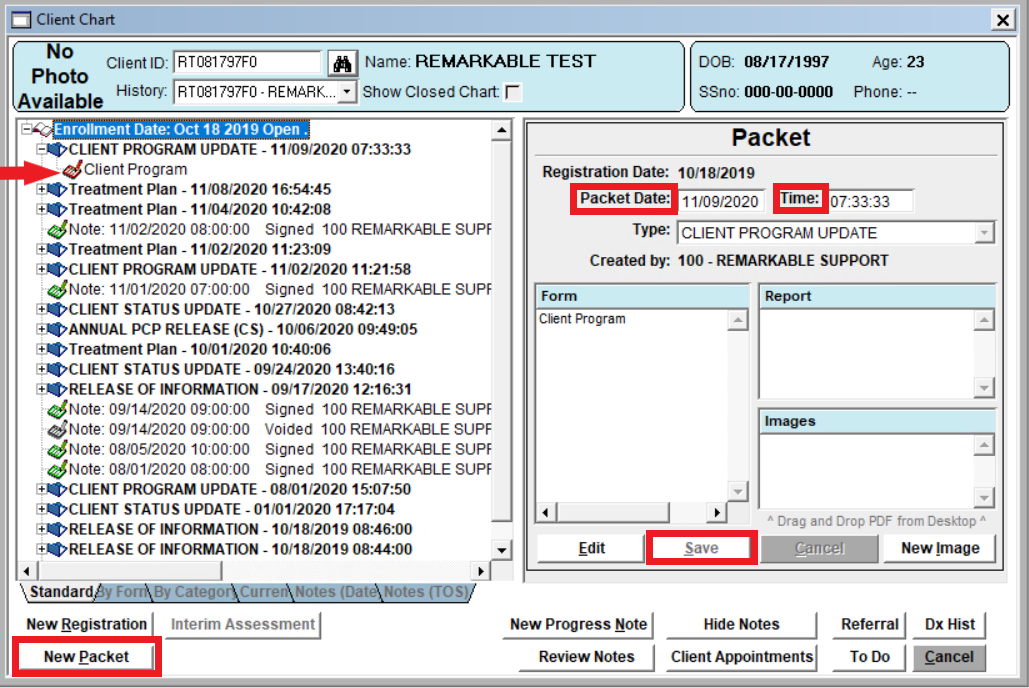
Once you have clicked Save, the Client Program Update form will appear on the Client Chart.
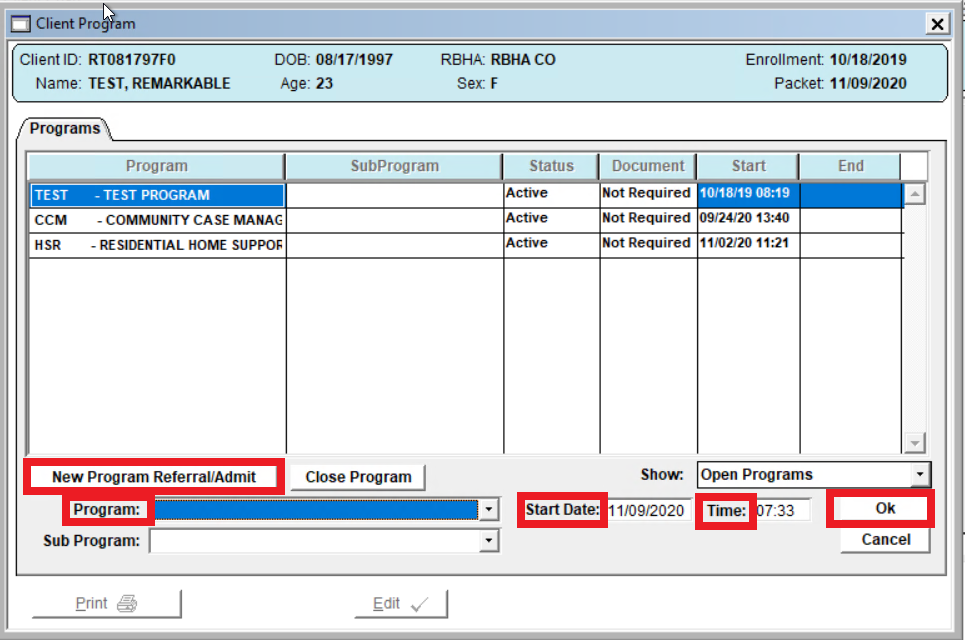
Click the New Program Referral/Admit button to add the client to their applicable Program via the Program dropdown.
Then tab through the Start Date and Time, click Ok and then click Save.
*Repeat the above steps for each Program the Client should be enrolled in.
Staff Master – Program Access
Program-based treatment plans require that staff have access to the Program, via the Staff Master for the staff to be able to edit the Program tab.
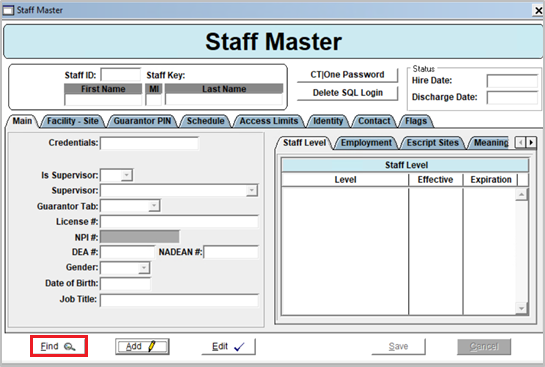
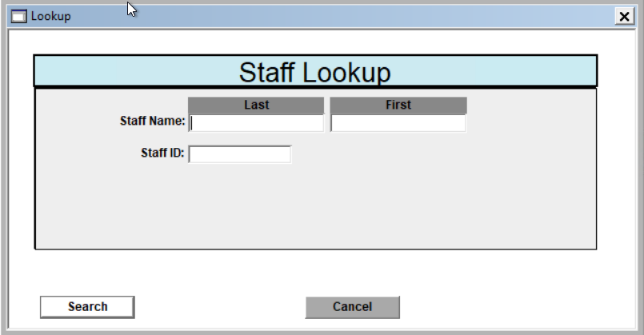
Select Find in the lower left-hand screen and search for staff members name or ID.
Any staff that will be documenting on a Program tab of the Maine Program Based Treatment Plan need to have the Program listed on their Program Sub Tab of the Access Limits Tab of their Staff Master.
On the Program Sub Tab of the Access Limits Tab, click the Edit button
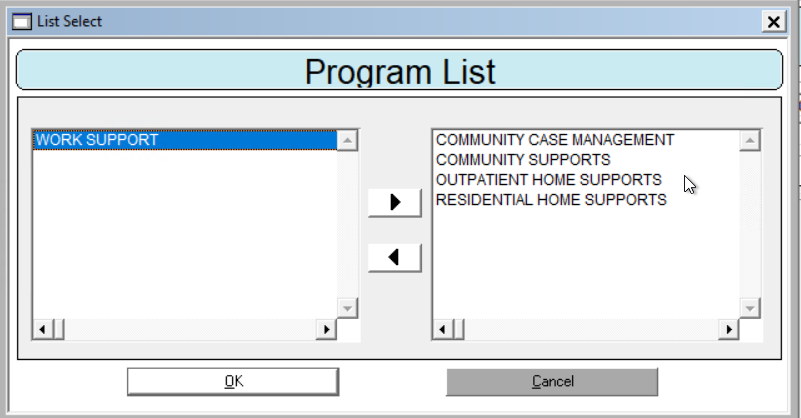
Then click the Edit List button to open the Program List window.
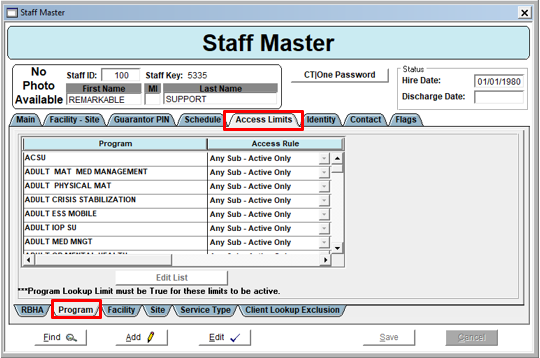
In the Program List window, add the applicable Programs by selecting the Program and clicking the right-pointing arrow. This adds the Programs to the list of Programs the Staff can access.
Click Ok once finished selecting Programs.
Configuration fields as they appear in the Maine Program Based Treatment Plan:
Options in the Class Member status Options/Values list will appear in the dropdown of the Class Member Status field of the Treatment Plan – General Tab.

The Label for Crisis/Safety Plan section appears as the title of the Crisis section on the General Tab of the Treatment Plan.

Create/Review: The Create/Review button is on the General tab of the Maine Program Based Treatment Plan.
Type of Treatment Plan Options/Values - These values appear in the Type of Plan dropdown field on the Maine Program Based Treatment Plan.
Goal/Obj/etc. Status Options/Values: These options appear in the Goal Status dropdowns in the Long-Term Goal, Short-Term Goal, Objectives, and Service Methods windows of the Maine Program Based Treatment Plan.
Session Length, Frequency, Duration Options/Values: The entered Session Length, Frequency and Duration Options/Values appear in the Session Length, Frequency and Duration Dropdown fields of the Service Method window of the Treatment plan.
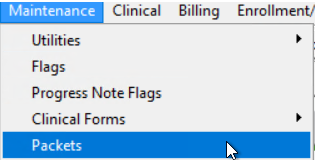
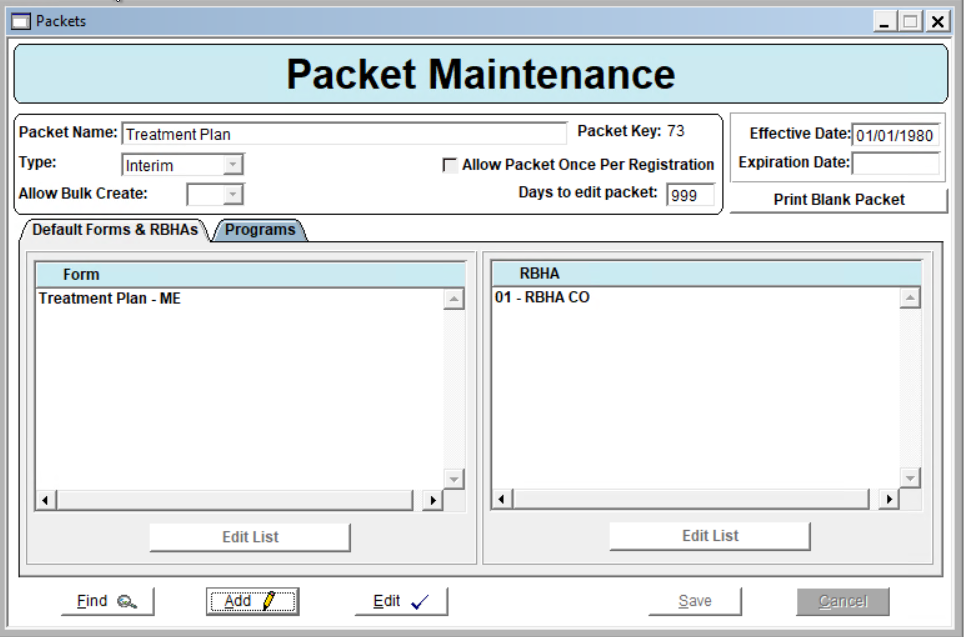
Packet Maintenance
Once all the configuration above is complete, the last step is to add the Maine Program Based Treatment Plan to a Packet. This is done at the Packet Maintenance window.
Completing Your Treatment Plan
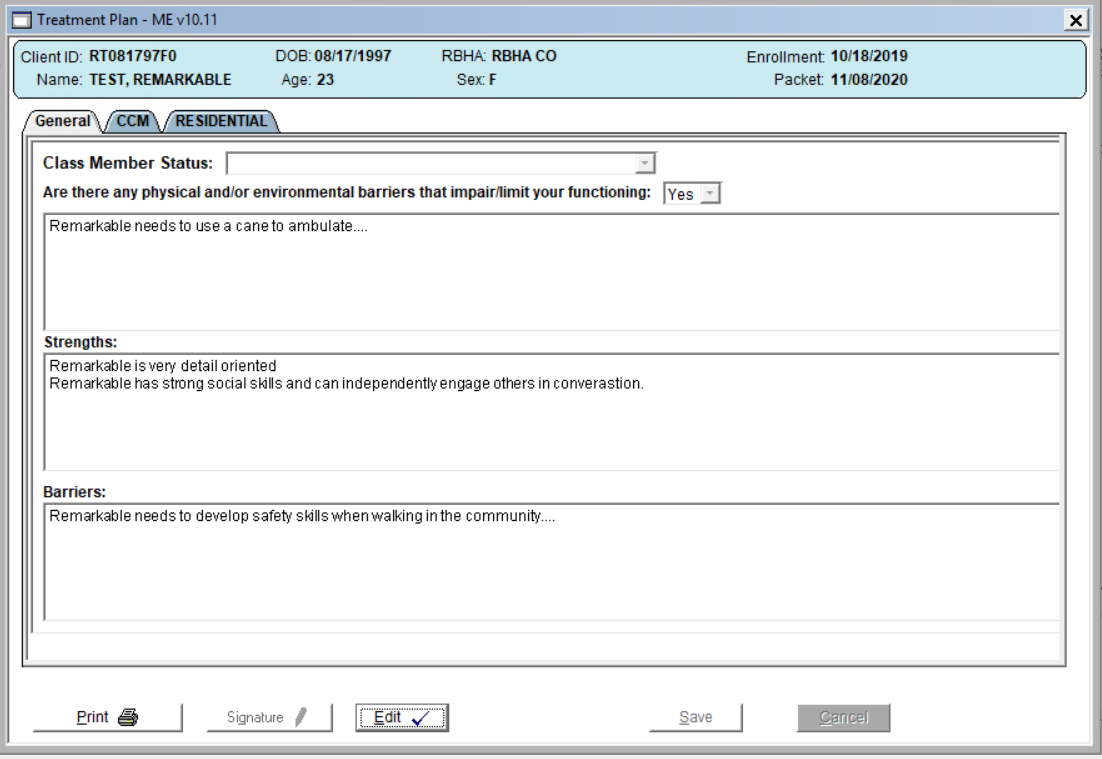
General Tab
The general applies to the client as a whole and is not tailored to any one program.
- Class Member Status: Select the applicable Class Member Status from the dropdown.
- Physical and/or Environmental Barriers: Select Yes or No from the dropdown and use Large Text field below to add applicable documentation.
- Strengths: Add narrative of client strengths.
- Barriers: Add narrative of client barriers.
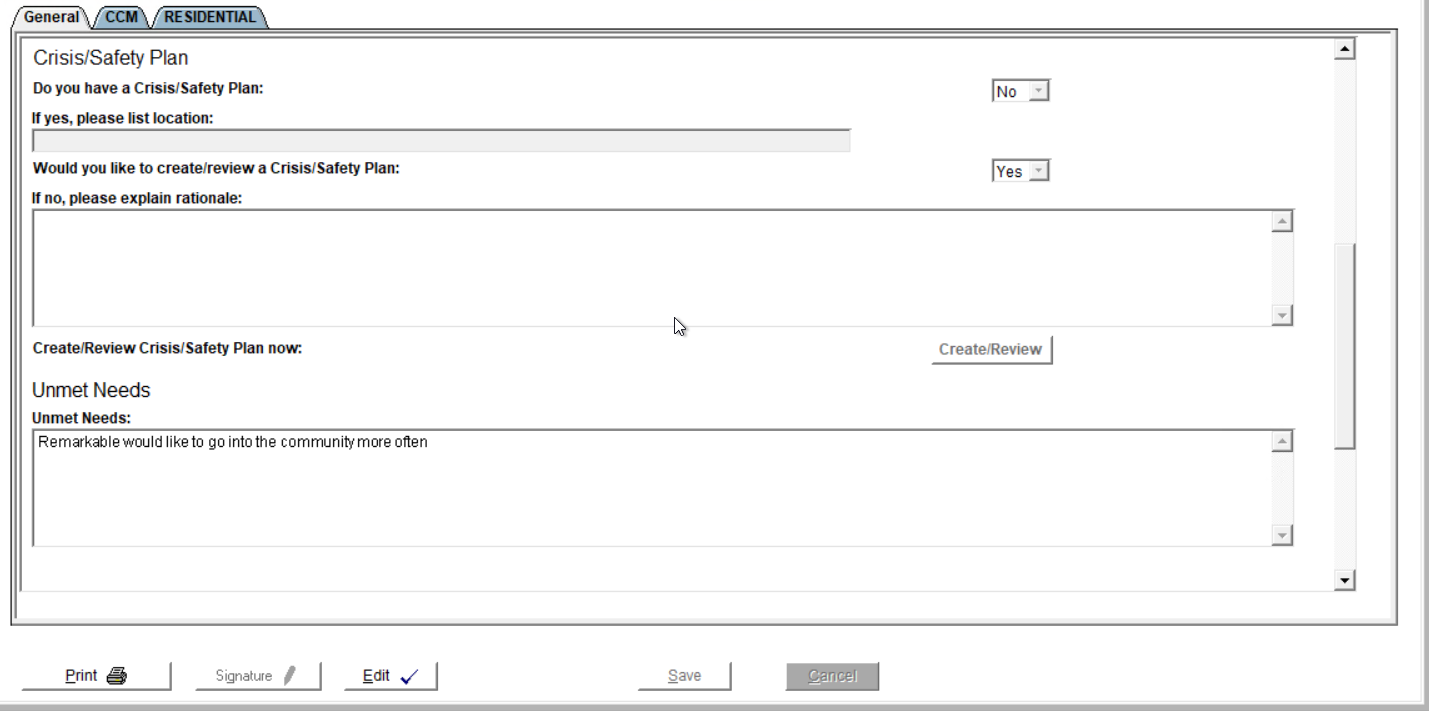
Crisis Safety and Unmet Needs
- Do you have a Crisis/Safety Plan: Select Yes or No from the dropdown.
- If Yes, please list location: This field will be active if Yes is selected from Crisis/Safety Plan dropdown. Document here where the Crisis/Safety plan can be found.
- Would you like to create/review a Crisis/Safety Plan: Select Yes or No from the dropdown.
- If no, please explain rationale here: Document rationale for client not having a Crisis/Safety plan or review.
Create/Review Crisis/Safety Plan now: Click on the Create/Review button to create or review the Crisis/Safety Plan configured to be use with the Maine Program Based Treatment Plan. This will open the Crisis/Safety Plan document.
Agency Specific Program Tab
This tab applies to agency specific programs configured to display on the treatment plan. Each program will have their own tab for treatment plan documentation.
Program Tab
Date of Program Initiation: The date the client was enrolled into the Program (via their Client Program Update form) will populate to this field.
Type of Plan: Select the Plan Type form the dropdown – e.g. Initial, Review, Discharge, etc.
Date of Plan: Enter the Plan Date in this field. Due date for next treatment plan review: Enter the date for next plan review in this field. *This field will auto-populate a review date as configured in the Program Maintenance window -TX Program Detail – Default Days for Next Review field.
Are there other provider/supports who you would like to involve in your treatment: Select Yes, No, or Not Reported from the dropdown.
If Yes is selected, a row will populate in the Support table below. Enter the name of the support and any additional details. Click the green Add button to add additional support team members.
Problem/Needs: Use this text field to document any client problems and needs.
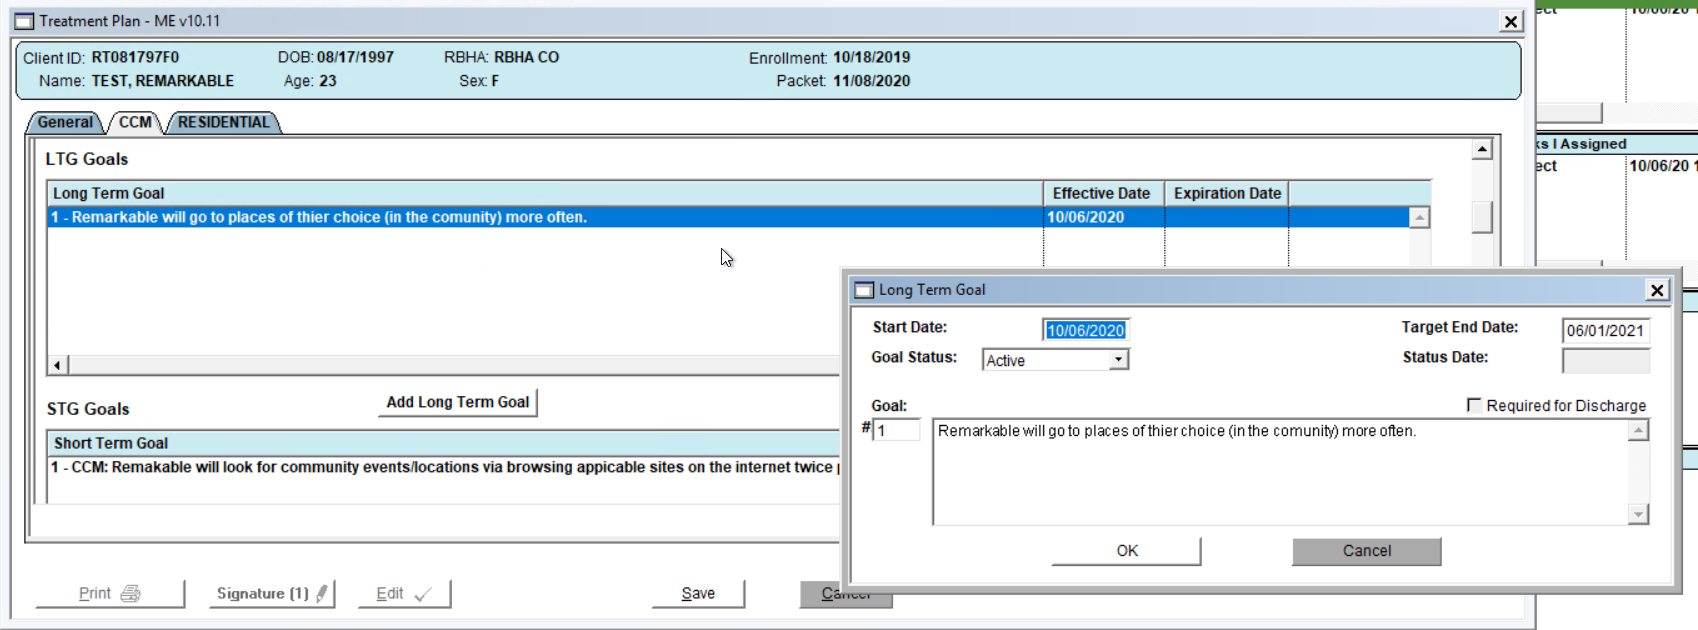
Entering a Long-term Goal
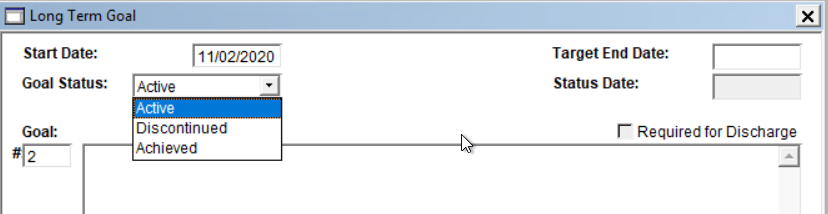
Click on Add Long Term Goal. A Long-Term Goal window will populate.
Start Date: Enter the start date for the Long-Term Goal. This will dictate when the goal pulls into the Progress Note and Performance Tracking notes.
Target End Date: Enter the date the Long-Term Goal should end. This is a reference date.
Goal Status: Select the applicable goal status from the dropdown- E.g. Active, Discontinued, Achieved.
*A Goal Status can be configured to Expire the Goal/Obj/etc. via the Treatment Plan Configuration window.
Status Date: Only enter a Status Date when you have given the Goal a status that has been configured to expire the goal.
*The Status Date dictates when the Goal will stop pulling into the Progress Note and Performance Tracking Notes.
Goal: Document the Long-Term Goal in the Goal Text Field.
Required for Discharge: Check this box if you would like the Long-Term Goal to appear in the list of Goals Required for Discharge in the Discharge Planning section of the Maine Program Based Treatment Plan.
Click Ok when finished.
You will get a pop-up window that says: Add Short-Term Goal for this Long-Term Goal? Select Yes or No.
* This pop-up is a convenient, workflow short-cut to entering a Short-Term Goal, however, you can enter a Short-Term Goal if you say No to this pop up and click the Add Short-Term Goal button.
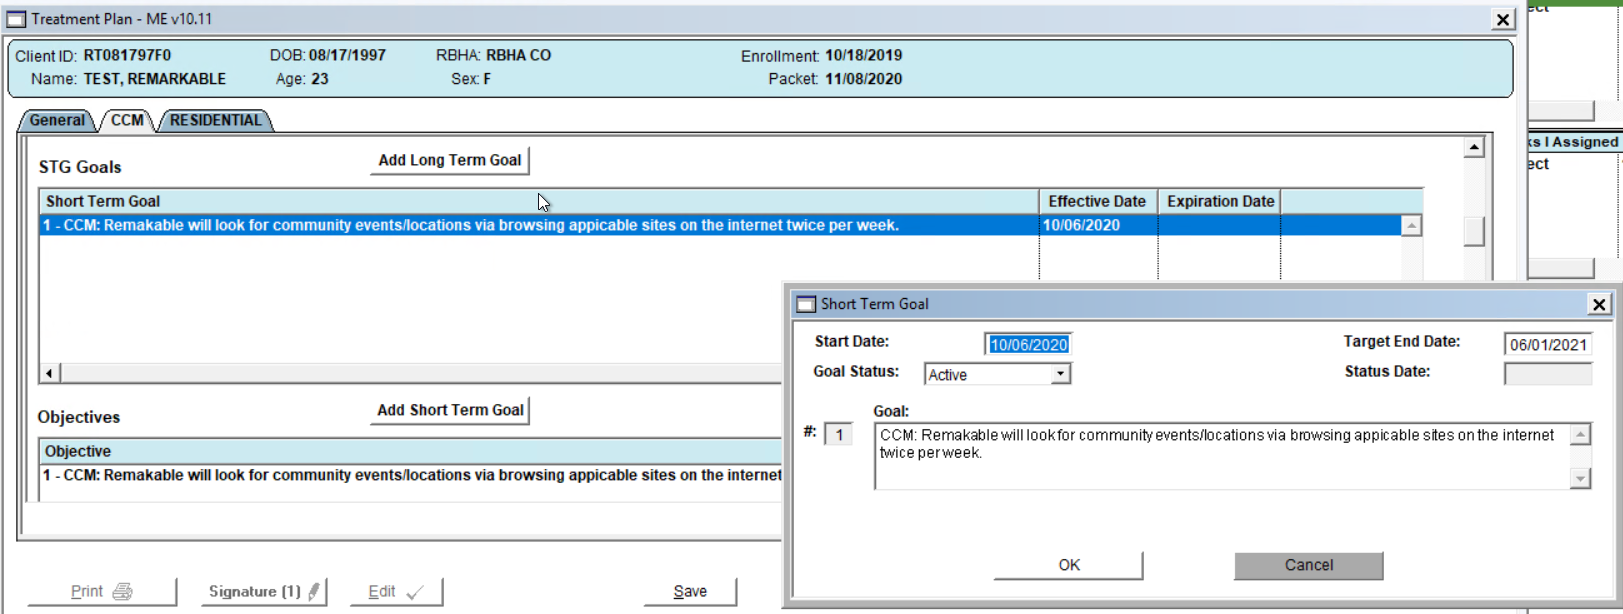
Entering a Short-Term Goal
Select the applicable Long-Term Goal from the list of Long-Term Goals. Then click on Add Short Term Goal. A Short-Term Goal window will populate.
Start Date: Enter the start date for the Short-Term Goal.
Target End Date: Enter the date the Short-Term Goal should end. This is a reference date. Note: This date will auto-populate from the Target End Date of the LTG.
Goal Status: Select the applicable goal status from the dropdown- E.g. Active, Discontinued, Achieved.
*A Goal Status can be configured to Expire the Goal/Obj/etc. via the Treatment Plan Configuration window.
Status Date: Only enter a Status Date when you have given the Goal a status that has been configured to expire the goal.
*The Status Date dictates when the Goal will stop pulling into the Progress Note and Performance Tracking Notes.
Goal: Document the Short-Term Goal in the Goal Text Field.
Click Ok when finished.
You will get a pop-up window that says: Add Objective for this Short-Term Goal? Select Yes or No.
This pop-up is a convenient, workflow short-cut to entering an Objective, however, you can enter an Objective if you say No to this pop up and click the Add Objective button.
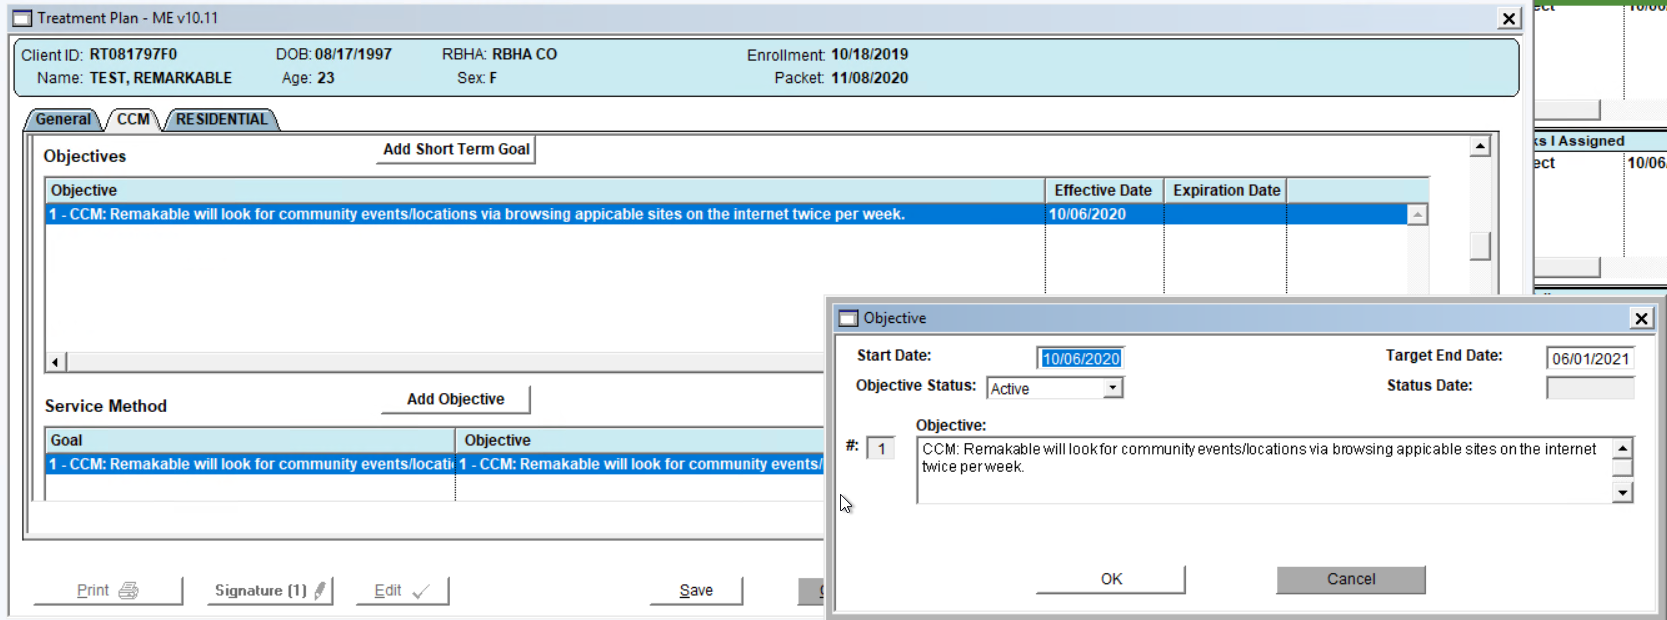
Entering Objectives
Select the applicable Short-Term Goal from the list of Short-Term Goals. Then click on Add Objective. An Objective window will populate.
Start Date: Enter the start date for the Objective. This will dictate when the Objective pulls into the Progress Note and Performance Tracking notes.
Target End Date: Enter the date the Objective should end. This is a reference date. Note: This date will auto-populate from the Target End Date of the STG.
Objective Status: Select the applicable Objective status from the dropdown- E.g. Active, Discontinued, Achieved.
Status Date: Only enter a Status Date when you have given the Objective a status that has been configured to expire the Objective.
*The Status Date dictates when the Objective will stop pulling into the Progress Note and Performance Tracking Notes.
Objective: Document the Objective in the Objective Text Field.
Click Ok when finished.
You will get a pop-up window that says: Add Method for this Objective? Select Yes or No.
This pop-up is a convenient, workflow short-cut to entering a Method, however, you can enter a Method if you say No to this pop up and click the Add Method button.
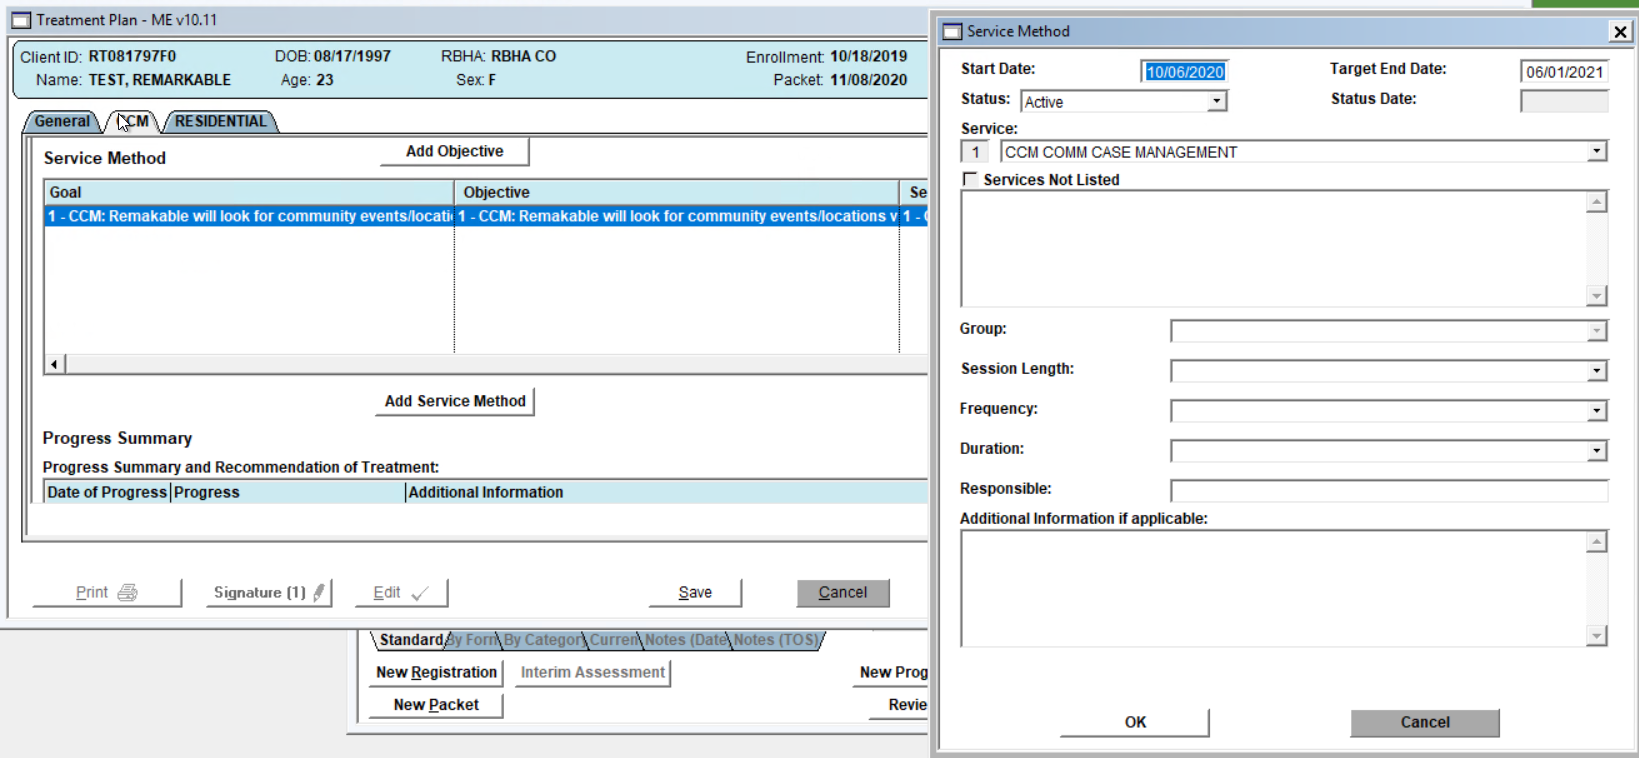
Entering Methods
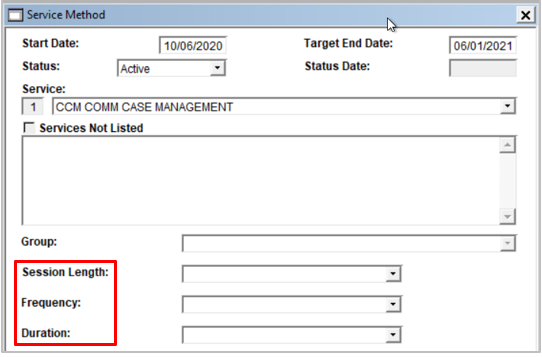
Select the applicable Objective from the list of Objectives. Then click on Add Service Method. An Service Method window will populate.
Start Date: Enter the start date for the Service Method.
Target End Date: Enter the date the Objective should end. This is a reference date. Note: This date will auto-populate from the Target End Date of the Objective.
Status: Select the applicable Service Method status from the dropdown- E.g. Active, Discontinued, Achieved.
Status Date: Only enter a Status Date when you have given the Service Method a status that has been configured to expire the Service Method.
Service: Select the applicable Service Type from the dropdown.
Services Note Listed: Select this box if the Service Type is not listed in the dropdown. This will activate the below Text field where you can document the Service.
Group: Select the applicable Group from the dropdown.
Session Length, Frequency and Duration: Select the applicable from the dropdowns.
Responsible: Document who is responsible for the Service Method in this field – if applicable.
Additional Information if applicable: Document additional information about the Service Method in this field.
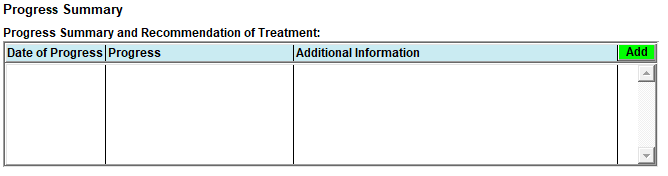
An Open Text Field or a Progress Summary Field will display in the plan Progress Summary section, depending on the configuratoin made in the Treatment Plan Maintenance window.
Option 1
Open Text Field - This is an open text field to document the Progress Summary and Recommendation of Treatment on the Maine Program Based Treatment Plan.

Option 2
Progress Summary Grid – This option appears in a grid format to document the following structured data: Date of Progress, Progress, Additional Information
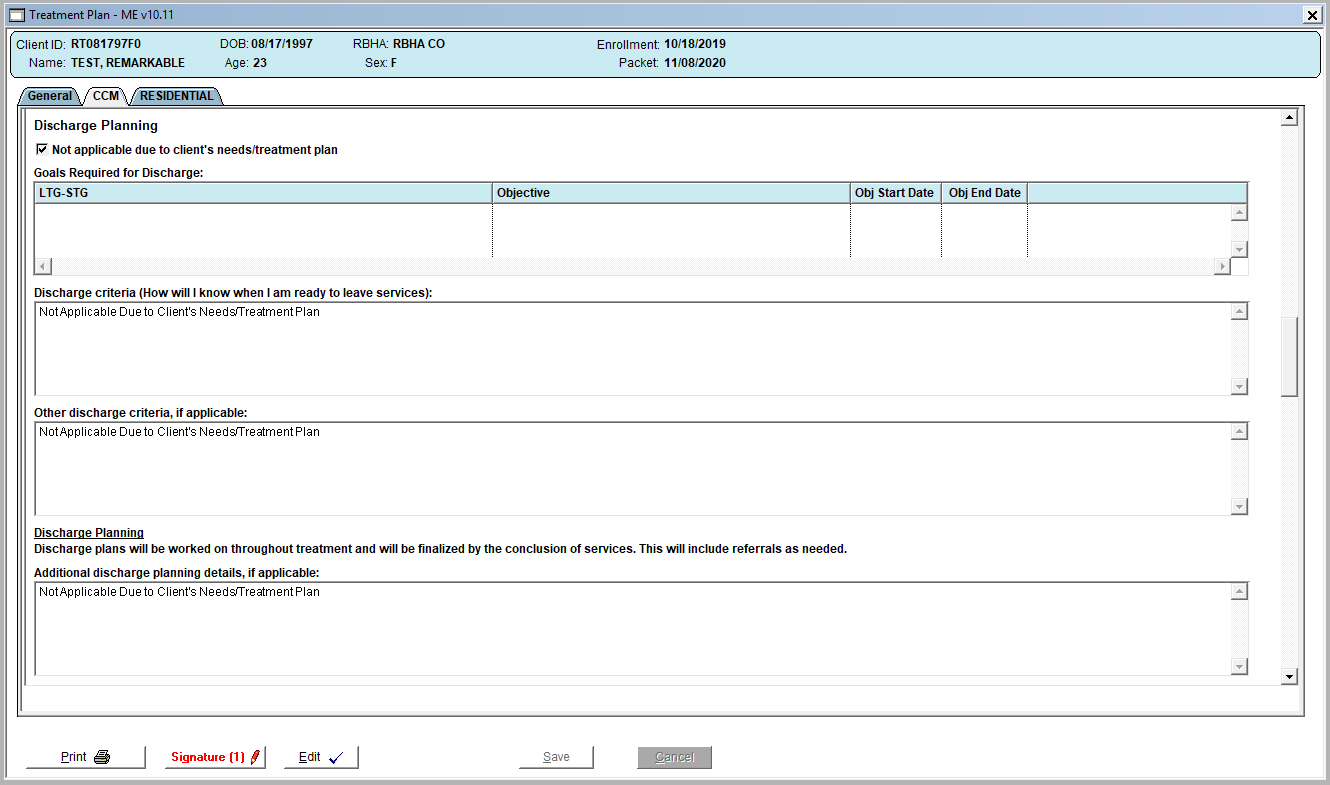
Discharge Planning
Not applicable due to client’s needs/treatment plan: Check this option if the Discharge Planning section is not applicable to the Client’s Treatment Plan. If selected, this section will not appear in the Maine Program Based Treatment Plan Report and the text fields will populate with the following default language: “Not Applicable Due to Client’s Needs/Treatment Plan.”
If completing this section, see Discharge Planning steps below:
Goals Required for Discharge: Any Long-Term Goals that were selected as Required for Discharge will appear in this list.
Discharge Criteria (How will I now when I am ready to leave services): Include Discharge Criteria documentation, as applicable.
Other discharge criteria, if applicable: Add any additional discharge documentation here, as applicable.
Additional discharge planning details, if applicable: This is additional text space to document discharge planning details.
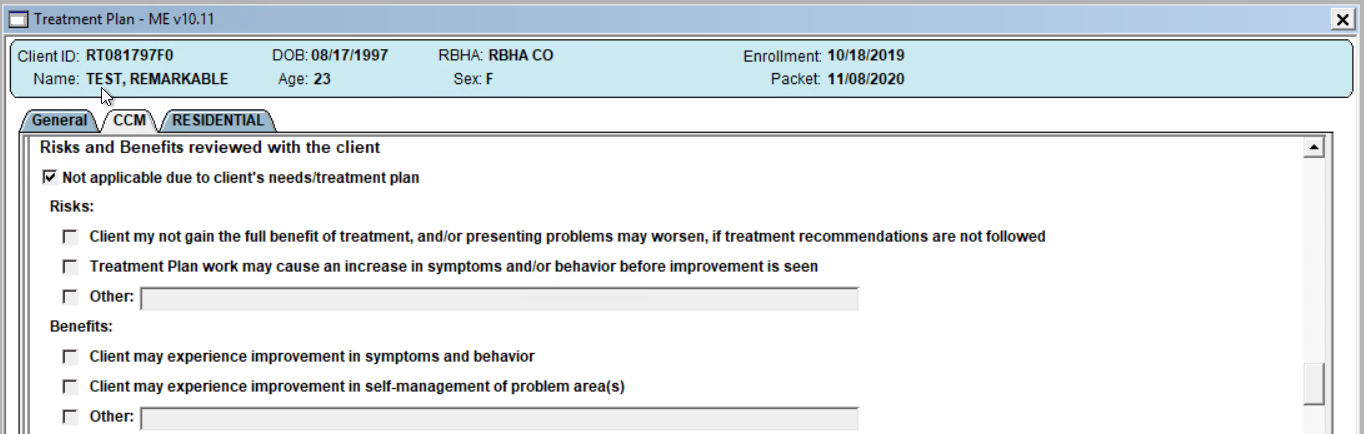
Risks and Benefits Reviewed with the Client
Not applicable due to client’s needs/treatment plan: Check this option if the Risks and Benefits section is not applicable to the Client’s Treatment Plan. If selected, this section will not appear in the Maine Program Based Treatment Plan Report and the Risks and Benefits check boxes will become inactive.
If completing this section, see Risks and Benefits steps below:
Risks: Check the applicable risks from the list. If other is selected, the Other text field becomes active.
Benefits: Check the applicable benefits from the list. If other is selected, the Other text field becomes active.
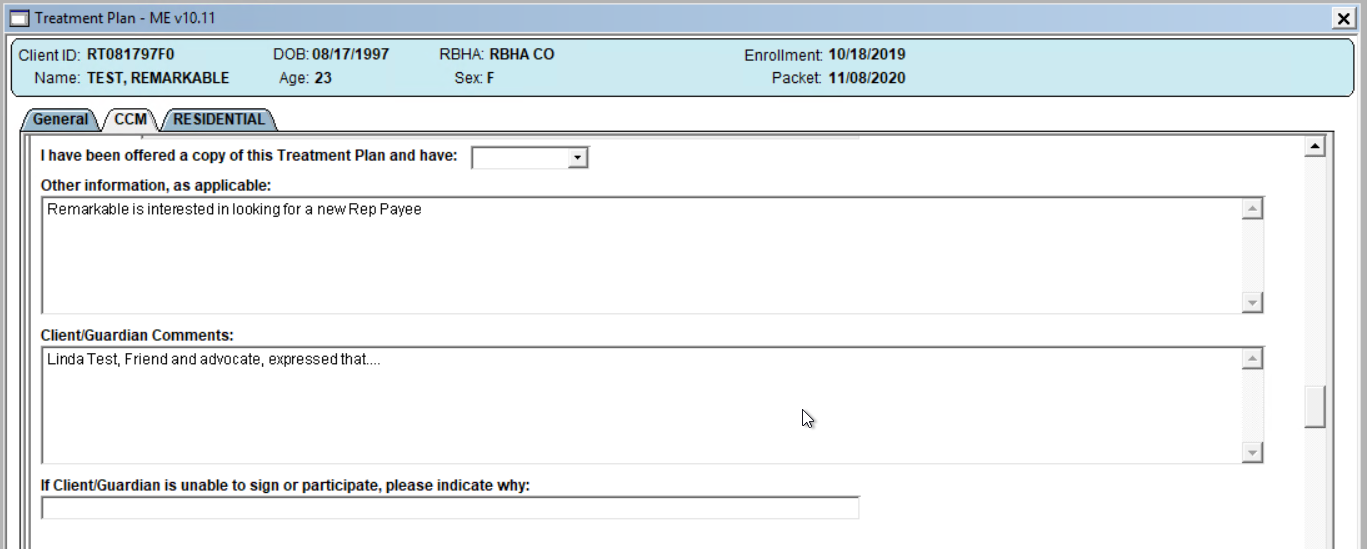
General
I have been offered a copy of this Treatment Plan and have: Select Accepted or Declined from the dropdown.
Other information, as applicable: Use this text field to document any other plan information for the Program.
Client/Guardian Comments: Use this text field to document any Client/Guardian comments or feedback about the Plan.
If Client/Guardian is unable to sign or participate, please indicate why: If applicable, document why the Client and/or Guardian are unable to sign or participate in the Plan process or meeting.
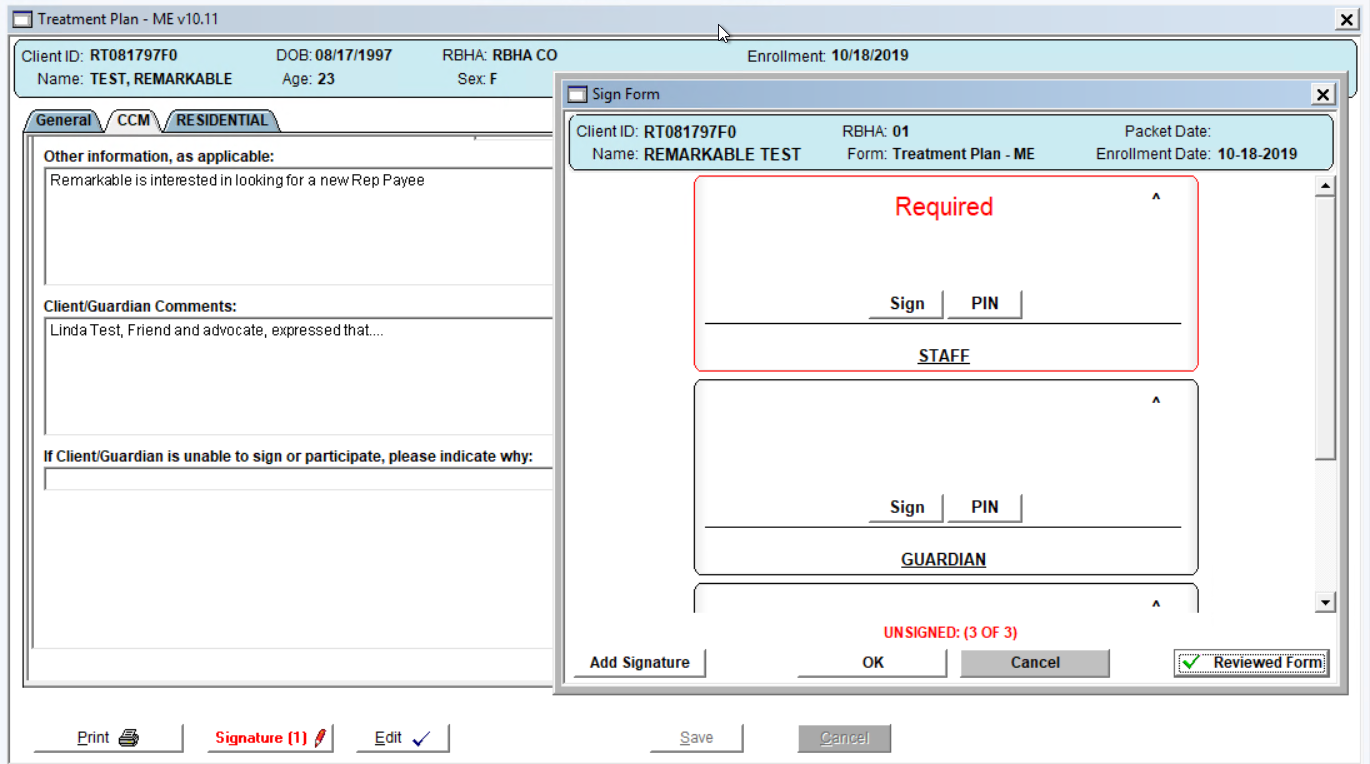
Saving and Signing
When finished with the Maine Program Based Treatment Plan Entry, click Save.
Once you have clicked Save, the Signature button at the bottom of the Plan Tab will turn red as it is ready to sign.
You will be prompted to sign for a particular Program Tab of the Treatment Plan per the Signature Template that was selected for the given Program (via the Program Maintenance – Treatment Plan Program Tab). See example below:
Confidential and proprietary property of Remarkable Health, LLC. Not for distribution, except to authorized persons.